Introducing the “Template Builder” – A Game Changer for Efficient Template Creation!
Launched in May 2024, the “Template Builder” is now available on CxAlloy, offering a revolutionary way to save time when creating new Checklist and Test templates.
Born from a customer request for a commissioning component library, the Template Builder has evolved into a powerful tool that eliminates the need for cumbersome Excel manipulation. Whether at the account level or individual project level, users can now easily take an existing template and extract the desired line items into a new, customized template.
By streamlining the template creation process, faster and more efficient multi-layered checklist development can be enabled for a variety of project management teams.
The Template Builder allows users to create concise and comprehensive checklist templates that are specific to components of a system/equipment. Once these templates have been developed, Template Builder allows for these detailed checklists to be compiled together into a complex and more accurate overall checklist. Each checklist can then be assigned to specific stakeholders.
Before, generic templates may have been applied to a wide variety of similar units that may or may not have applied to the checklist lines. Now with Template Builder, the team can make checklists in a quicker format with better results.
Overall, this feature is intended to give users the capability to create accurate checklists for each commissioning project by selecting the specific checklist components that are required for that project.
Figure 1: Multiple Checklist Templates for Air Handling Units
Practical Example:
Air Handling Units (AHUs) often have custom configurations that can include various fans, heating and cooling types, number of air filters, and sensor types. With the Template Builder, you can create multiple succinct checklists or test templates and then combine them to meet the specific requirements of each air handling unit.
Example 1: AHU-1 (Air Handling Unit with Supply and Return, Hydronic Heating Only)
This checklist template includes:
– General Checks – Checklist
– Supply Fan – Checklist
– Return Fan – Checklist
– Hydronic Heating Coil – Checklist
– Unit Electrical – Checklist
– Hydronic Plumbing – Checklist
By using the Template Builder, these individual checklists can be combined into a comprehensive template or assigned individually to subcontractors responsible for each aspect of AHU-1.
Example 2: AHU-2 (Air Handling Unit with Supply and Exhaust, Hydronic Cooling & Gas Fired Heating)
This checklist template includes:
– General Checks – Checklist
– Supply Fan – Checklist
– Exhaust Fan – Checklist
– Hydronic Cooling Coil – Checklist
– Gas Fired Heating – Checklist
– Unit Electrical – Checklist
– Hydronic Plumbing – Checklist
Similarly, these individual checklists can be bundled using the Template Builder to create a comprehensive template or assigned to subcontractors handling each component of AHU-2.
Despite having different configurations, by utilizing Template Builder, both AHU-1 and AHU-2 can be ensured to have a tailored checklist/test. This will avoid unnecessary “Not Applicable” (N/A) sections and promote precise, relevant checklists for every configuration.
The Template Builder is designed to make your workflow more efficient, helping you build comprehensive, customized templates with ease and precision.
On Wednesday, March 23, CxAlloy TQ experienced a period of extended downtime as the result of a failed database migration. This postmortem will explain what went wrong, the steps we took to recover, and the changes we are making to mitigate the chances of such an event in the future.
Most importantly, we would like to deeply apologize for the disruption the outage caused. We know that the availability of our software is directly tied to your ability to get your work done and it is a responsibility we take very seriously. Postmortems, such as this one, are part of our commitment to you to provide a high-level of service by examining those instances where we fall short and communicating to you how we are improving our systems and processes to be more resilient and dependable.
Incident Timeline
11:06 PM Eastern – Site update performed and change to database structure begins
The evening of March 23 starting at 11:06 PM Eastern we released several updates to the application. These updates included two database “migrations”, or changes to the structure of the database.
The second migration added several new columns to the table that stores checklist lines. Because that table is so large (approximately 125 million rows) we knew from past experience that adding these new columns would likely take several hours, but adding columns does not block the application from operating. No downtime was expected as a result of this change and we have performed similar actions many times in the past.
4:45 AM Eastern – Database error occurs
At approximately 4:45 AM Eastern time the migration failed which caused the database to automatically shut down and initiate a restart. Our initial analysis indicates that the migration failed due to excessive contention for server resources that built up over the course of the migration.
Our team discovered this issue just before 5 AM Eastern and begin communicating the issue to other team members and working towards a resolution.
Shortly thereafter we closed the site to users and posted our prebuilt maintenance page that directs users to our status page for further information and updates. Later in the day we updated that page with more appropriate messaging for the nature of the incident.
5:34 AM Eastern – Database is restarted and status page incident is created
At 5:34 AM Eastern we updated our status page (status.cxalloy.com) with the incident and the information we had at the time. We would continue to update our status page throughout the day.
The first thing we did was wait for the database to complete its restart cycle. On the rare occasions in the past where a database error has occurred it has been resolved by the automated restart of the database. This step alone is painful, however, as restarting our database takes over an hour due to its size. The restart started at 4:47 AM Eastern time and was not completed until 6:03 AM Eastern.
When the database completed its restart we began verification that the database was fully functioning. This is when we discovered that the checklist lines table would not load. Bringing up the logs showed:
Table `cxalloytq`.`checklistsectionline` is corrupted. Please drop the table and recreate it
6:34 AM Eastern – Backup data is secured
At this point our primary concern was securing your data to ensure no data would be lost. At 6:34 AM Eastern we ran an export of the checklist line data from our backup database and moved that to another machine. We ran a second export at 6:56 AM Eastern after the replica had a chance to synchronize the remaining data captured in the source database’s logs (data that had been created during the time the source database was attempting to run the migration that ultimately failed).
At the same time we investigated whether it was possible to repair the corrupted table rather than recreate it. We determined based on the logs, server state, and MySQL’s documentation that it was not possible to repair.
We are now approaching 7 AM and customers are logging on. Our goal is to get the site up and running as soon as possible. In pursuit of this goal, and having secured the data, we began the process of removing the corrupted checklist lines table and replacing it with the one exported from our backup. Our plan was to consider other options, including failing over to our backup database, while the data was rebuilt.
7:18 AM Eastern – Restore begins and a mistake is made
At 7:18 AM we began the restore of the checklist lines table from our backup. Unfortunately we made a critical error at this point. We failed to pause replication to our backup server before starting the process of replacing the checklist lines table. This meant that the backup database, replicating the actions of the primary database exactly, also removed its checklist lines table. The result of this mistake was that our only option to bring the database back up was to wait for the restore to complete.
We did not discover this failure to pause replication until approximately 8:15 AM. That is when after an hour of observation we estimated the data restore was going to take 10 hours or more. That crossed the threshold where it is worth it for us to instead switch over to our replica database. As we began to prep for that switch we discovered our earlier error.
The team discussed whether it would be possible to open the site in a limited state that blocked access to the checklist areas. However, because of the interrelated nature of CxAlloy data we determined this was not feasible. Other areas, such as issues and files, would attempt to pull in checklist line data and fail.
8:39 AM Eastern – Waiting for restore is determined as the course of action
At 8:39 AM Eastern we determined that our course of action was fixed – we had to keep the site closed while the restore completed.
At 9:11 AM Eastern we posted an update on the status page of the situation, including that the restore would take 10 hours to complete. From that point on we observed the restore, posted regular updates to the status page, and continued to communicate with customers through our support channels.
At approximately 9:30 AM we also paused the automated jobs we run in the background, such as sending out activity notifications.
5:47 PM Eastern – Restore completes
At 5:47 PM Eastern the restore finished. We posted an update to the status page at 5:52 PM Eastern that the restore had completed and the site would open after we verified the completeness and stability of the restore.
Over the next 30 minutes we tested the site and iOS app against the restored data, verified that the full data set was present, and tested for general application stability and performance.
6:21 PM Eastern – Application is made available
At 6:21 PM Eastern we reopened the site. At 6:29 PM Eastern we posted an update to the status page that the site was now open and changed the incident status to “Monitoring”.
Over the remainder of the evening we observed the operation of the application for any issues. Finding none through the evening and overnight, we resolved the incident at Thursday morning at 8:44 AM Eastern.
Process and Infrastructure Changes We Are Implementing
We never want to experience anything like this again. We have evaluated the failure points in this incident and will be implementing the following changes.
Process Changes
Adding columns to large tables will be done using a different methodology. Instead of adding the column in-place to the existing table we will create a new table with the updated structure and copy data to it prior to any application update. At the time the application is updated we will then rename the tables so the table with the new structure comes into use. We have used this approach in the past with success and it provides greater resilience and control compared to modifying a table in-place.
Releases that involve migrations on large or critical tables will be done outside of the business week. This incident was more impactful than it might otherwise have been because it happened on a business day during business hours. We have found that releasing application updates during the week usually provides a better experience for our team and users because it allows the quick identification and correction of any issues, however for database changes that have the potential – however unexpected – to cause downtime we will no longer do those during business weeks.
Implement a “buddy system” for emergency actions. A significant factor in the length of this outage was the inability to fail over to our replica due to a mistake we made. Although the team was communicating and working together, each member was taking individual actions in their domain to address the issue. Going forward we will require at least two people to give an OK before infrastructure actions are taken during incident response. We can never eliminate the possibility of a mistake being made but we can reduce their likelihood.
Infrastructure Changes
A second replica will be created. Although the failure to pause replication in this instance was purely a mistake, by having a second replica it allows us to make pausing a replica part of our standard process rather than a decision that has to be made during the incident.
In addition and separate from this incident, our offsite backup program is moving to a frequency greater than 24 hours. Although our offsite backups were not a factor in this case there is always the possibility that a catastrophic situation happens (such as a data center burning down) that could require restoration from an offsite backup. At the size and scale we now operate we believe it is insufficient to have the potential to lose more than a few hours of data even in the case of a truly catastrophic situation.
Our Commitment to You
We are always trying to get things right. In this case we got it wrong. When that happens we look at what where the problem came from, identify the solutions, and implement them. We’ve done it before and we will do it here, and we will – as always – aim to be open, honest, and transparent with you about our efforts.
Webinar: Keep everyone up to date on commissioning issues by connecting Cx professionals with the construction team.
QUESTIONS FROM WEBINAR
Do you know if there will be an integration to pull startup inspection checklists from Procore into CxAlloy?What about field observation reports and meeting minutes? Drawings and RFIs?
We plan to add additional points of integration with Procore over time. We are still evaluating which areas make the most sense, but integrating CxAlloy TQ checklists and tests with Procore’s inspections is currently one of the most likely additions. Other content such as field observations, meetings, drawings, and RFIs may be possibilities in the future.
How does it work if you already have Procore? Is there an additional cost?
There is no cost for the CxAlloy TQ Sync app in the Procore Marketplace. So, if you have a Procore subscription and a CxAlloy subscription, then you are good to go!
Can you force CxAlloy to sync with Procore for situations like when you’re in a meeting others waiting on an update?
Although you can’t start a sync on-demand, changes from CxAlloy TQ should show up in Procore within 10 minutes, and changes from Procore should show up in CxAlloy TQ nearly instantaneously. The capability to initiate a sync on-demand is something that we have on our list, and we are looking for feedback from users to help guide our development roadmap.
Can you use the location field within Procore to assign the observation to a piece of equipment
We are pursuing a number of enhancements to the issue integration, including using Procore’s “location” field to capture the CxAlloy TQ issue’s related asset.
Does the admin in Procore and the admin in CxAlloy need to be the same user? Or can it be divided between two users?
The admin in Procore does not need to be the same person as the admin in CxAlloy TQ.
Two different user authorizations are necessary to enable Procore Integration, represented as two discrete steps in the Procore Integration:
“Connect to Procore“. CxAlloy TQ must receive an authorization for a specific Procore user, and that Procore user must approve the CxAlloy TQ Sync app. Clicking “Connect to Procore” redirects to the Procore login page and then prompts the user to authorize the CxAlloy TQ Sync app after logging in. The Procore user must have the following Procore permissions:
‘Admin’ on the project’s Admin tool (Necessary to configure project Webhooks)
‘Admin’ level permissions on the project’s Observations tool. (Necessary to allow for deleting of observations).
“Configure Procore“. The integration must then be configured and enabled by a CxAlloy TQ user with the following project permissions:
‘Manage’ for Settings
‘Manage’ for Design Issues and/or Construction Issues (only necessary with the “Ongoing Sync” approach).
“Connect to Procore” and “Configure Procore” are discrete steps that can be performed by separate users.
Ultimately both steps must be performed by a CxAlloy TQ user that has ‘Manage’ permissions for Settings, as both steps are within the Project Settings area. However, the two steps (“Connect to Procore” and “Configure Procore”) do not have to be performed by the same CxAlloy TQ user. In addition, the user that performs the “Connect to Procore” step does not need to retain the ‘Manage’ permissions for Settings after successfully connecting.
This means that you could invite in a GC that has the required Procore permissions and have them perform the “Connect to Procore” step, authorizing the integration under their Procore user account. You could then remove them from the project or turn off their ‘Manage’ permissions for Settings, and have a different CxAlloy TQ user perform the “Configure Procore” step.”
Does the same company need both subscriptions? As a Cx company, we work with contractors who use Procore but they are the ones with the subscription and we are invited to it, similar to how we have a subscription to CxAlloy and invite contractors.
No, the subscriptions to CxAlloy TQ and Procore can be held be entirely different companies. All that is needed is an authorization from a Procore user with the necessary permissions in the Procore project.
Can we see the issue activity details (on the CxAlloy issue) to visualize how the “syncs” are captured?
Yes, any changes to issues that happen as a result of the Procore Integration will show up under the “History” area of the issue. These actions will all show up as actions performed by whichever user configured and enabled the Procore Integration.
How do the observations in Procore get assigned to particular users that are required to respond to issues?
The observations created in Procore will not have an assignment, regardless of the assignment of the associated CxAlloy TQ issue. Observations created in Procore through the integration will therefore need to be assigned independently. We are investigating ways we might be able to enhance the integration in the future to maintain the assignment.
Is there a way to choose which project CxAlloy syncs to within a Procore Company Project?
You can choose on a project-by-project basis within CxAlloy TQ whether you want to turn on the Procore Integration. Then, as part of configuring the integration you choose which Procore project to integrate with. These choices are made within CxAlloy TQ, not Procore.
Any future plans to work with PlanGrid as well?
We intend to expand our integrations to additional platforms in the future, and PlanGrid (or more generally, Autodesk Construction Cloud) is one of our top prospects.
How do you know who really made the changes if you can log into Procore and CxAlloy as a different person?
To see who originally made a specific change you have to view that change in the system it originated from. If a change originally came from CxAlloy TQ, you would look in the “History” section of the issue to see who made it. If a change originally came from Procore, you would look in the “Change History” section of the observation.
In addition, the integration will append the issue creator’s name to the observation’s Description, and comments (both originating from Procore and from CxAlloy TQ) always have the commenter’s name appended to the comment.
Within the Procore Observations module, there are a number of metadata fields like “Contributing Conditions.” Are these fields mapped to CxAlloy?
Not all fields available in Procore and CxAlloy TQ are mapped to each other. The fields that are mapped are:
Description
Status
Priority
Due Date
Discipline (labeled Trade in Procore)
Comments
Files (called Attachments in Procore)
Some fields that CxAlloy TQ has are appended to the description, including Asset, Drawing, and the name of the issue creator.
We are pursuing a number of enhancements to the issue integration and this is certainly one we will look into.
Can the sync and issue pass over be changed from one time to continuous and switched back and forth depending on the stage of the project? Can the priority mapping be changed for issues at different stage of the project?
You can change the configuration at any time via the “Change Options” button found in the toolbar on the Procore Integration settings page when Procore integration is enabled.
Are there any issues if someone in Procore makes changes to the comment where the asset information is listed from CxAlloy when it is synced back to CxAlloy?
Changes to the description in Procore will always sync back to CxAlloy TQ. As long as the line “————— CxAlloy TQ Details —————” is not changed, nor anything below it, then the “CxAlloy TQ Details” section will only appear in Procore and not in CxAlloy TQ. If that line is removed or edited then changes will still sync back, but the changes will include the complete content (including anything previously found within the “CxAlloy TQ Details” section).
What are the most notable limitations, currently?
See our Procore Integration support article for details on limitations. The most notable is likely that assignments are not carried over, and we are currently exploring ways to address that.
Is it possible to copy/sync multiple CxAlloy projects to a single Procore project?
Currently this is technically allowed but not supported. The results of doing so are unpredictable. A future update will address this situation, though it may be necessary for us to block it rather than support it.
Does a contractor using Procore need to add the CxAlloy App to their Procore dashboard as well, or once I integrate and sync on my end will the pushed observations show up for anyone belonging to that project in Procore?
Other Procore users in the project do not need to do anything. Once the integration is enabled the observations brought over via the integration will be visible to all Procore users (assuming they have access to Observations in that Procore project) without them having to do anything.
Can there be more than one authorized CxAlloy user for sync?
Not at this time.
Can the one-time sync be repeated without creating duplicate issues/observations, where it updates those that have already been created but on a more manual time interval?
Not currently.
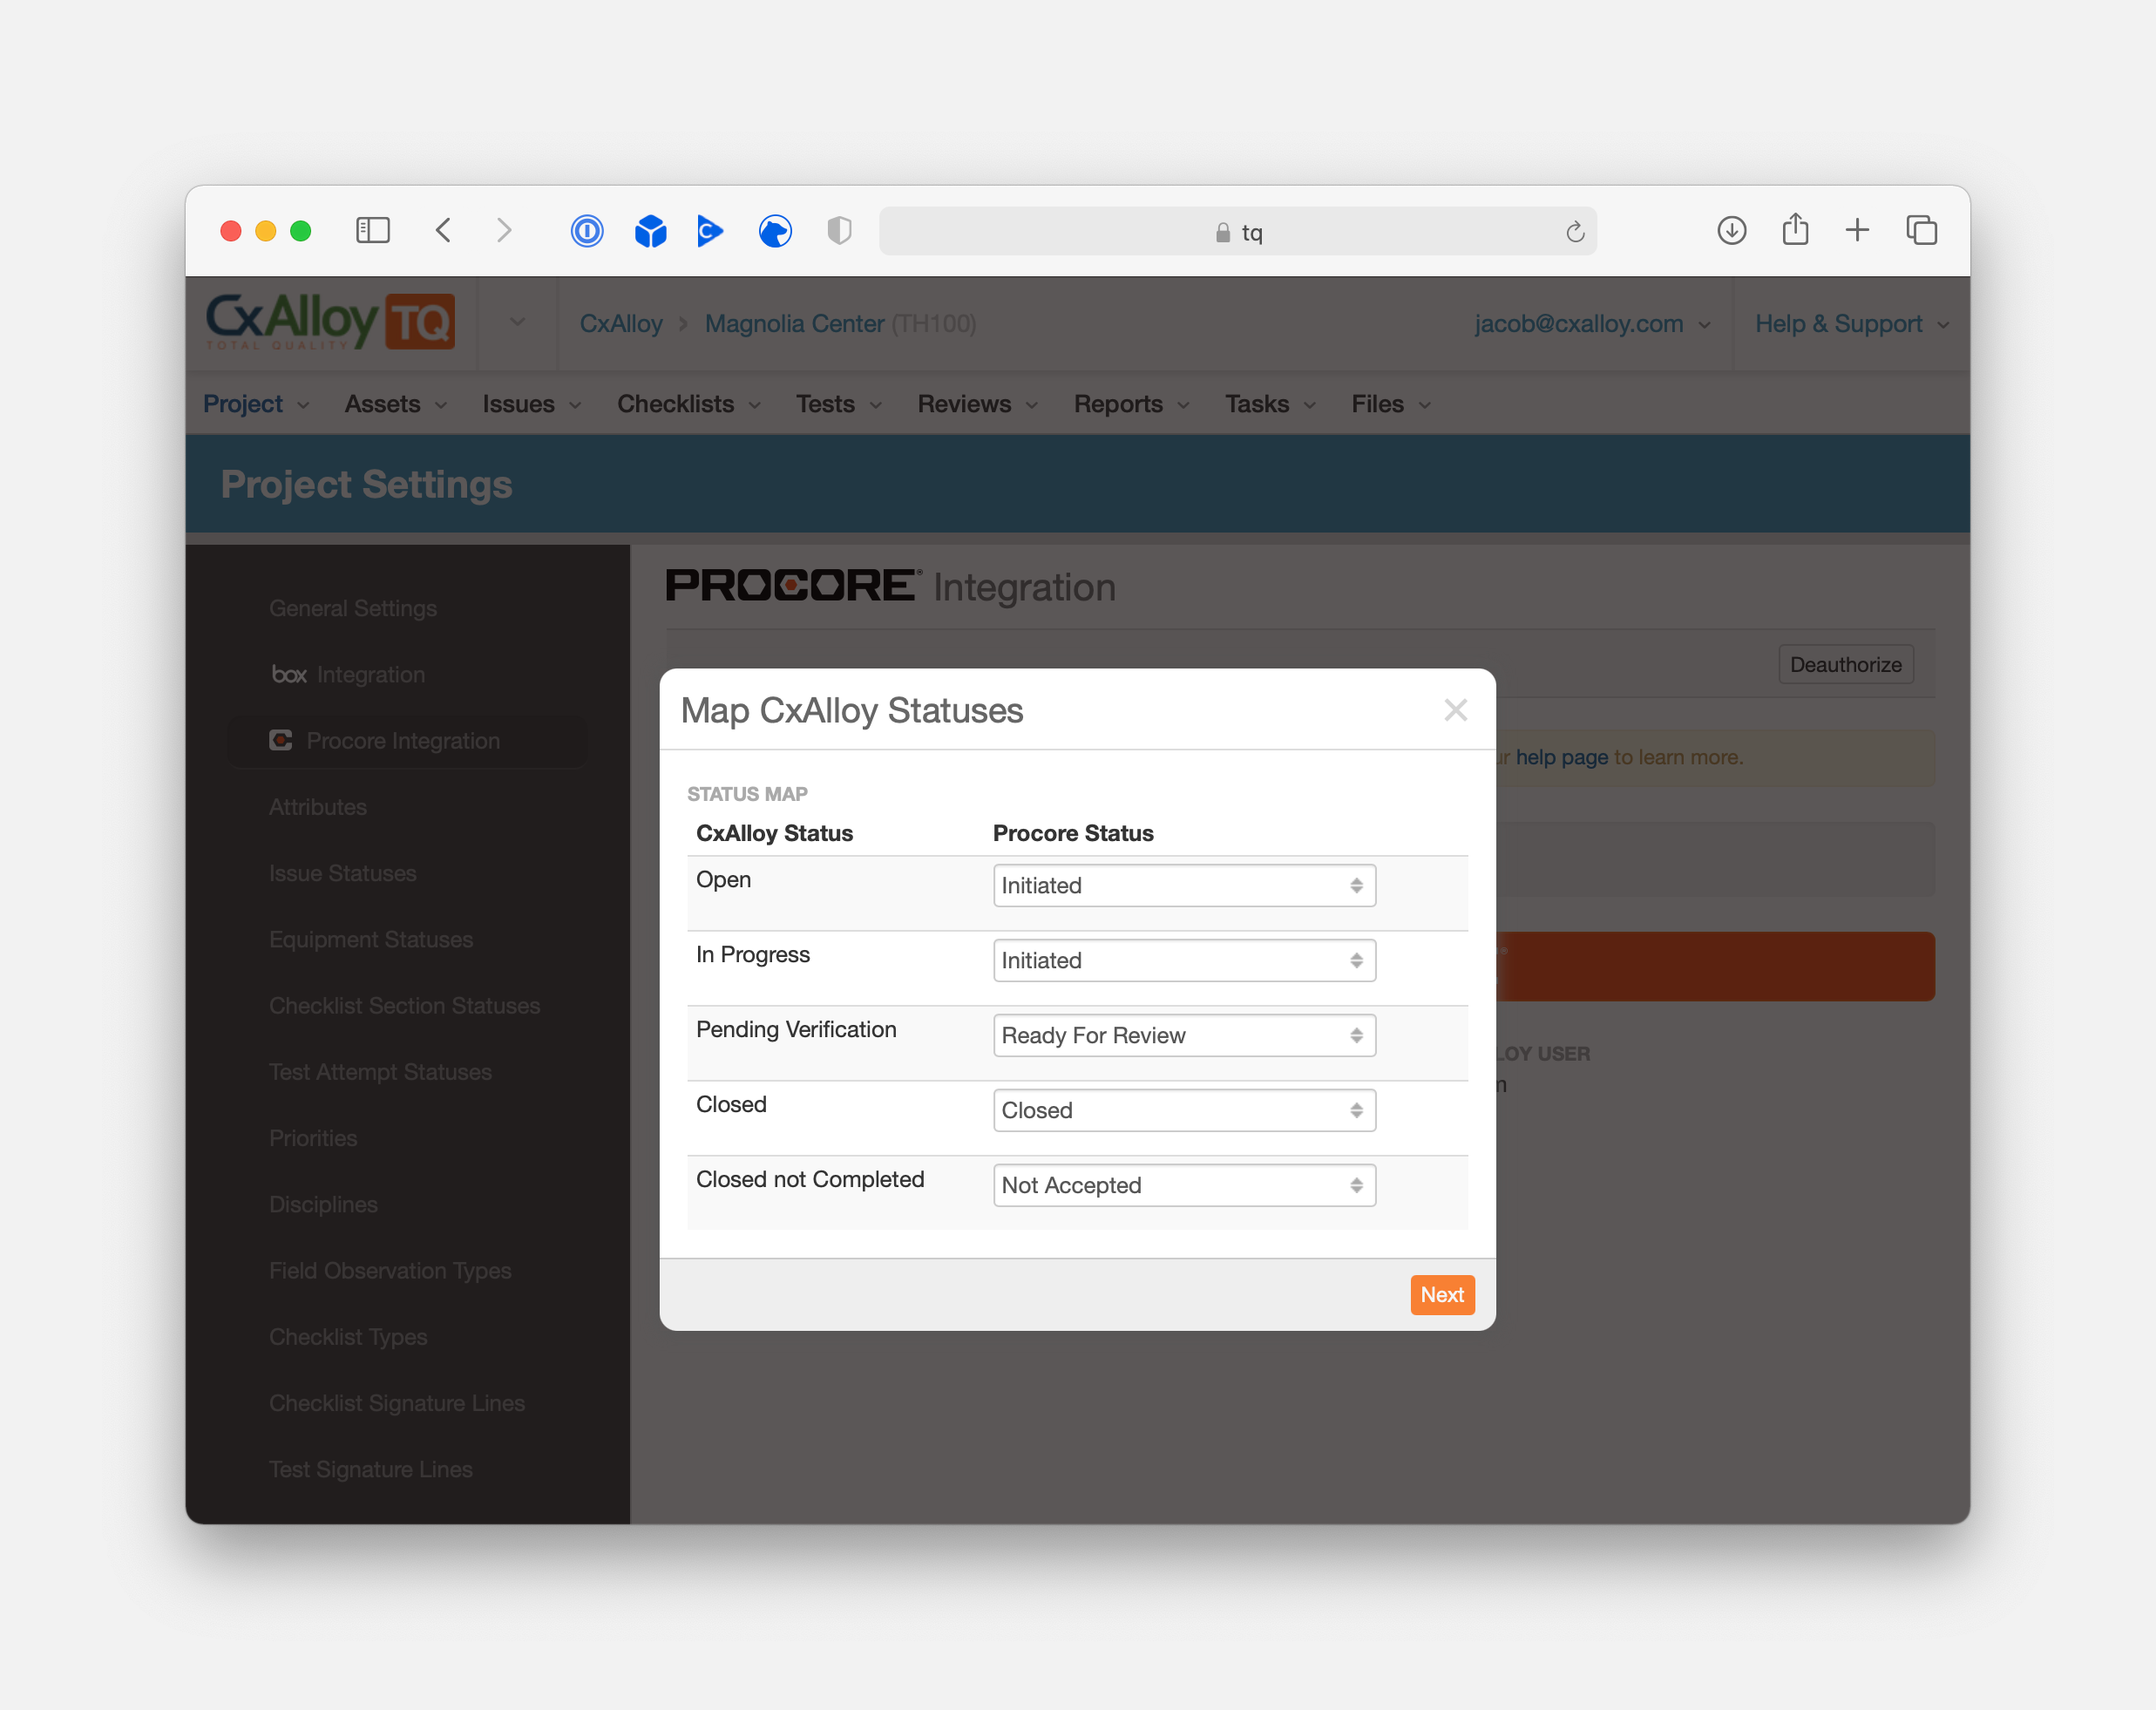
Can you explain the default handling for statuses on Procore again? What happens if there is no match on CxAlloy? Does the status mapping have to be one to one? For example, can the Procore status “Ready for Review” map to multiple CxAlloy statuses?
The mapping does not have to be one-to-one. Multiple CxAlloy statuses can map to the same Procore status.
The mapping works by first ensuring that every CxAlloy value maps to a specific Procore value. If a CxAlloy value maps to exactly one Procore value, then the reverse mapping is assumed. For example, if the CxAlloy status “Closed” is mapped to the Procore status “Closed”, and no other CxAlloy status maps to Procore’s “Closed” status, then when an observation is set to “Closed” on the Procore side it will be set to the CxAlloy “Closed” when it syncs.
If you select the same Procore value for multiple CxAlloy values then you must choose the “reverse mapping” – which of the CxAlloy values should be set when that Procore value is set. For example, if you selected the Procore status “Ready for Review” for both “In Progress” and “Pending Verification” CxAlloy statuses, then you must choose which of those two should be set when the status is changed to “Ready for Review” on the Procore side.
If there is a Procore value that you don’t select when mapping the CxAlloy values, then the “reverse mapping” of that Procore value is the default CxAlloy value. For statuses this is your initial issue status (often “Open”), or blank for Discipline and Priority. For example, if “Open” is your initial CxAlloy status, and none of the CxAlloy statuses are mapped to Procore’s “Not Accepted” status, then when “Not Accepted” is set on the Procore side the CxAlloy status will be set to the “Open”.
Can an integration template be created to make integration easier instead of having to select everything each time for each job?
Not currently, but that is an excellent suggestion. In general we plan to reduce the friction in setting up the Procore Integration with future updates.
Can you link to Procore document from within CxAlloy without additional sign in?
Yes, if all you want to do is provide a link to a resource in Procore you can do that by pasting the link. CxAlloy TQ automatically detects links and makes them clickable within the interface.
Will you have another webinar down the road for these questions?
Thank you! We’ll look at having another session on Procore integration.
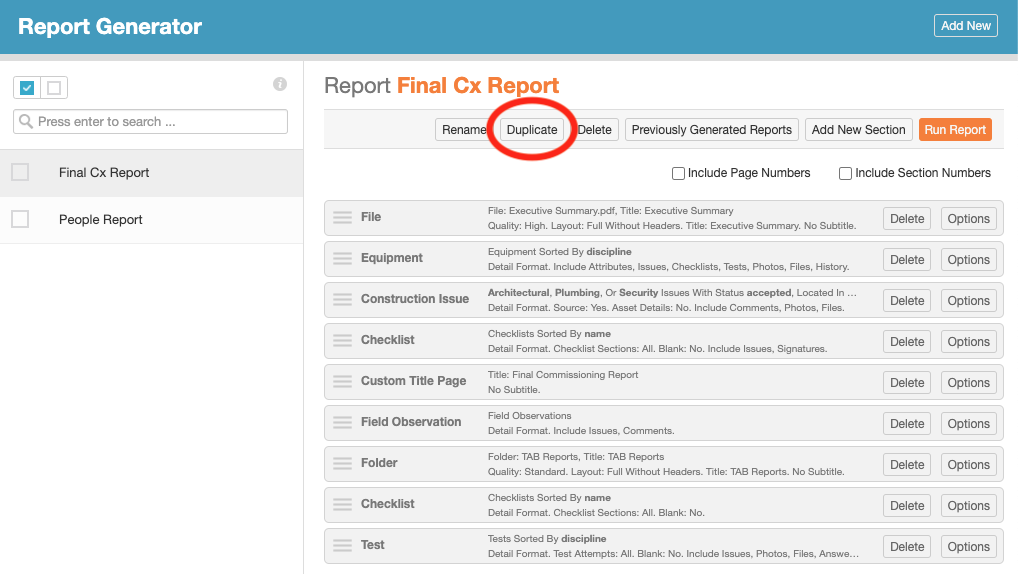
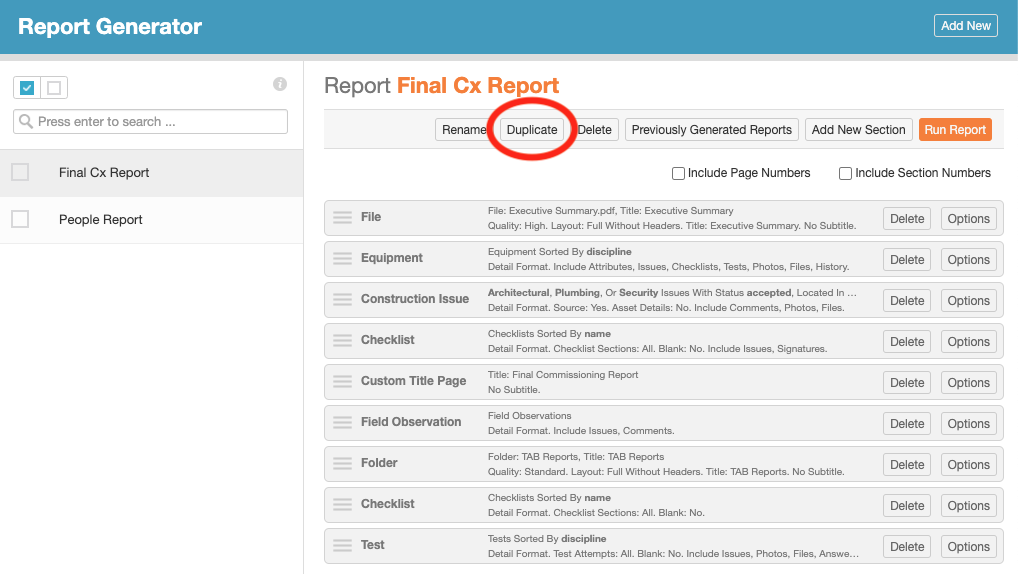
Often times, users have found themselves needing to generate multiple reports for a given project with slightly varying configurations. Even if a similar configuration existed, users would have to build a new report from scratch. This week’s feature addresses that problem by allowing users to duplicate existing report configurations.
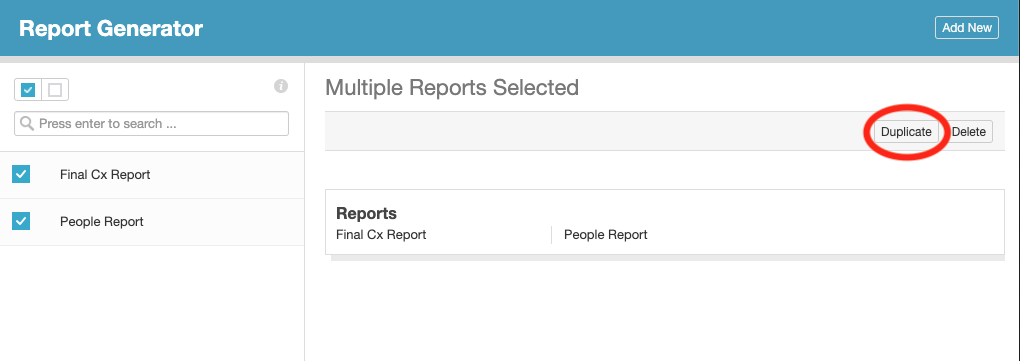
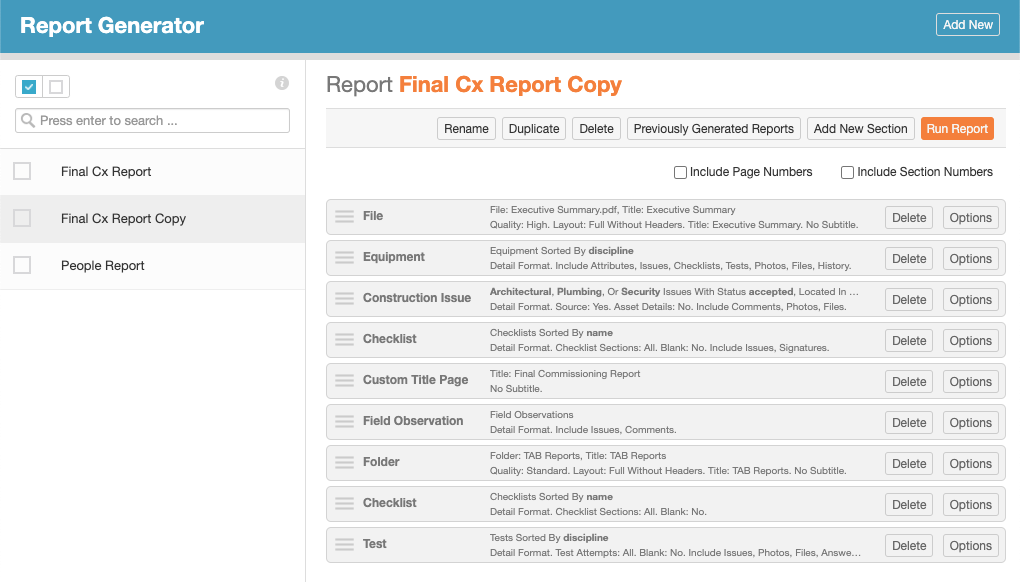
Action bar Duplicate button when viewing an individual report.Batch action bar Duplicate button when selecting multiple reports from the list view.Example duplicate report.
This new duplicate feature has been implemented as an additional button in both the detail view’s action bar for an individual report, and the list view’s batch action bar when selecting multiple items. Duplicated reports will have the exact same report sections and section options as the parent report at the time of duplication, with the word “Copy” appended to the name to differentiate it from the original. After creation, the duplicate can be modified freely without effecting the original, drastically reducing administrative overhead in the Report Generator section.
As with all of our features, we welcome any feedback to further improve your user experience moving forward. Please submit any recommendations or ideas to “support@cxalloy.com”.
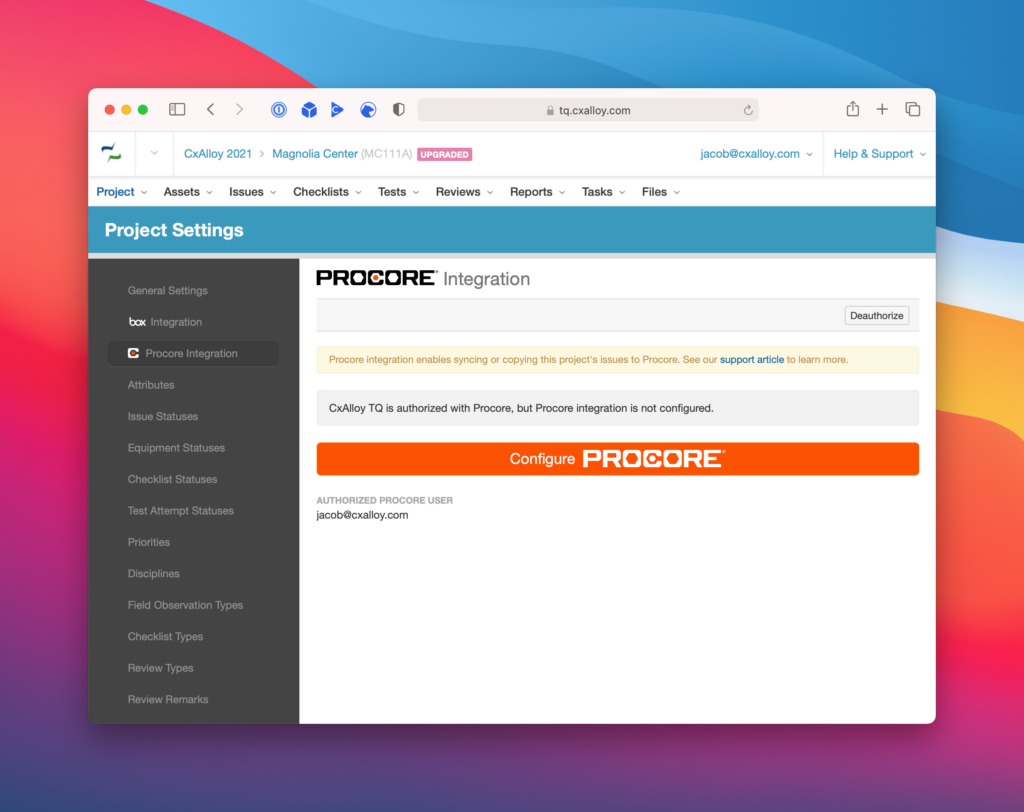
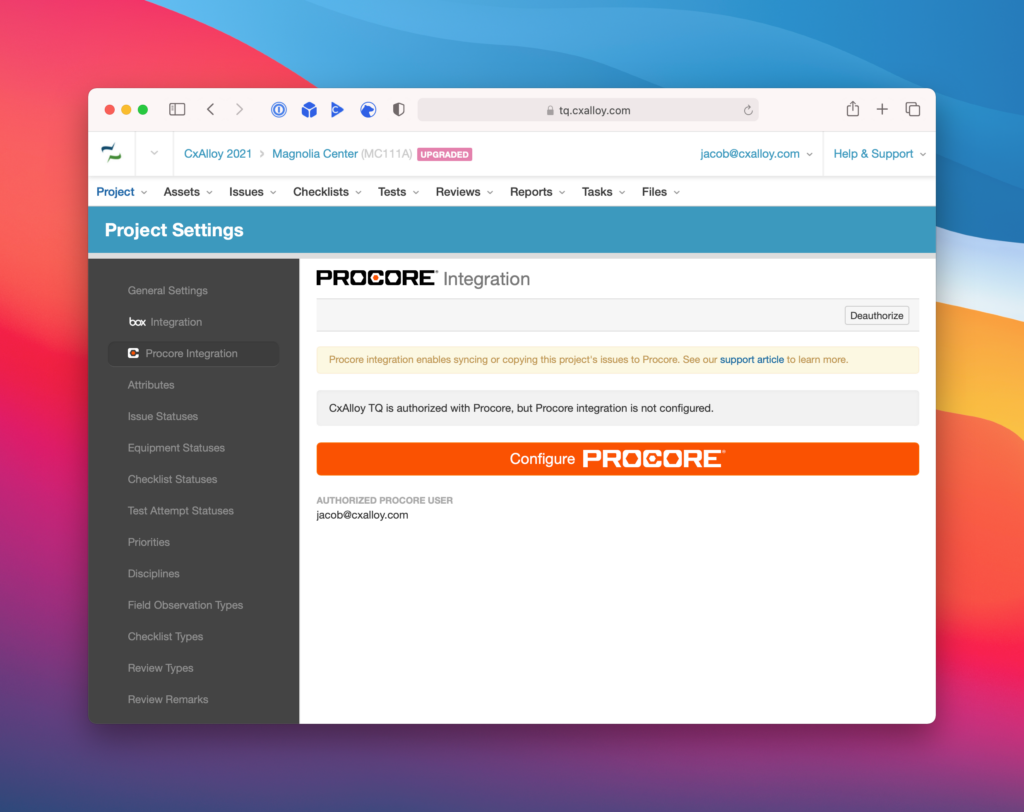
We’re excited to announce that we are launching our first integration point as the first step in our partnership with Procore. Watch our recent roadmap webinar to learn more about this and other exciting plans for CxAlloy TQ.
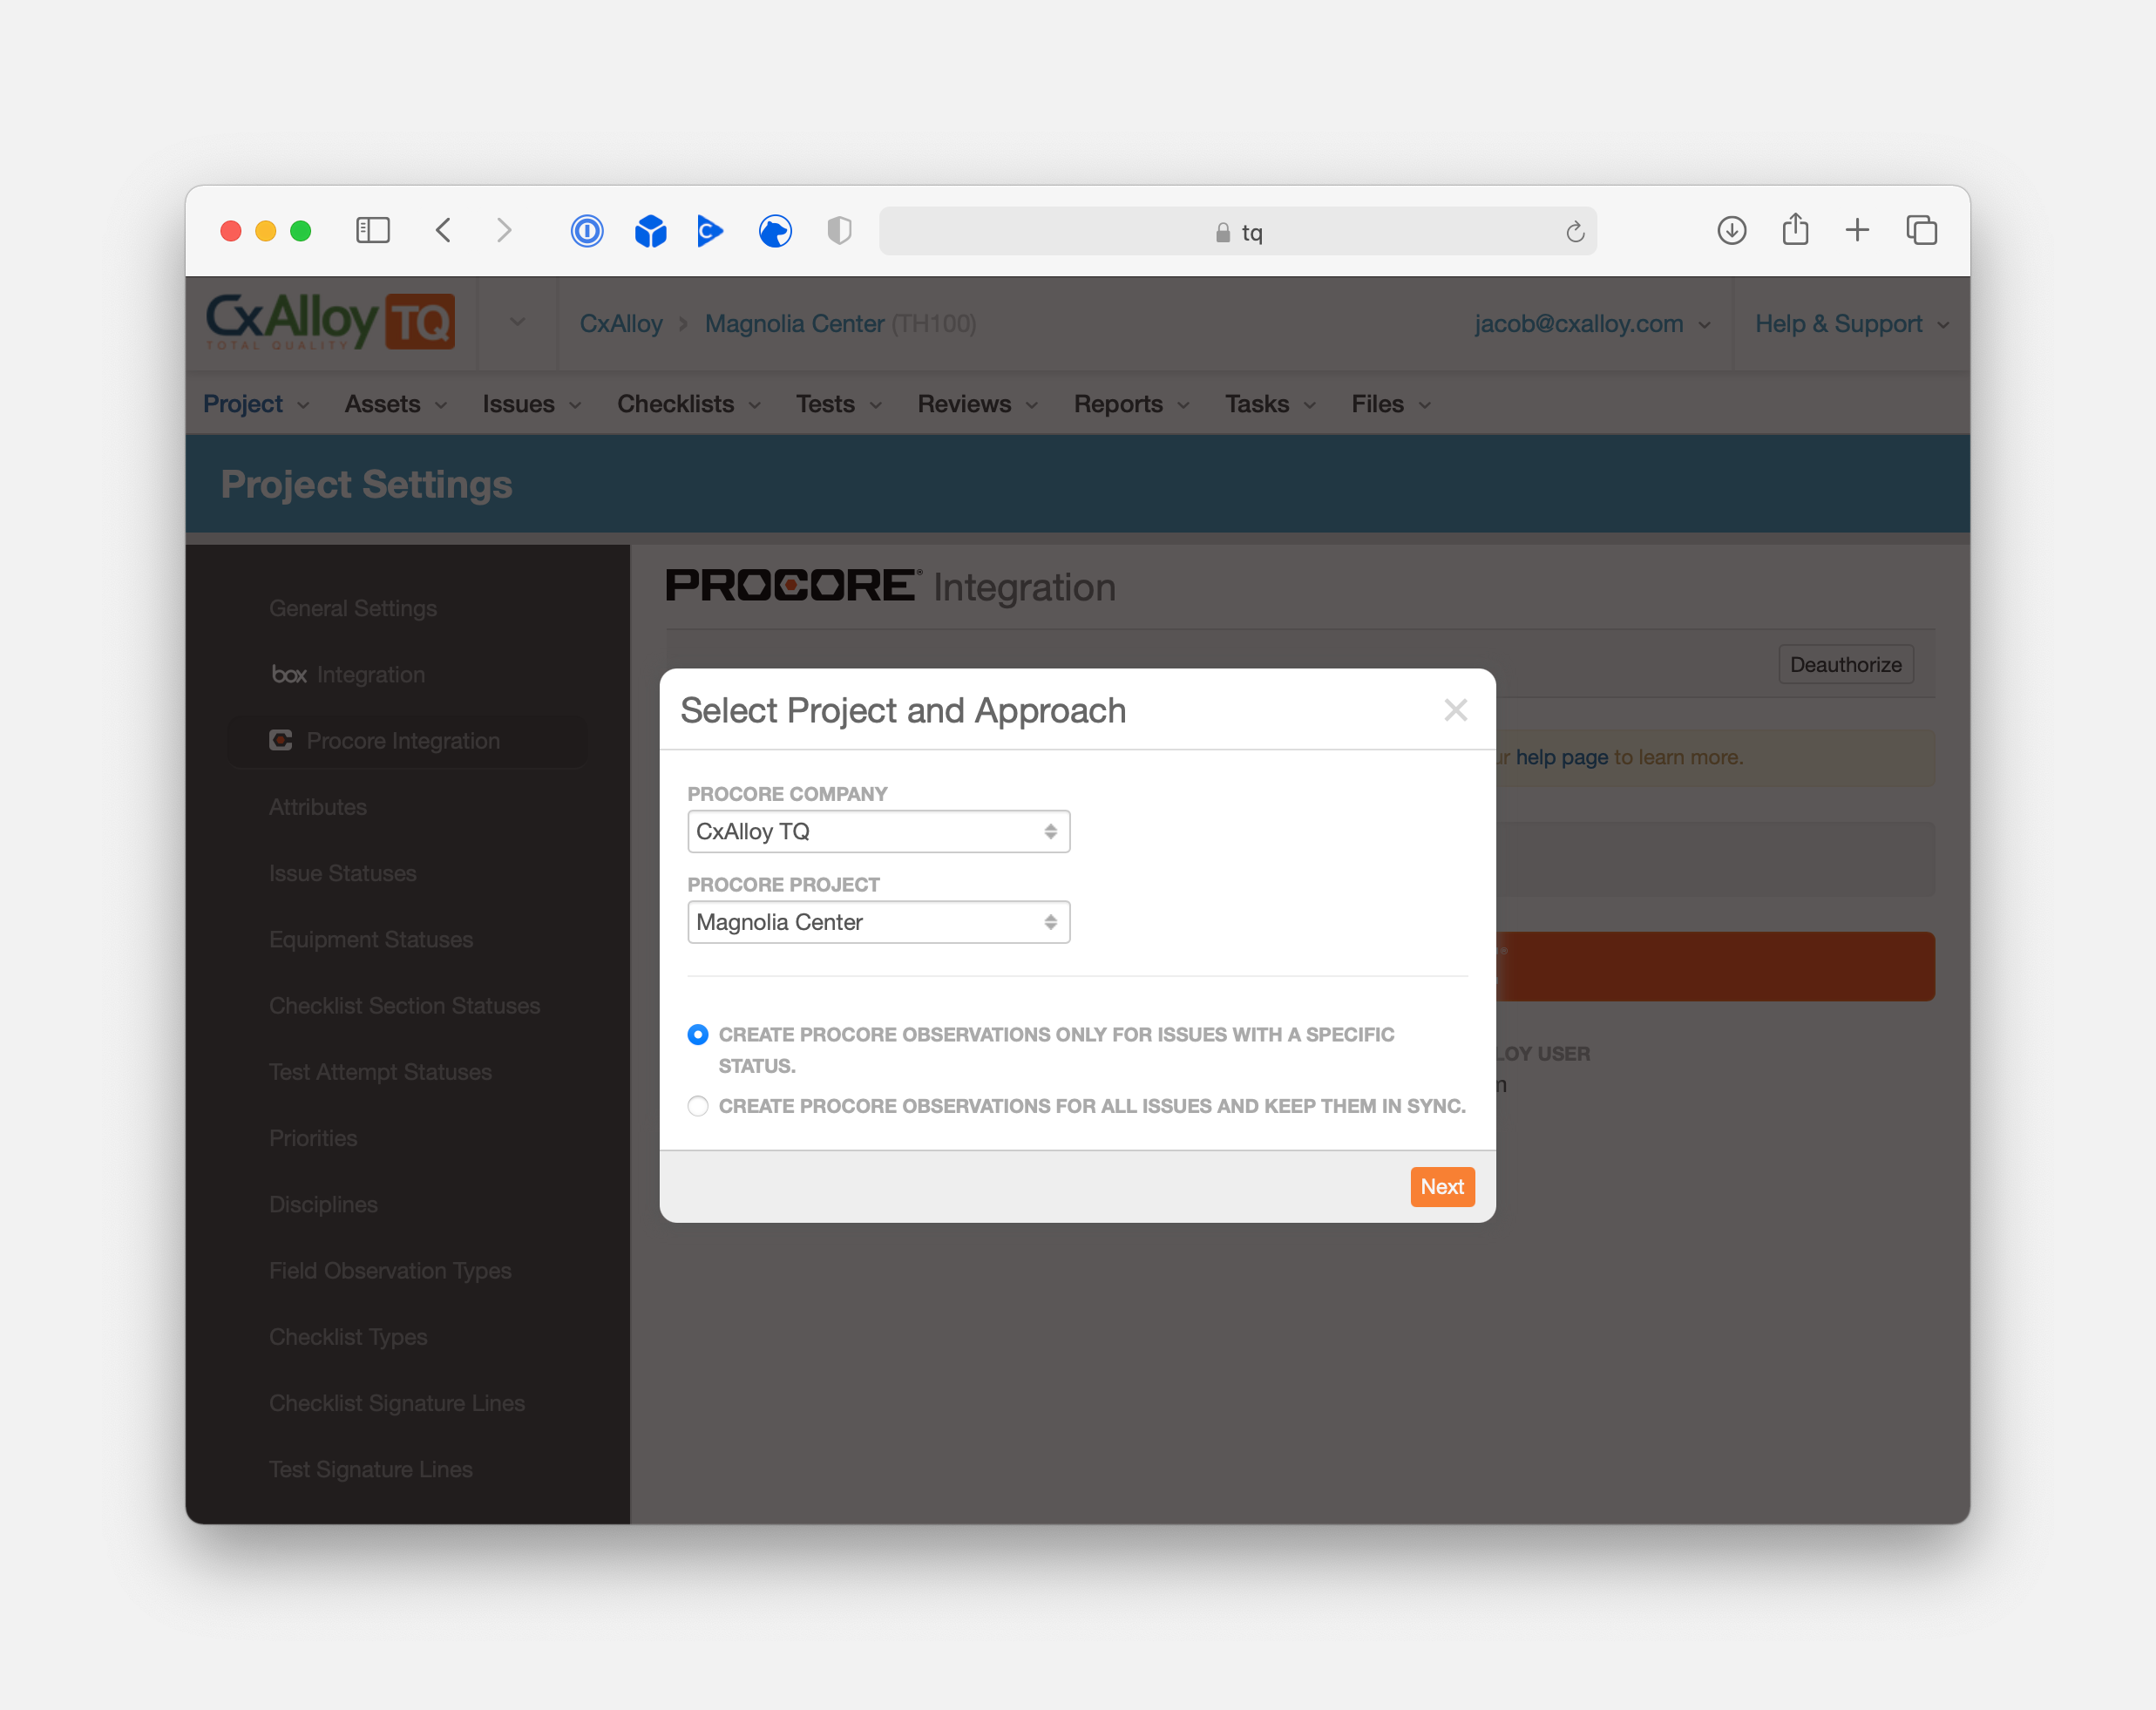
We are starting our Procore integration with the most obvious and requested connection point – bringing CxAlloy TQ issues into Procore as commissioning observations. Our integration operates at the data level, allowing direct communication and either one-way copying or two-way syncing between Procore and CxAlloy TQ.
Our goal, as ever, is to reduce the amount of time and tedium in managing data by simplifying and automating those tasks.
One-Time Copy
The one-time copy option is for those situations where you want to create issues in CxAlloy TQ but prefer issue follow-up and resolution to be managed exclusively through Procore.
With this approach, you choose which status triggers the copy to Procore, and which status is set after the issue is successfully copied. CxAlloy TQ issues with the designated status are copied to Procore, including the issue’s comments and files. After being copied, the CxAlloy TQ’s issue status is updated to indicate the copy was completed.
By leveraging statuses as the trigger for copying issues to Procore you can easily control which issues get copied and see which issues have been copied. In CxAlloy, you also get the benefits of all the tools that already exist for managing statuses such as batch editing and import.
Ongoing Sync
With the ongoing sync approach, all CxAlloy TQ design and/or construction issues created in the project are copied to Procore. Updates to the observation in Procore are synced back to the CxAlloy TQ issue, and updates to the CxAlloy TQ issue are synced back to the Procore observation.
As with the copy operation, the ongoing sync approach includes issue comments and files, with the addition that new comments and attachments in Procore are brought over to CxAlloy as well.
Per-Project Settings
We’ve designed our integration to be flexible, with the ability to enable and customize it on a project-by-project basis. The integration options can be changed or disabled altogether at any time. After authorizing a project through Procore, CxAlloy TQ automatically runs the integration at regular intervals and safely manages credentials.
As we evolve our partnership with Procore in 2021 and beyond we plan to deliver deep integration across many areas. We hope this new integration helps you to Get In, Get Done, and Get Home faster than ever before.
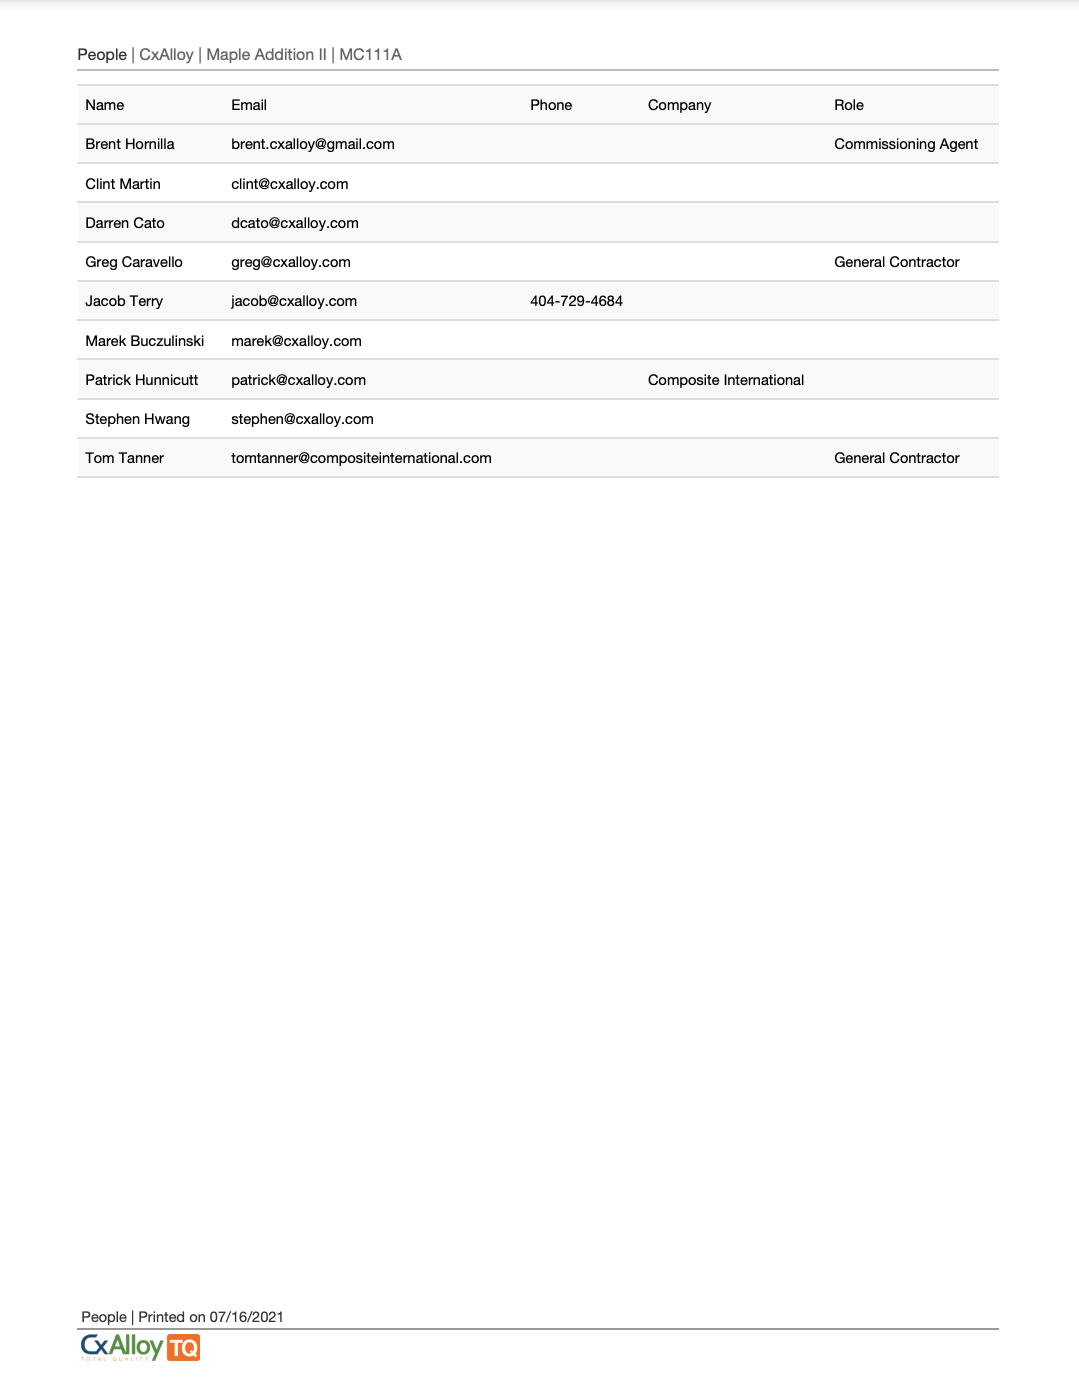
This week’s feature release is the long awaited addition of a People section to the Report Generator. Users can now add a People section to their reports, which will include the name of all users in the project, as well as their email, phone number, company, and role.
Report with People sectionPeople section title pagePeople section as seen in reports
As with all of our features, we welcome any feedback to help us make any additional improvements.
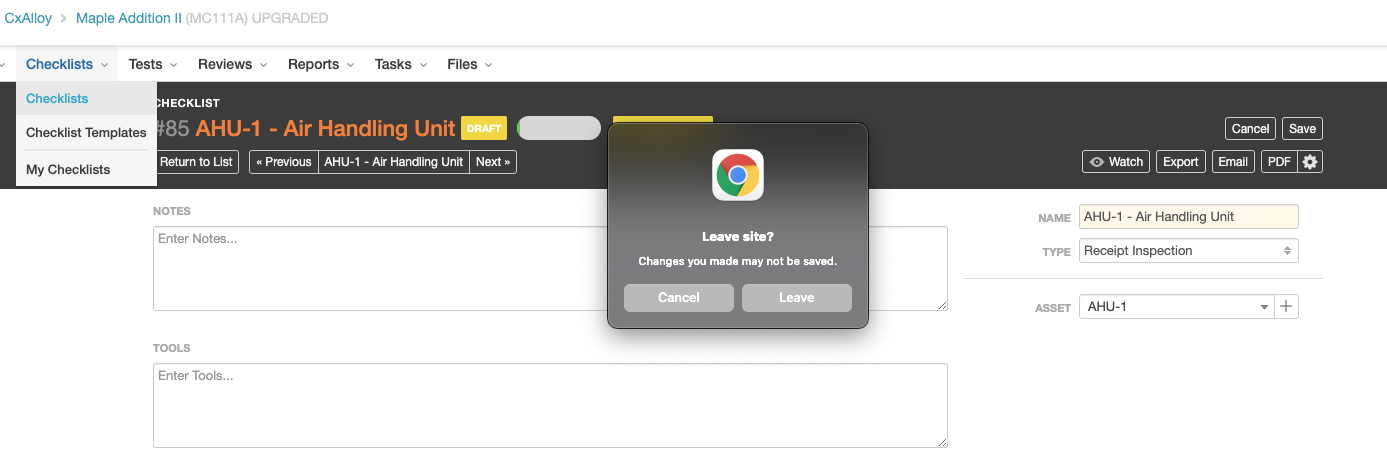
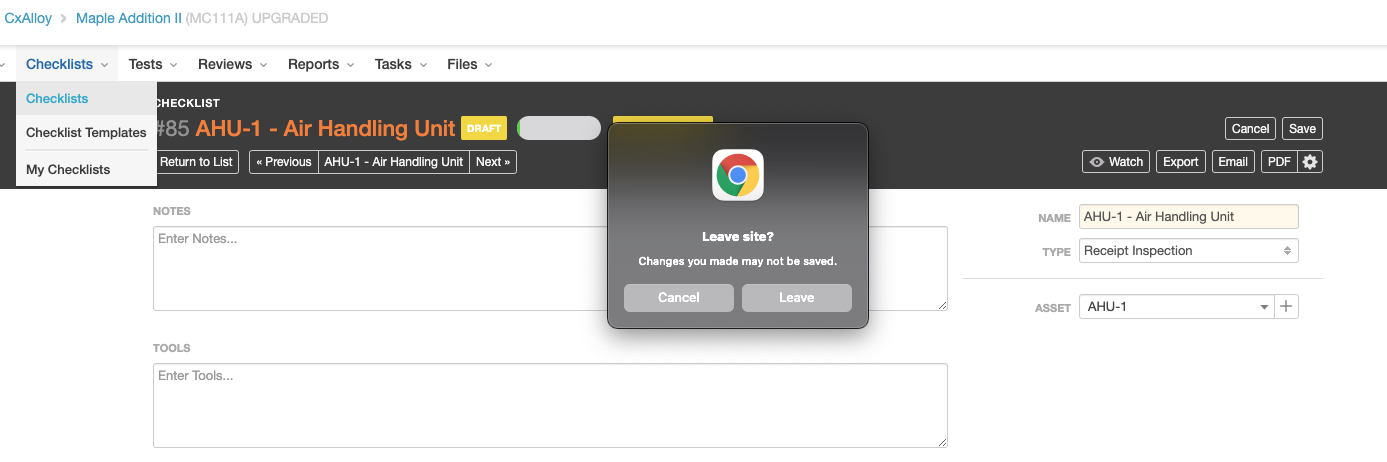
We’ve previously received a number of reports from users regarding accidental navigation away from a page while editing an item. This week’s update adds a notice warning users of potential data loss, and providing the opportunity for users to verify or cancel any attempts to leave the page before saving.
This warning only applies to the direct edit of an existing item, but the framework for this feature will allow us to to address any future requests for similar functionality in other areas as well.
Generally speaking, we don’t enforce unique names across most sections of CxAlloy TQ. However, this has occasionally led to situations where users accidentally create duplicate entries for companies that already exist.
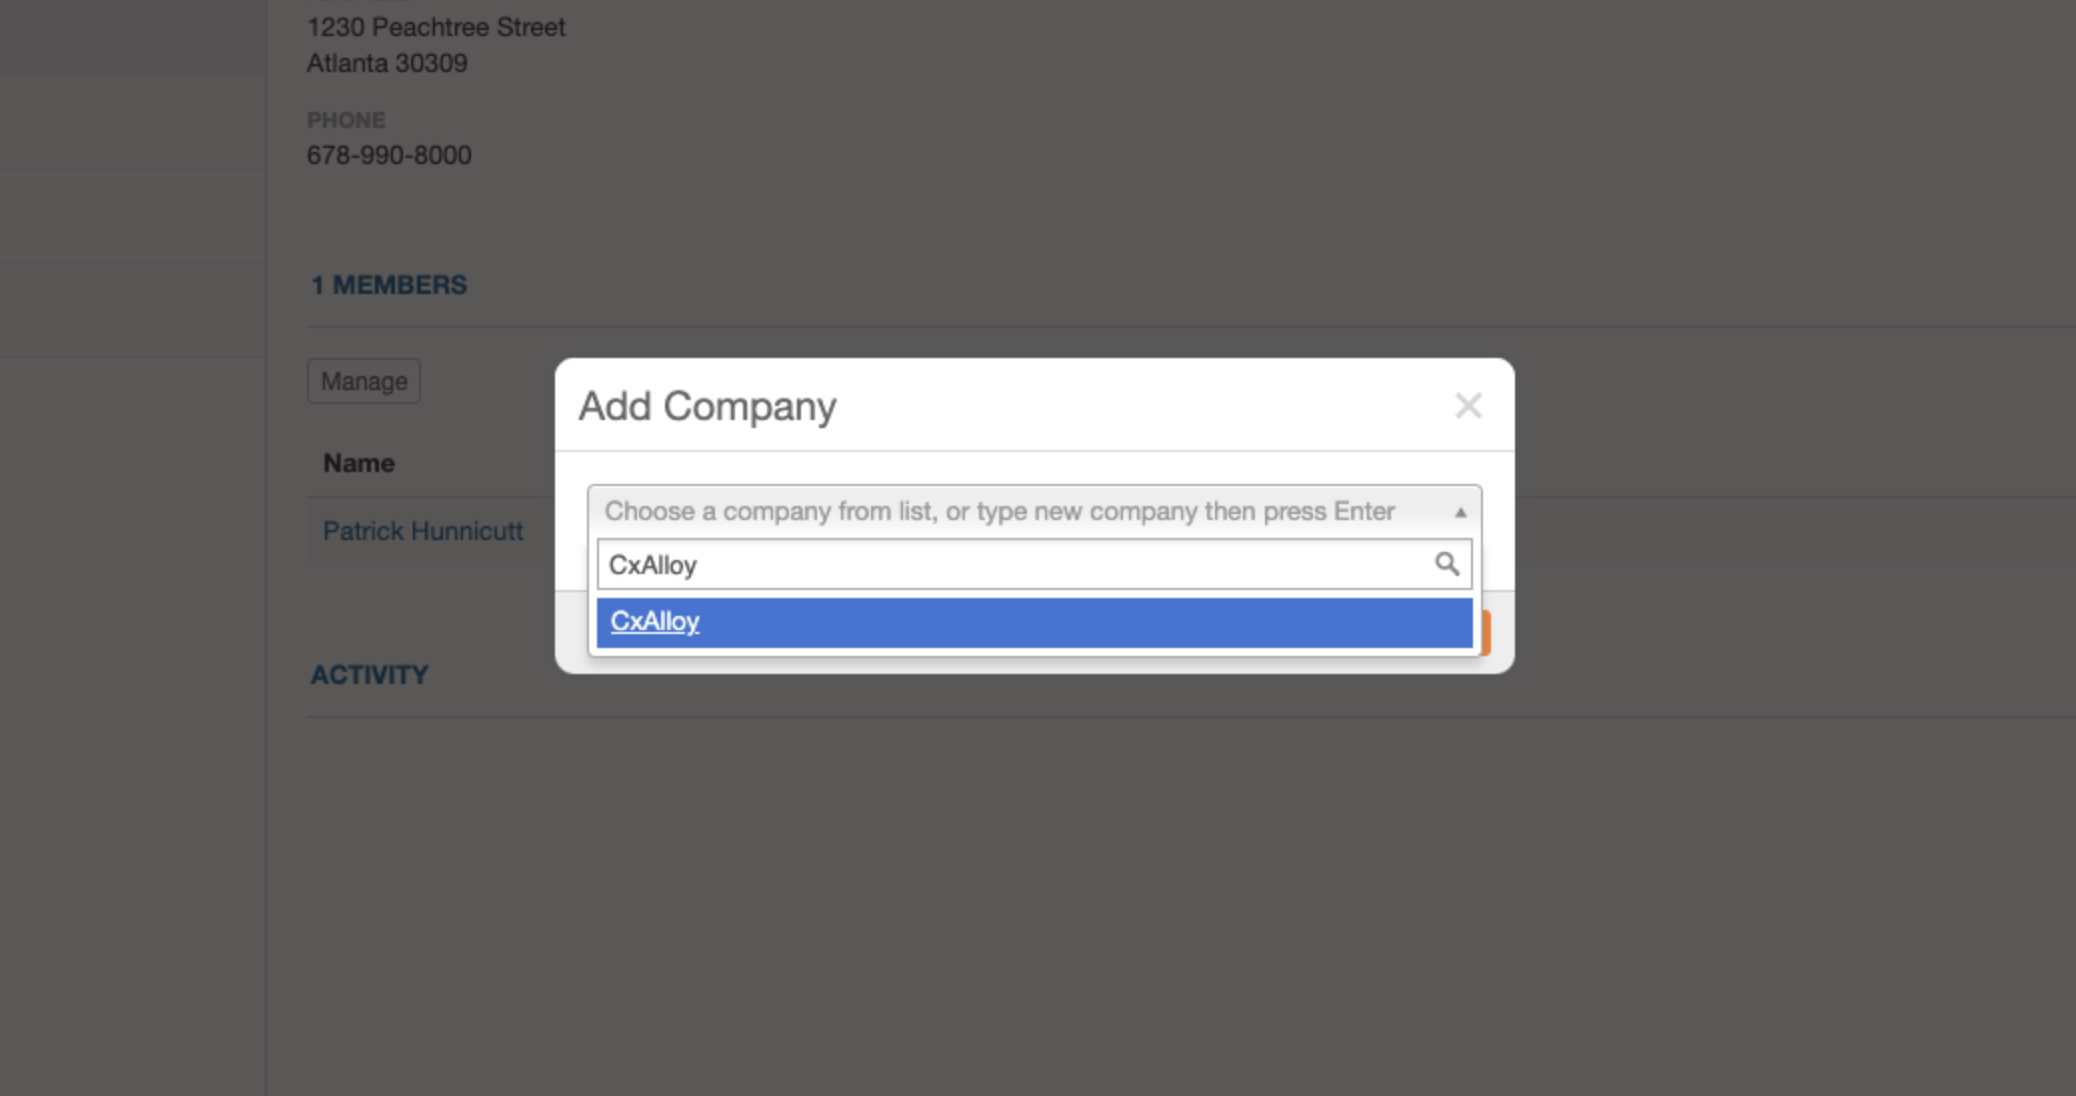
To address this problem, we have made it so that attempts to add a new company at the project level will default to using the existing account level entry when a duplicate is found.
Company Dropdown
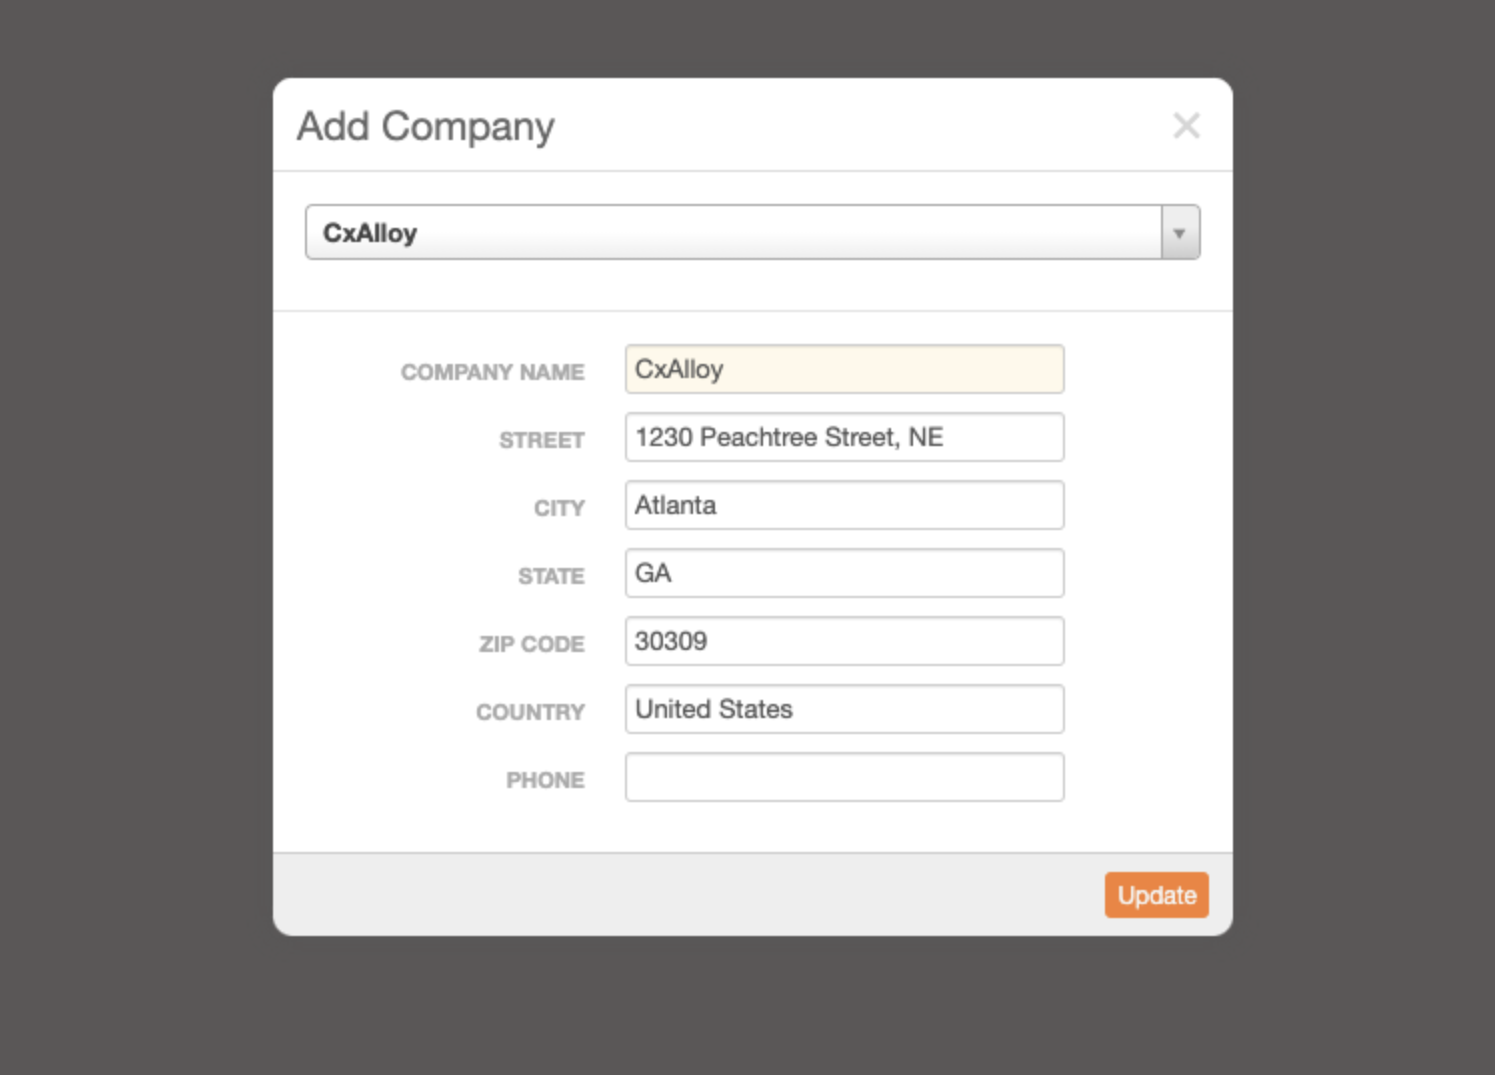
On selection of an existing company, the form will change to update the existing entry instead of creating a new one.
Autofilled Update Form
Additionally, we’ve added the dropdown search that was already being implemented for the project People list to the Account people list as well.
Users can still add a new company with the same name as other existing companies by typing the name in the search dropdown and hitting the Enter/Return key without selecting an existing entry from the dropdown.
With this update, we hope to eliminate the addition of redundant company entries at both the project and account level, while still allowing multiple companies with the same name to exist if desired.
This week’s feature expands on a sort that was added during a previous customer appreciation summer – date updated.
We’ve leveraged that existing functionality to allow users to apply it as a filter. As with other date related filters, the new Date Updated filter lets users select an arbitrary date range from a calendar dropdown. The resultant filtered list will only display items that have been updated within the chosen date range.
What qualifies as an update varies slightly based on the section being filtered, but it generally includes any direct edits to those items, as well as issue creation and file uploads where applicable.
With the addition of this new filter, users will be able to quickly determine whether items of interest have received any new updates.
A forthcoming update to the iOS app will also include this new filtering option.
It’s that time of year again! We are kicking off our fourth annual Customer Appreciation Summer. As in past years, during the summer we will be releasing a new feature every week pulled from the suggestions our customers have made in our feedback forum.
Our focus with these features is on the smaller “quality of life” improvements that can often slip under the radar.
In that spirit, our first Customer Appreciation Summer feature is the ability to sort checklists and tests by line answer percentage. This new sort is called “Percent Progress”.
This new sort option sorts on the number of “Yes” and “N/A” responses within a given checklist or test as a percentage of all answerable lines.
A forthcoming update to the iOS app will also include this new sorting option.
Users can now quickly gauge progress on line items while identifying potential problems or bottlenecks. We’ll be releasing plenty more features in the coming weeks, including some other high demand sorting and filtering options. We hope you’re looking forward to it!
We recently rolled out some great improvements to CxAlloy TQ for web and iOS.
CxAlloy TQ for Web
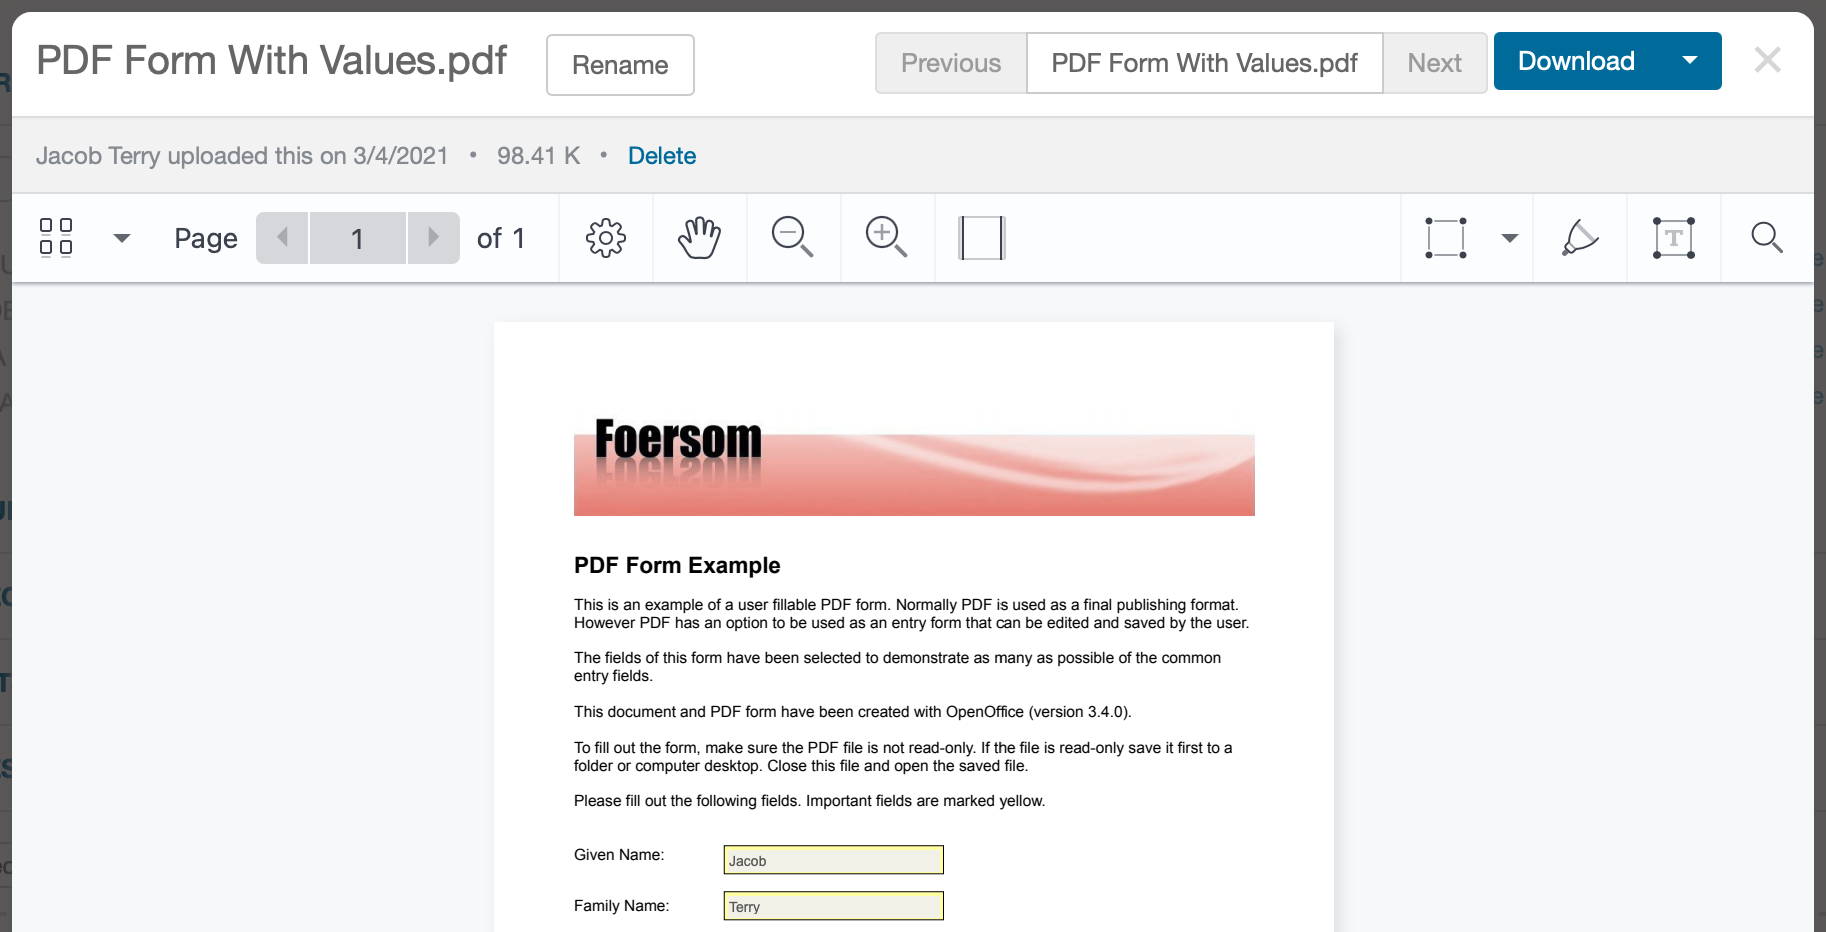
The ability to see PDF form field values.
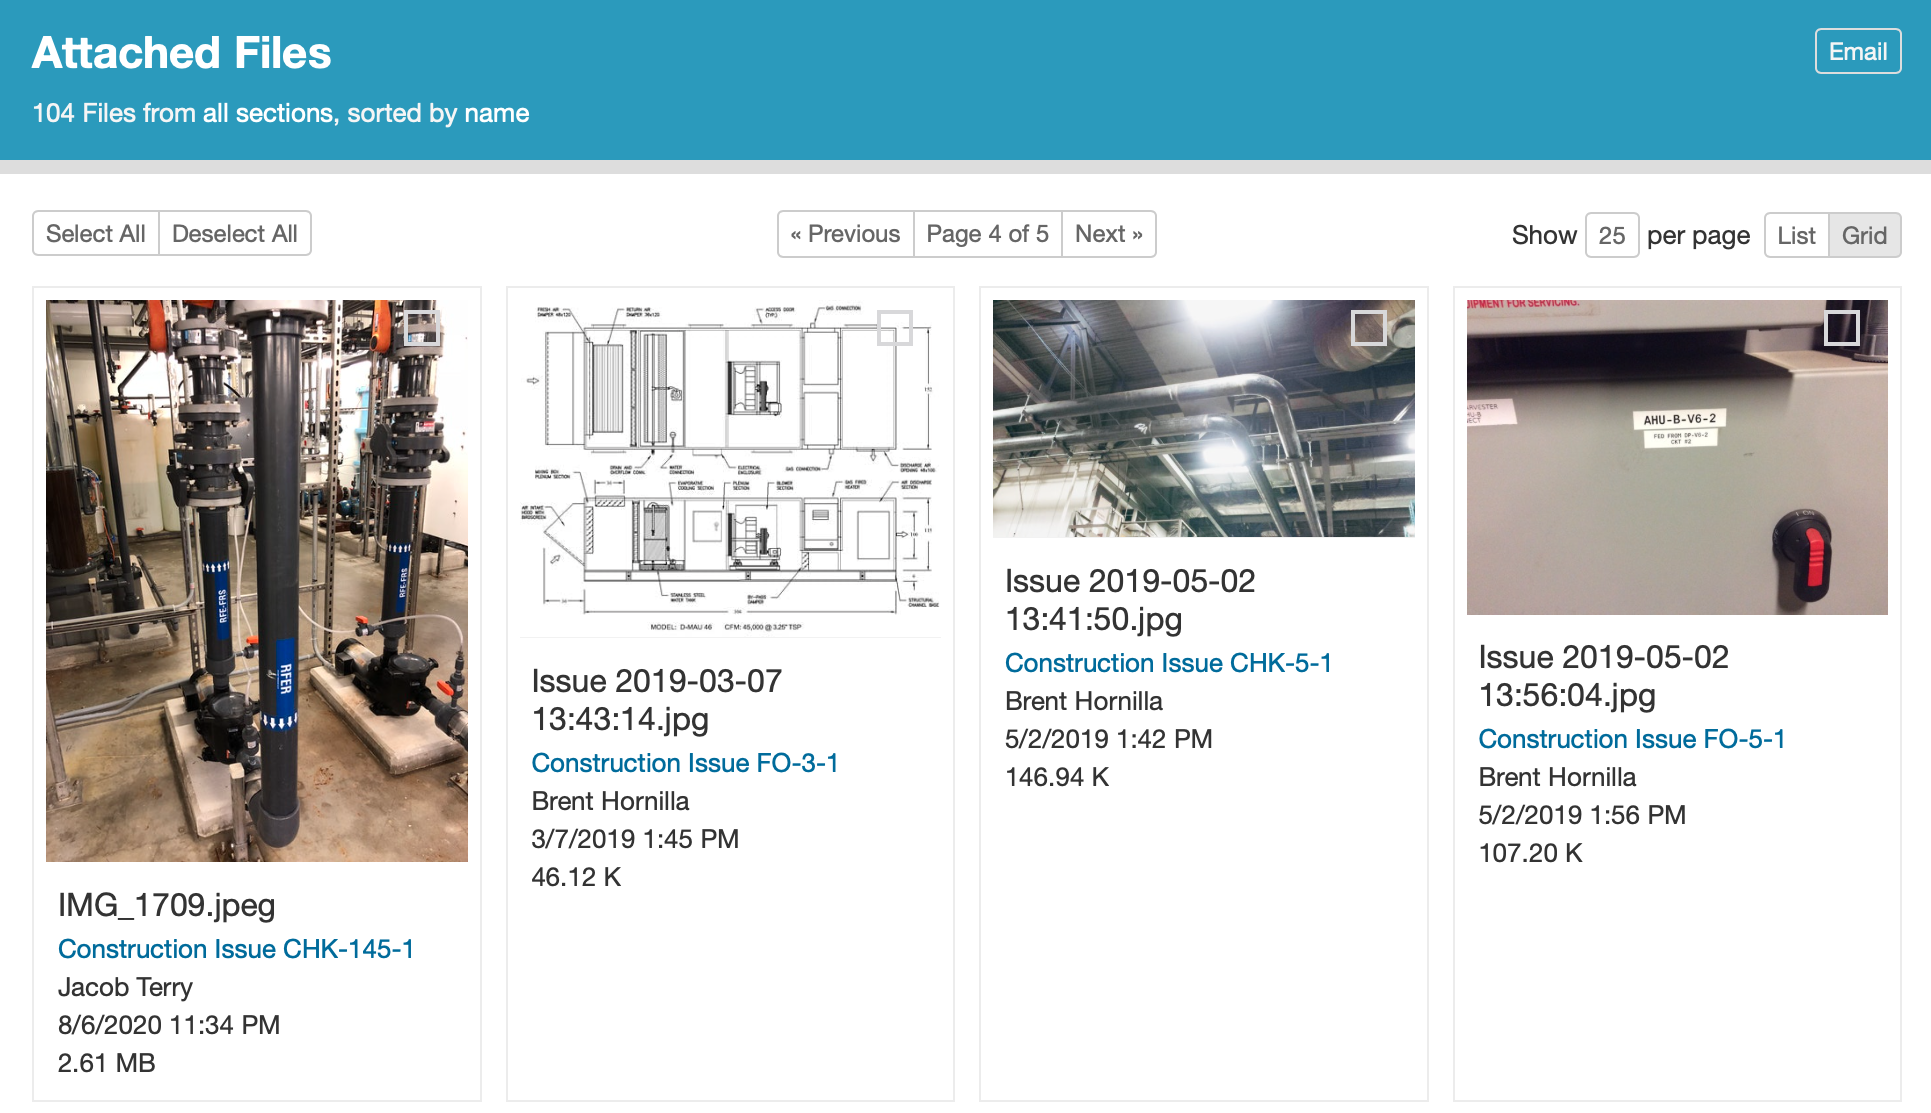
An improved “Attached Files” page.
Separation of attribute units into a separate column in the equipment export.
Ordering attribute columns alphabetically in the equipment export.
Performance improvements and bug fixes.
CxAlloy TQ for iOS 5.1
CxAlloy TQ app for Apple Silicon Macs.
Open CxAlloy TQ urls in the app (“Universal Links”)
If you have multiple Apple devices, you can now browse your project on one device and continue it one another (“Handoff”).
Read on for more details about these features.
PDF Form Field Values
Now when you view a PDF in CxAlloy TQ you will see any values previously entered into form fields in that PDF. Please note that you cannot enter new data into forms in CxAlloy TQ.
Improved “Attached Files” Page
The “Attached Files” page has been revamped with a cleaner view that features larger thumbnails and more information. This same revamp is on the way for the “Project Files” page as well.
Performance Improvements and Bug Fixes
Images and PDFs now load faster in the viewer, especially when using the “Next” and “Previous” buttons to navigate between files.
The Attached Files page loads faster.
The “Next”/”Previous” controls load faster when viewing an issue detail page.
The “Source” field for attached files now includes more information for checklist and test line files and is a clickable link.
Tabbing between issue comment text boxes now works in more situations.
Searching in “Attached Files” now follows standard CxAlloy search rules, allowing for quoted strings and negation.
CxAlloy TQ for Apple Silicon Macs
Last year, Apple announced that it would start making its own chips for the Mac, like it already does for iOS devices. An interesting side effect of this was the new ability to run iOS apps on these new Apple Silicon Macs. After some testing and some tweaking of the user interface, we have now made the iOS app available on Apple Silicon Macs. To download it, simply search for “CxAlloy TQ” in the Mac App Store on an Apple Silicon Mac.
Universal Links
When you tap on a CxAlloy TQ link in an email, message, or note on your iOS device, it will launch the app and go to that item in the app instead of the website. This means you can successfully click on links even when you are offline!
If the project or item is not available in the app, the app will automatically pass it on to be opened in your browser instead as before.
Handoff
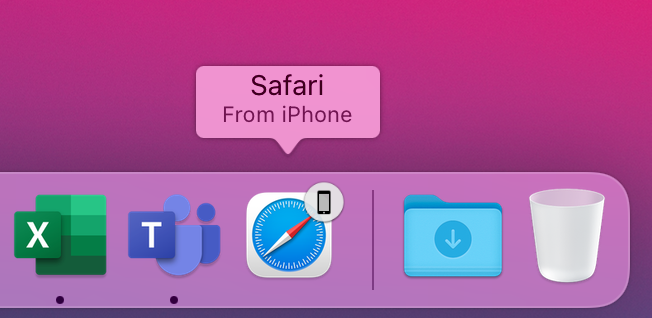
If you have multiple Apple devices, you can now browse your project on one device and continue it one another using Handoff. For example, if you are viewing a list of checklists in the iOS app and you bring your phone close to your Mac, you can click the Safari icon in your dock to load the same list of checklists in your browser.
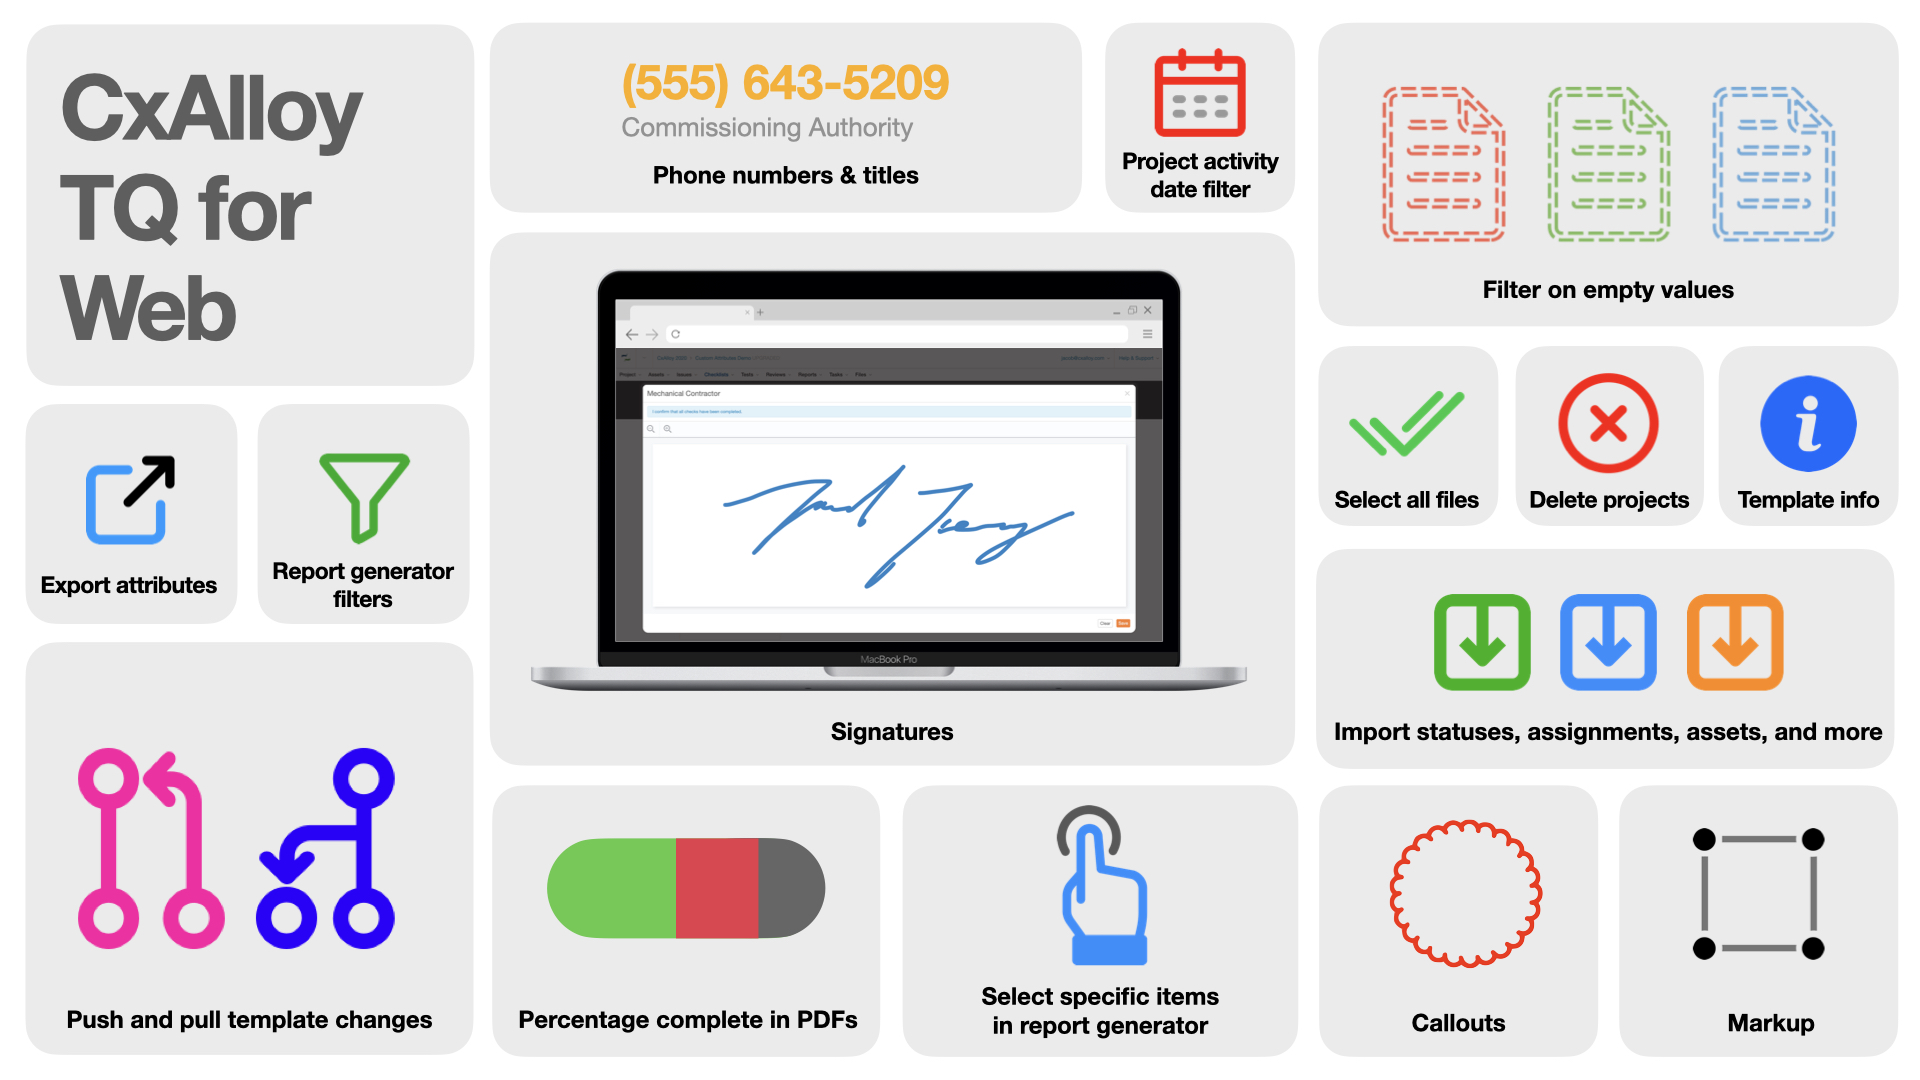
Our final webinar of 2020 was a roadmap of our plans for 2021 and a look back at what we released in 2020, including several features that we launched shortly before the webinar.
If you are a CxAlloy TQ user, you can watch the webinar right now on our training page by clicking the play button below, or read on for a brief synopsis.
CxAlloy TQ for Web
Throughout 2020 we focused on features that eliminated friction and administrative overhead in managing the data in your projects. From the many small improvements made during our third Customer Appreciation Summer to the major enhancement of pushing template changes – which allows you to update tens to hundreds of checklists or tests instantly, even when they’re partially completed – you can manage your work in CxAlloy TQ faster than ever.
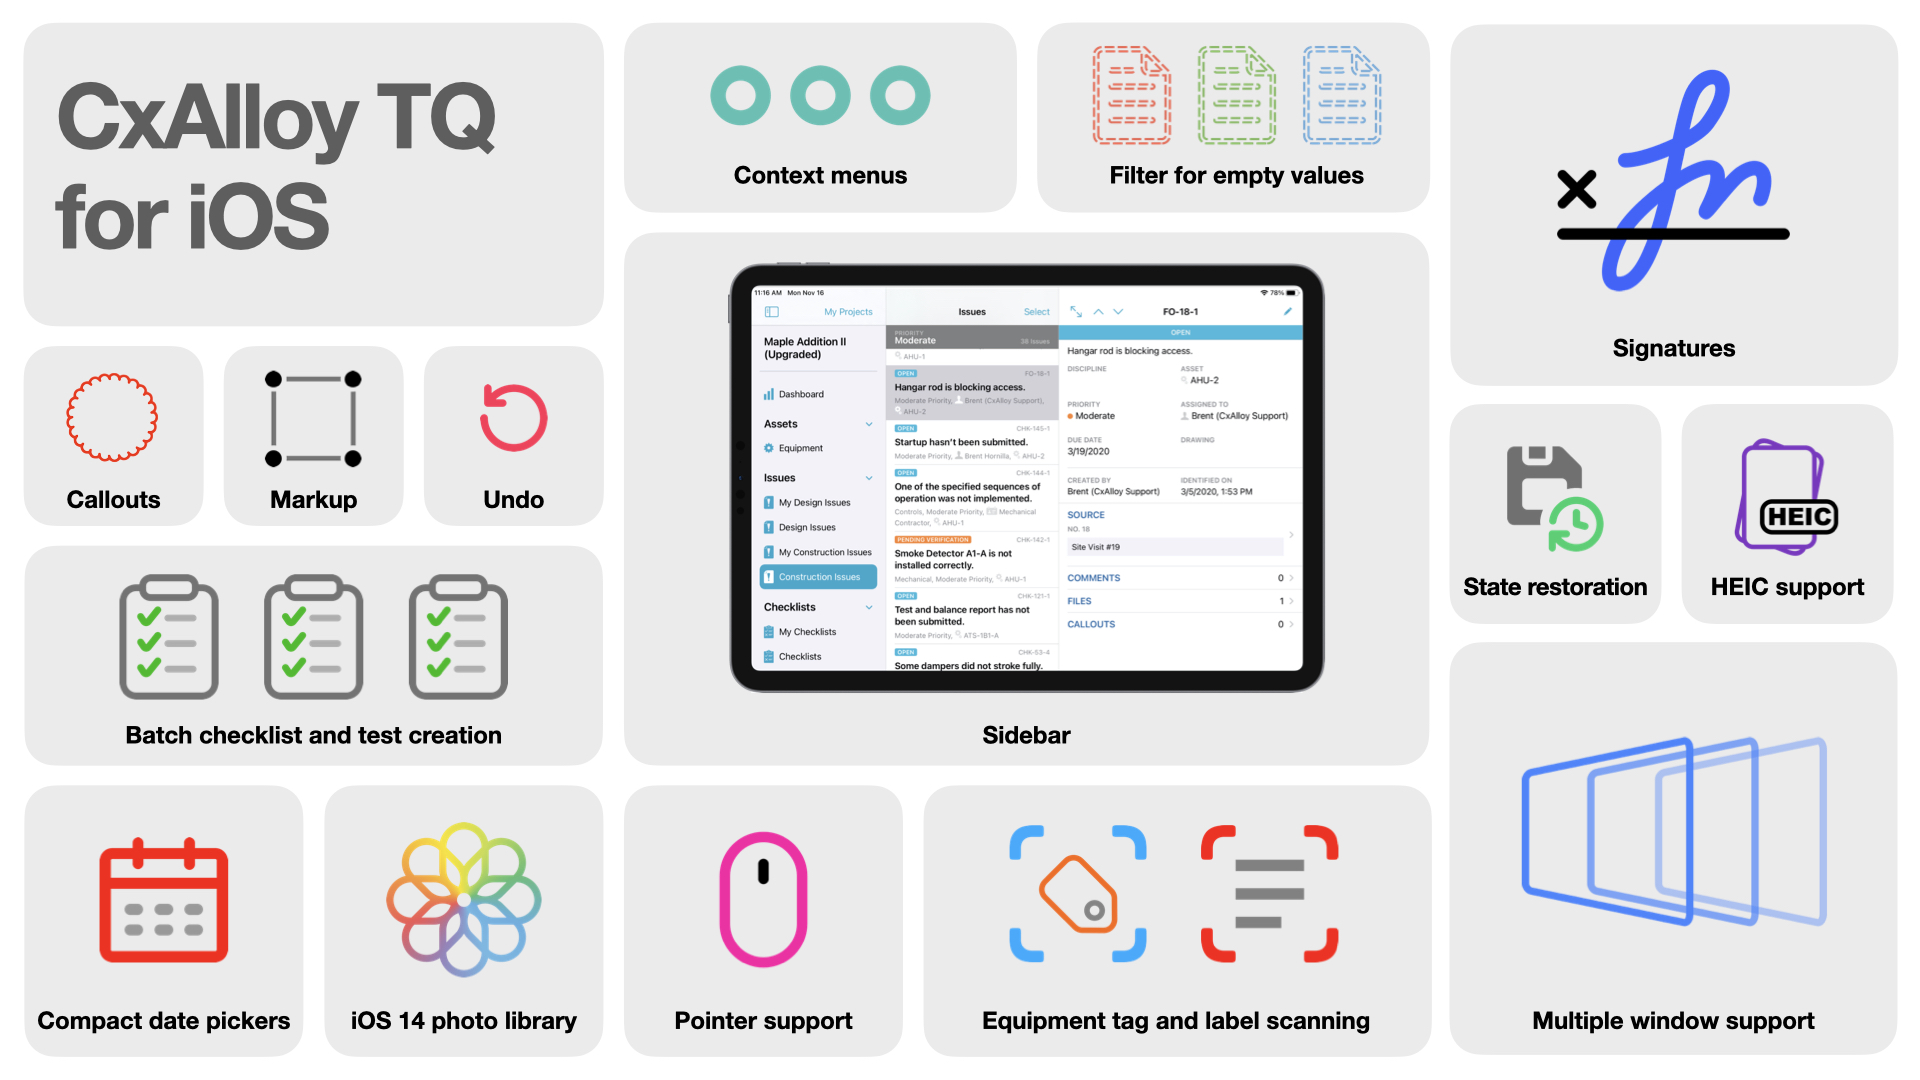
At the end of the year we also made our markup and callouts feature available to all accounts, allowing you to draw on any image or PDF, and added signatures for those projects that require that extra layer of accountability.
CxAlloy TQ for iOS
Besides matching the markup and callouts, signatures, and other features that debuted on the web, the iOS app added new features all its own in 2020. From scanning labels so you don’t have to type in serial numbers to batch answering identical checklists and tests, the iOS app empowers you to be more efficient than ever before.
CxAlloy TQ for Windows
Finally, we released the beta of our Windows app. The Windows app represents a major step forward compared to our previous Chrome-based Windows solution, allowing offline access to multiple projects, adapting to any screen or window size, and featuring a more usable, modern interface. We have built it off of the same battle-tested sync backend as our iOS app so that you can be confident it will have the information you need when you need it.
You can download the Windows app today in the Windows store by clicking below.
We have big plans for the Windows app in 2021 as we work to bring it to full feature parity with our iOS app. Speaking of 2021…
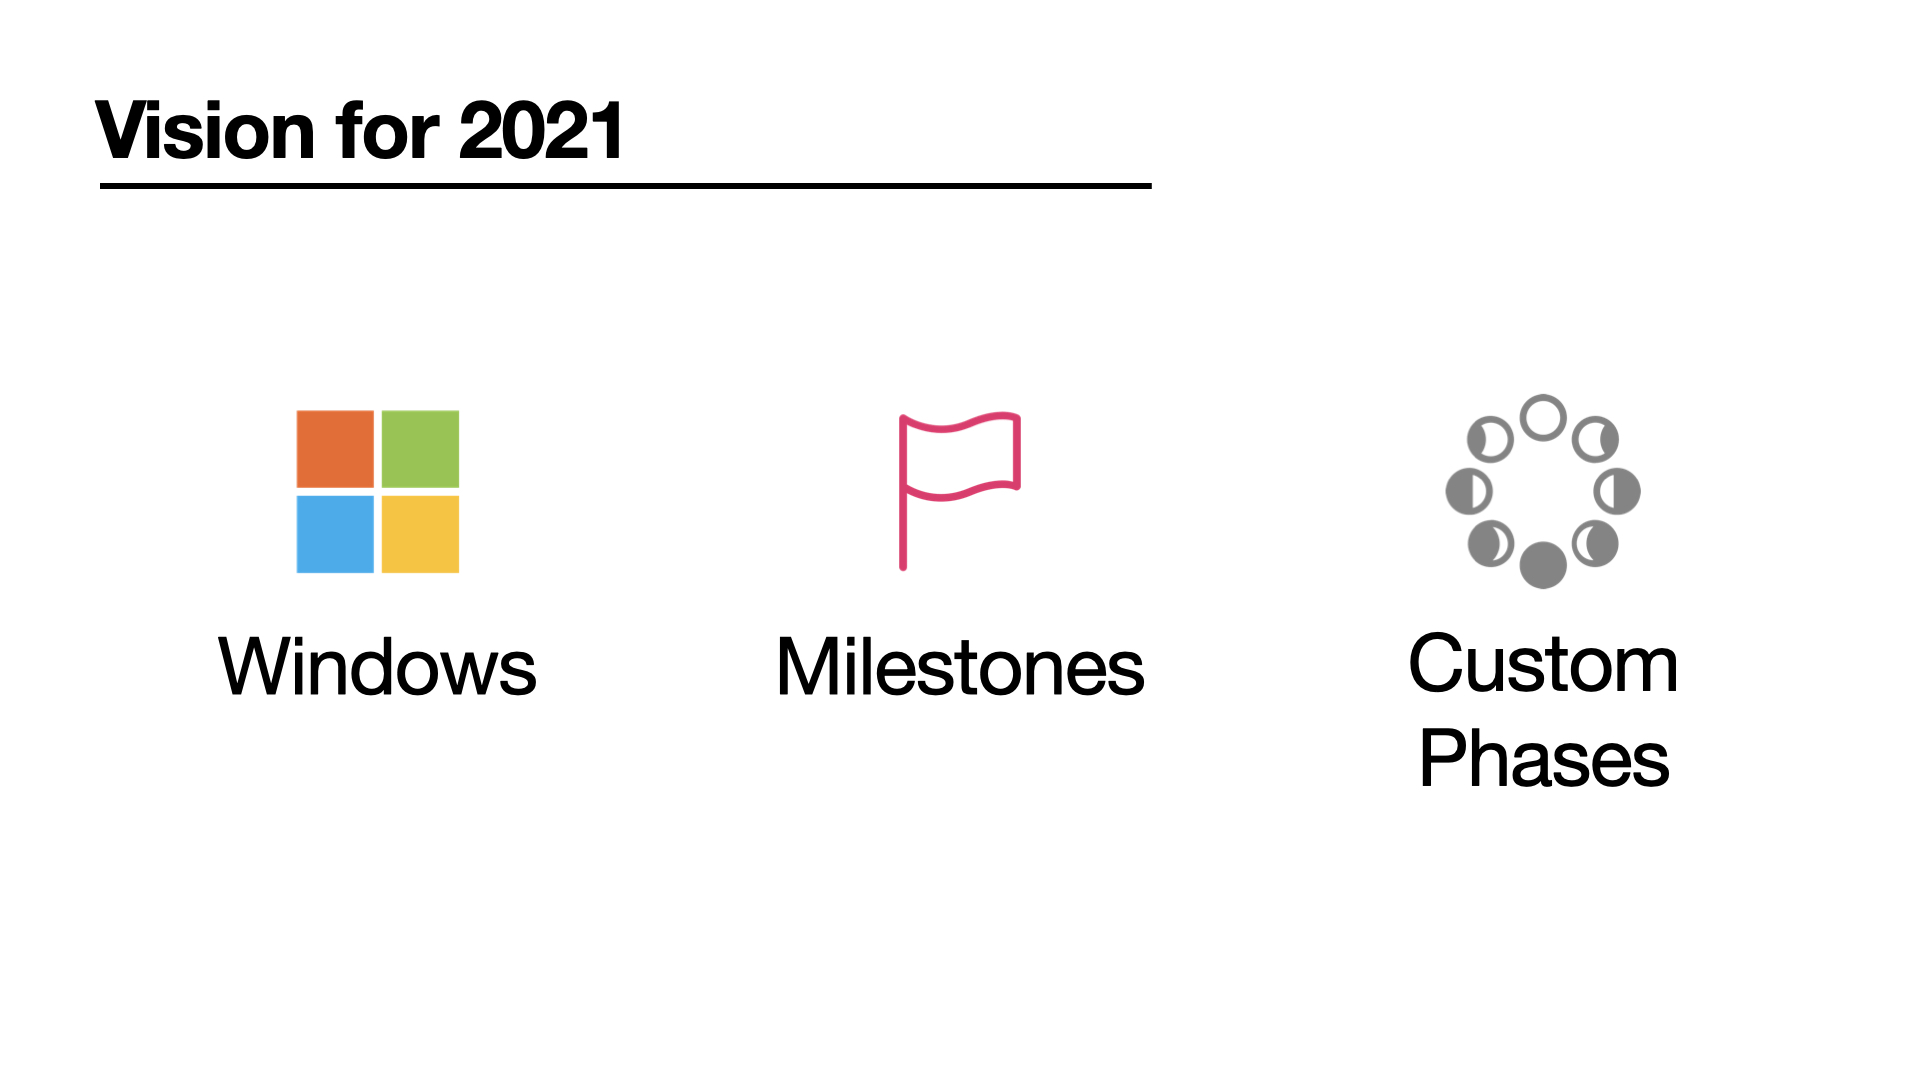
Vision for 2021
In addition to the Windows app, we have two major initiatives planned for 2021: Custom Phases and Milestones. We believe both of these will greatly expand the ways in which CxAlloy TQ can be used to manage and monitor project progress, giving you greater flexibility in how you organize, report, and track your project data. You can watch the webinar video for more details on our plans for these features as well as information about other planned features.
Of course, we’ll release other, smaller features throughout 2021 as well, so please keep an eye on the blog for details as those roll out. We think 2021 is going to be a great year!
We recently released a major update to CxAlloy TQ with Markup and Callouts, Signatures, a new Account Projects page, and several other improvements.
Markup and Callouts
In this release we made Markup and Callouts, which was previously in beta, available to all accounts while also rolling out improvements based on the feedback we received during the beta.
Markup allows you to annotate images and PDFs with arrows, text overlays, shapes, and freeform drawings. To use these new tools click on an image or PDF and you’ll find new annotation tools available in the toolbar.
The updated toolbar contains the new markup tools
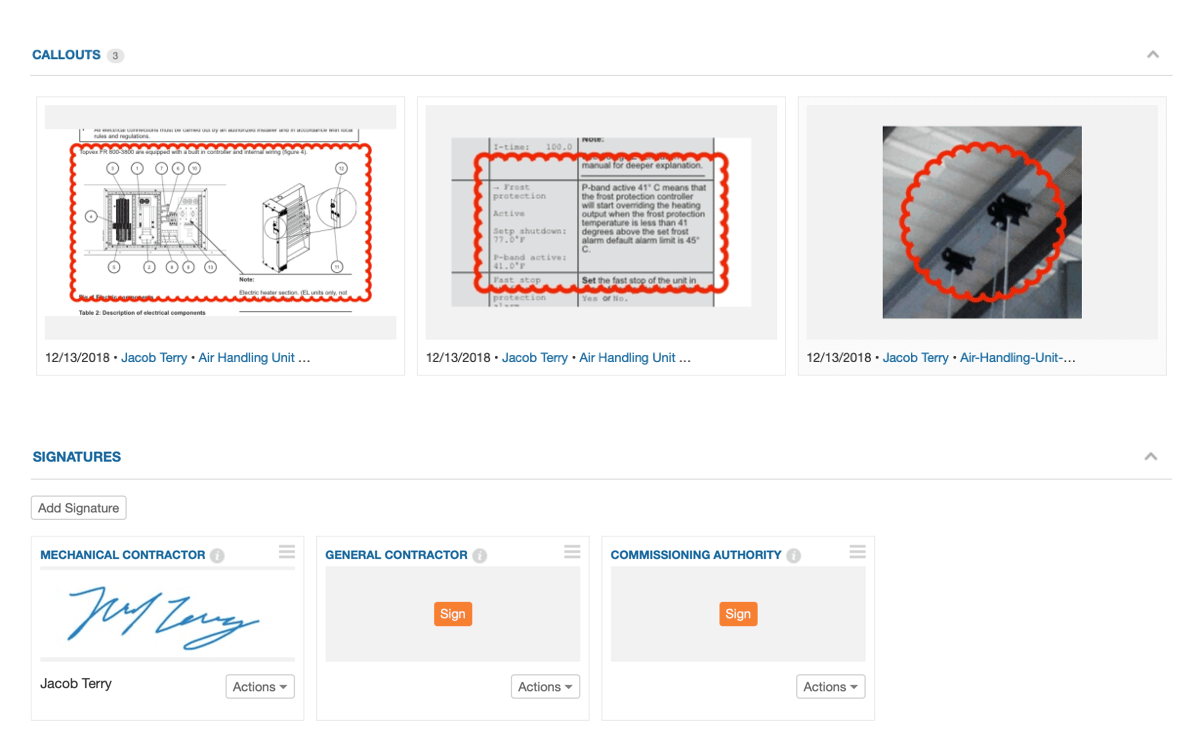
Callouts is a feature of Markup which creates thumbnails of any area you annotate with a circle or rectangle. This is particularly useful for multi-page PDFs, as it allows you to easily surface information on any page of the PDF.
Circle and rectangle annotations create Callouts
Markup is deeply integrated into CxAlloy TQ – when you markup a file those markups are reflected in the image thumbnails, PDF reports, and subsequent file downloads. Markup is available in the iOS app as well, and annotations sync as you would expect.
For those that have been using Markup during our beta period, this release makes several improvements:
Increases the resolution of annotated images
Adds multiple download formats
Original file without annotations
Flattened file with annotations
PDF with embedded native annotations
Updates batch downloading to use the annotated version of a file if it has annotations
Improves performance of loading the viewer
Correctly handles HEIC images
Fixes an issue where Callouts that were drawn close to the edge of a document would not appear correctly
Signatures
With Signatures you can now add signatures to checklists, tests, and templates and users can sign using their mouse or finger (on devices with a touchscreen). Signatures are also available in our iOS app.
A new “Signatures” section appears for checklists, tests, and templates
When creating checklists and tests from a template, any signatures you have defined on the template are copied over just like lines. Signatures on a checklist or test can then be signed.
Of course, signatures can be included in checklist and test PDFs, and signature activity is now included in history.
Signatures replace the previous “Signature Lines” feature. If you have ongoing projects that need the prior “Signature Lines” functionality, please contact support and we can re-enable it for those projects.
Account Projects
Previously available as a separate “Overview” page, the new Account Projects page includes significant improvements over the simple project list it replaces.
The biggest change is that each project shows it’s dashboard summarizing the status breakdown of issues, checklists, tests, tasks, and equipment. There’s quite a bit more, though, as you can now sort and filter your project list, generate PDF reports, and export the data.
The new Account Projects page
Many of these features were available in its previous incarnation as your account “Overview”, but we made several improvements as we brought it over to replace the projects list.
Added administrator, location, and date created sorts
Added Checklist Open Count and Checklist Closed Percentage sorts
Added administrator, location, and date created information to each project listing
One note is that the checklist sorts can only sort projects with upgraded checklists. Accounts that have not upgraded will not see the checklist sorts, and in upgraded accounts the sort will ignore un-upgraded projects.
Other Improvements
Several other improvements were included in this release.
Templates now have a new section that shows all related checklists or tests and their “Push Changes” status
You can create new assets or attributes “on-the-fly” in more places
The presentation of related template information on checklists and tests has been improved, and the “Pull Changes” button has been moved next to the template information
You can now download a sample file from the import screen
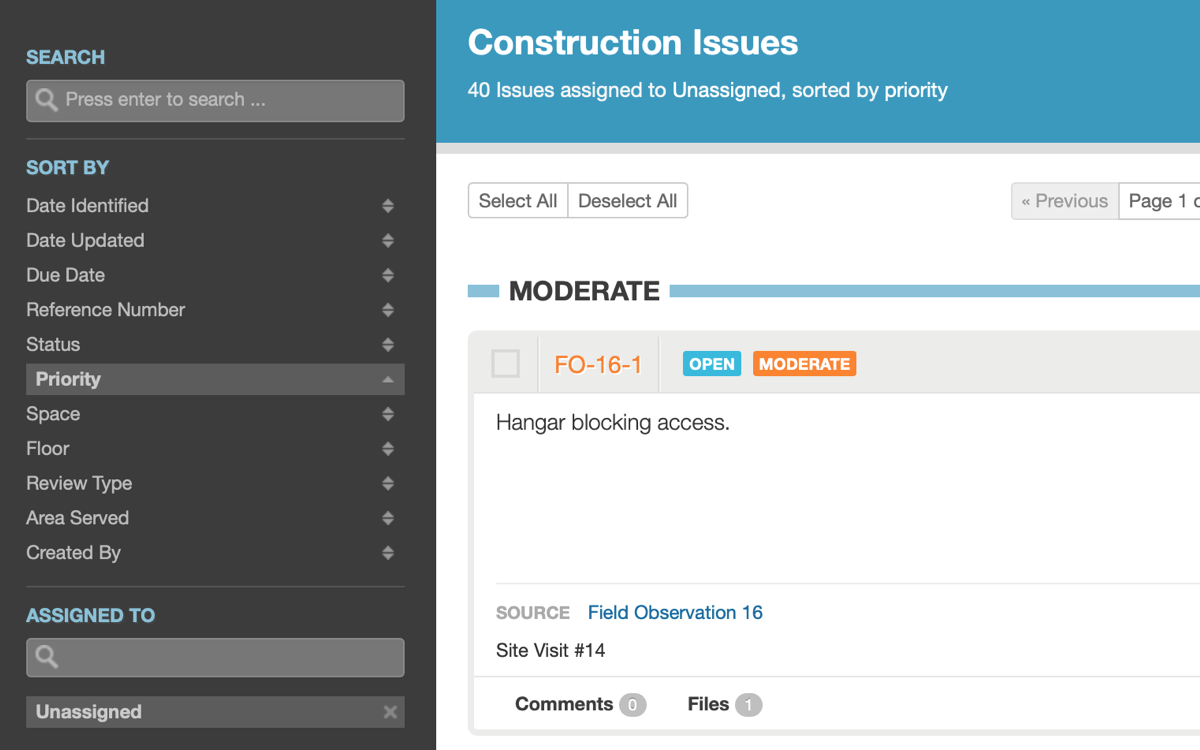
For Week 11 of Customer Appreciation Summer we’ve added the ability to filter based on when a value is not set. This makes certain actions much easier, such as finding all unassigned issues. Combined with our batch editing tools it’s now trivial to quickly audit and correct data gaps.
Easily find unassigned issues with the new filtering options
This ability (what we internally call the “none” filter) is only available when it makes sense. For example, issues always have a status and therefore don’t have a “No Status” filter. Filters that include a “none” option include assignment, discipline, priority, equipment type, system, checklist type, review type, review remark, and field observation type.
The “none” filters can be combined just like other filters. For example, you could find all equipment that either has no discipline or has discipline “Mechanical”.
Finally, we’ve also added the “none” option to these same filters in the report generator.
We hope this makes it easier to manage the data in your projects!
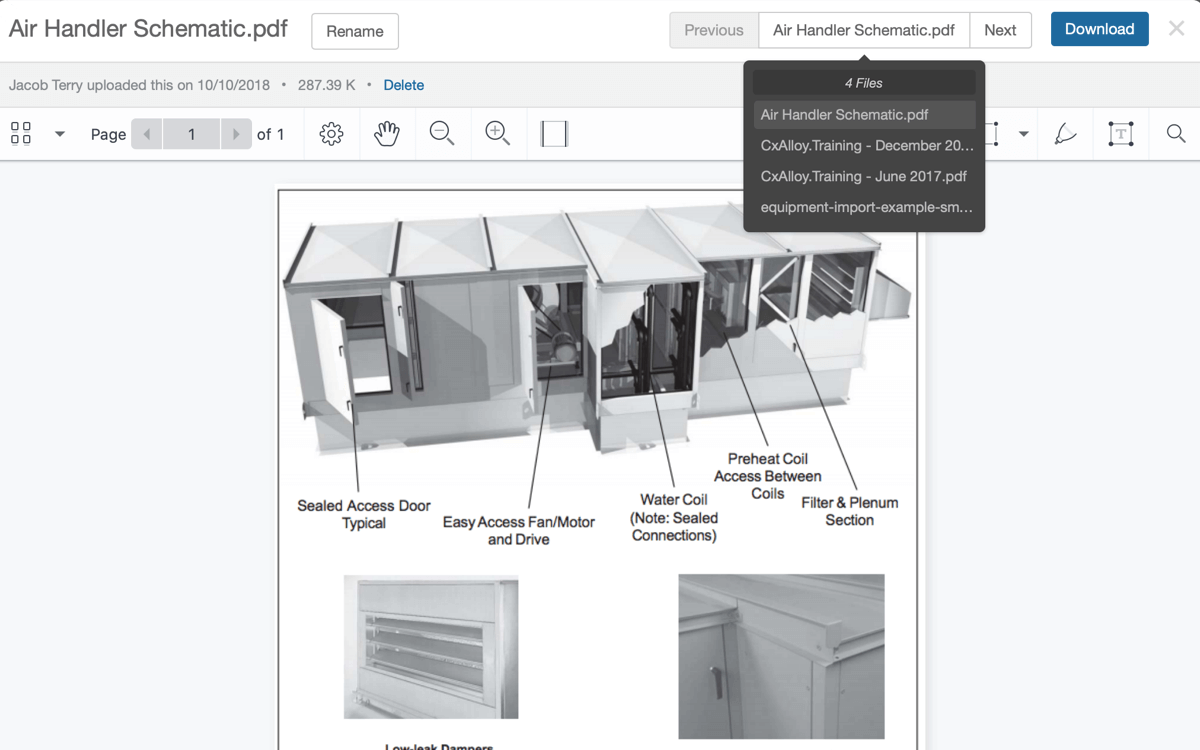
For Week 10 of Customer Appreciation Summer we have made two improvements to file navigation: we’ve added next and previous buttons so you can quickly cycle through attached photos and files, and we’ve added Select All and Deselect All buttons for attached photos and files.
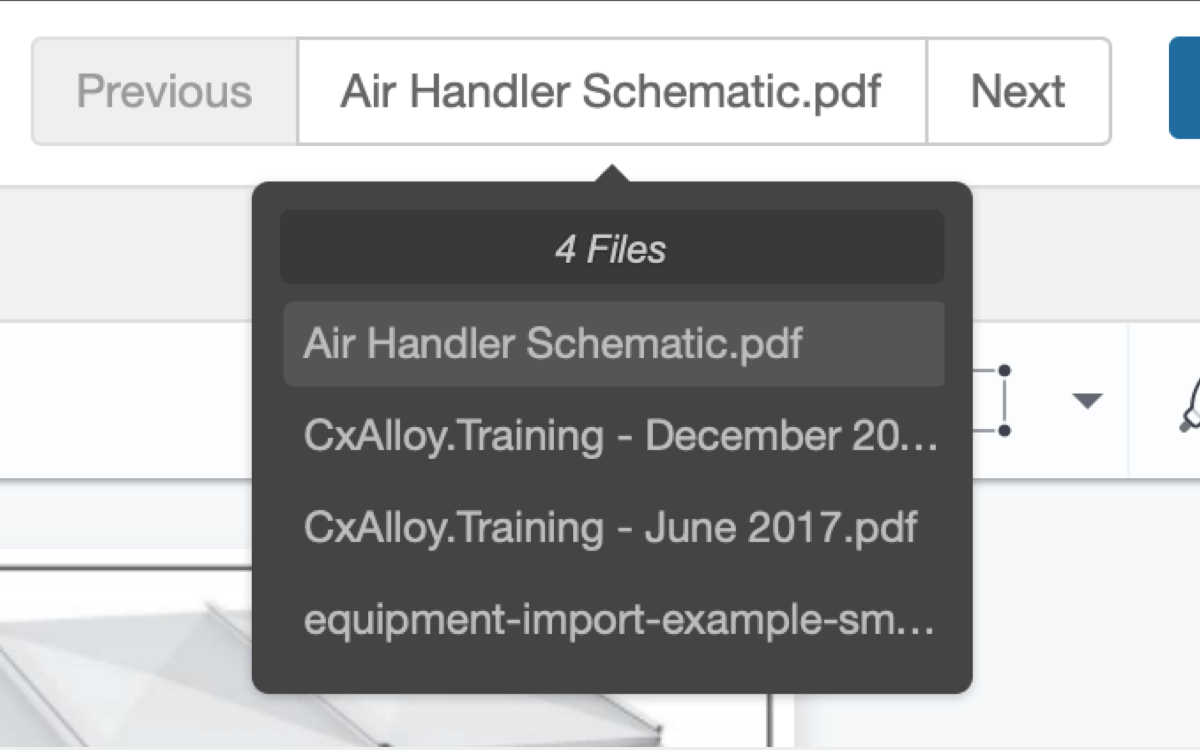
The new navigation controls allow you to move to the next or previous file in the list, or jump to any other attached file via a dropdown.
Quickly navigate between files with the new navigation controls
The new Select All/Deselect All buttons make it far easier to batch download files. We’ve also renamed the “Zip” button to “Download” (it still downloads a .zip file, though).
Easily select all attached files with the new Select All button
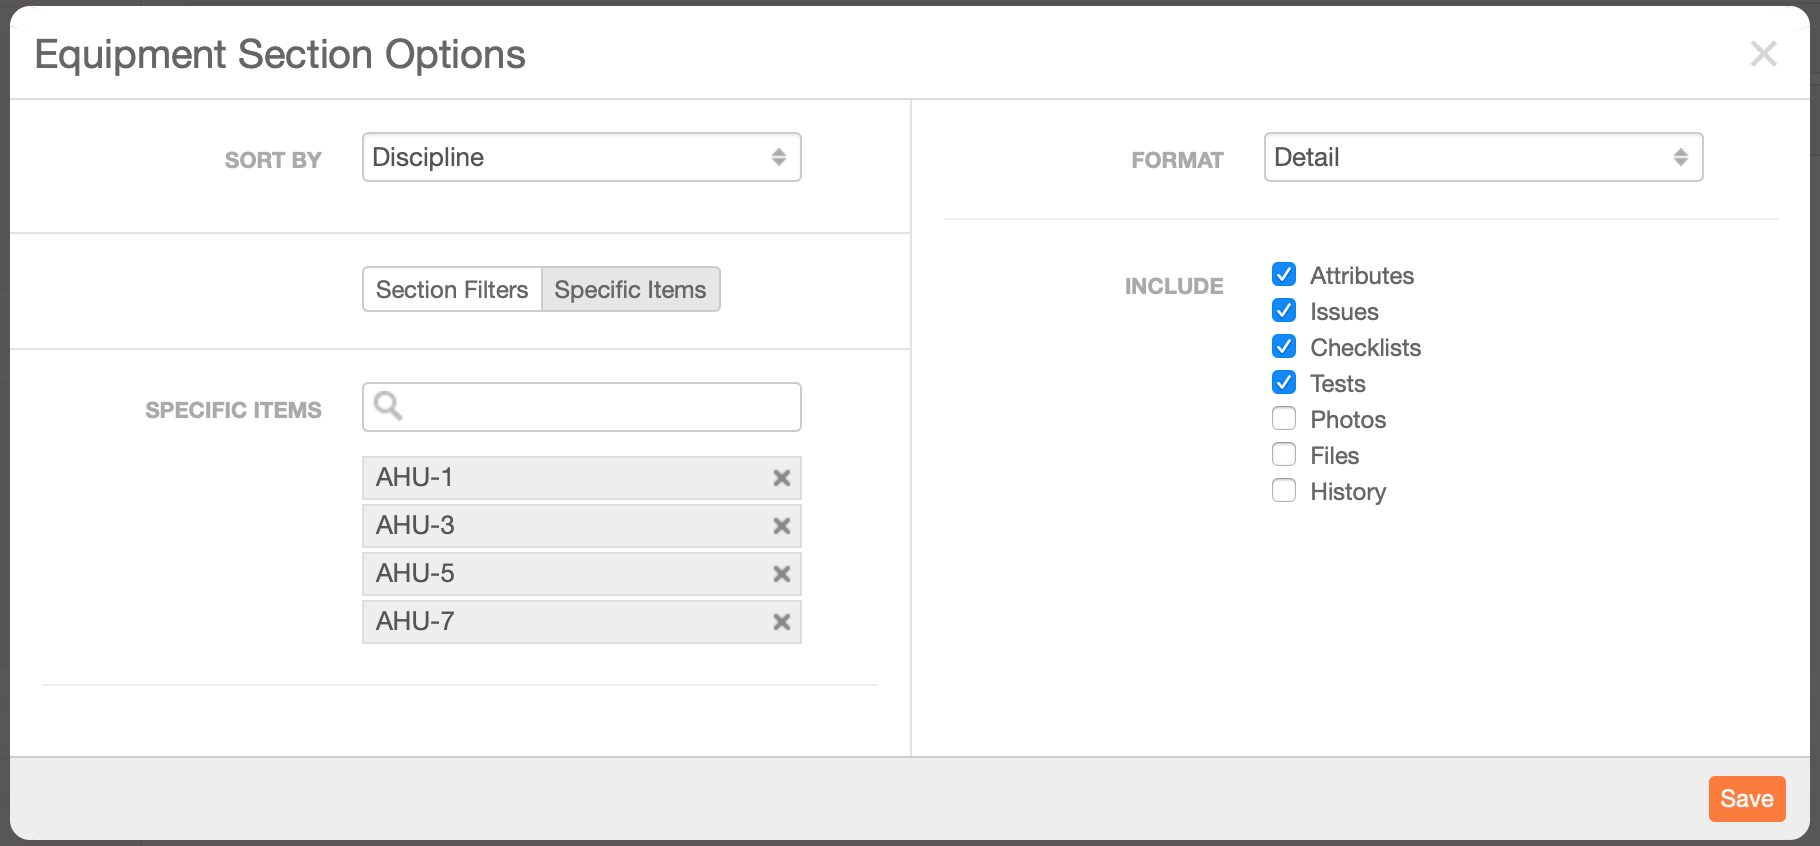
For Week 9 of Customer Appreciation Summer we’ve added new report generator options to select specific items for a section, such as specific equipment, checklists, issues, and so forth.
You can now choose specific items as an alternative to filters
Selecting specific items is an alternative to filters; you can’t combine the two. The interface reflects this with a toggle that allows you to switch between the two options.
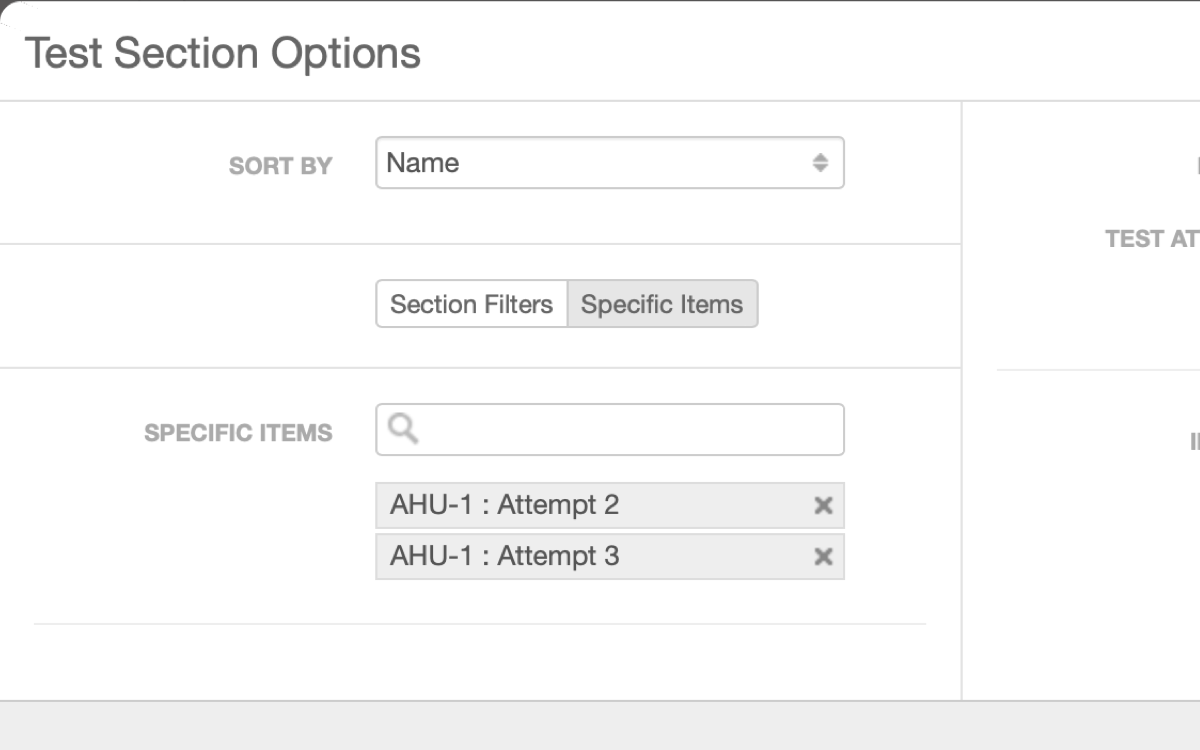
For tests we’ve done something special. The list of tests is actually a list of all attempts, allowing you to cherry-pick specific attempts to include. For example, you could select just Attempt No. 2 out of three total attempts. The resulting report would then only show Attempt No. 2 for that test. In addition, only issues, photos, files, and callouts related to Attempt No. 2 (or the overall test) would be included.
Tests give you the option to can select specific attempts
With these new options you are able to build reports that just weren’t possible previously. We hope you like it!
Summer is drawing to a close but not without the final releases of our third annual Customer Appreciation Summer! We hit a few bumps here at the end but in the past week we’ve released our final three features: file navigation, new report generator options, and filtering for items where a field is empty.
We’ve got a quick overview of these features below and we’ll have more detailed posts on each of these throughout this week and next.
Select Specific Items in the Report Generator (Week 9)
You now have the option to select a specific set of items to include in the report generator as an alternative to filtering. With tests, you can even select specific test attempts to include.
Select the exact equipment to include with the new “Specific Items” option
File Navigation (Week 10)
You can now navigate to the next and previous file in the file viewer, or jump to any other attached file from a dropdown. Plus, we also added Select All/Deselect All buttons to file lists.
Jump to any attached file with the new file navigation
Filter for Empty Fields (Week 11)
Certain filters now allow you to look for items that don’t have a value. For example, you can filter equipment to those that have no discipline set, or filter issues by those that are unassigned. These same filters are available in the report generator as well.
Find all unassigned issues with new filter options
We hope you like these features, and we hope you enjoyed Customer Appreciation Summer! Please keep letting us know what features you would like to see in our feature request forum.
But wait! What about week 12? Well… it needs just a little more time in the oven but we are working on one final Customer Appreciation Summer feature. It’s one a lot of people have asked for. We hope you’ll look forward to it!
Week 8 of our Customer Appreciation Summer adds the company and role of the author to comments, both on the web and in PDFs.
Comments now show the author’s role and company.
You’ll also see this information in the next release of the iOS app later this week. That update also features the “Include Asset Name” option when creating checklists and tests that we first rolled out on the web last week.
In addition, we’ve improved the presentation of field observation comments in the PDF to make it clearer which comment photos belong to.
It’s now clearer which comment photos belong to.
As a reminder, all of these features are based on feature requests at feedback.cxalloy.com. Although we focus on smaller features during the Customer Appreciation Summer, we are also working on many of the bigger requests. If you’ve added a request, made a comment, or just voted on the ones you want, thank you – your input there has been incredibly valuable to us.
We hope you like these updates and we’ll see you next week!