angle-graphic

Filter by Date Updated – Customer Appreciation Summer Week 2

This week’s feature expands on a sort that was added during a previous customer appreciation summer – date updated.

We’ve leveraged that existing functionality to allow users to apply it as a filter. As with other date related filters, the new Date Updated filter lets users select an arbitrary date range from a calendar dropdown. The resultant filtered list will only display items that have been updated within the chosen date range.

What qualifies as an update varies slightly based on the section being filtered, but it generally includes any direct edits to those items, as well as issue creation and file uploads where applicable.

With the addition of this new filter, users will be able to quickly determine whether items of interest have received any new updates.

A forthcoming update to the iOS app will also include this new filtering option.

Sort by Percent Progress – Customer Appreciation Summer Week 1

It’s that time of year again! We are kicking off our fourth annual Customer Appreciation Summer. As in past years, during the summer we will be releasing a new feature every week pulled from the suggestions our customers have made in our feedback forum.

Our focus with these features is on the smaller “quality of life” improvements that can often slip under the radar.

In that spirit, our first Customer Appreciation Summer feature is the ability to sort checklists and tests by line answer percentage. This new sort is called “Percent Progress”.

This new sort option sorts on the number of “Yes” and “N/A” responses within a given checklist or test as a percentage of all answerable lines.

A forthcoming update to the iOS app will also include this new sorting option.

Users can now quickly gauge progress on line items while identifying potential problems or bottlenecks. We’ll be releasing plenty more features in the coming weeks, including some other high demand sorting and filtering options. We hope you’re looking forward to it!

CxAlloy TQ Winter ’21 Updates

We recently rolled out some great improvements to CxAlloy TQ for web and iOS.

CxAlloy TQ for Web

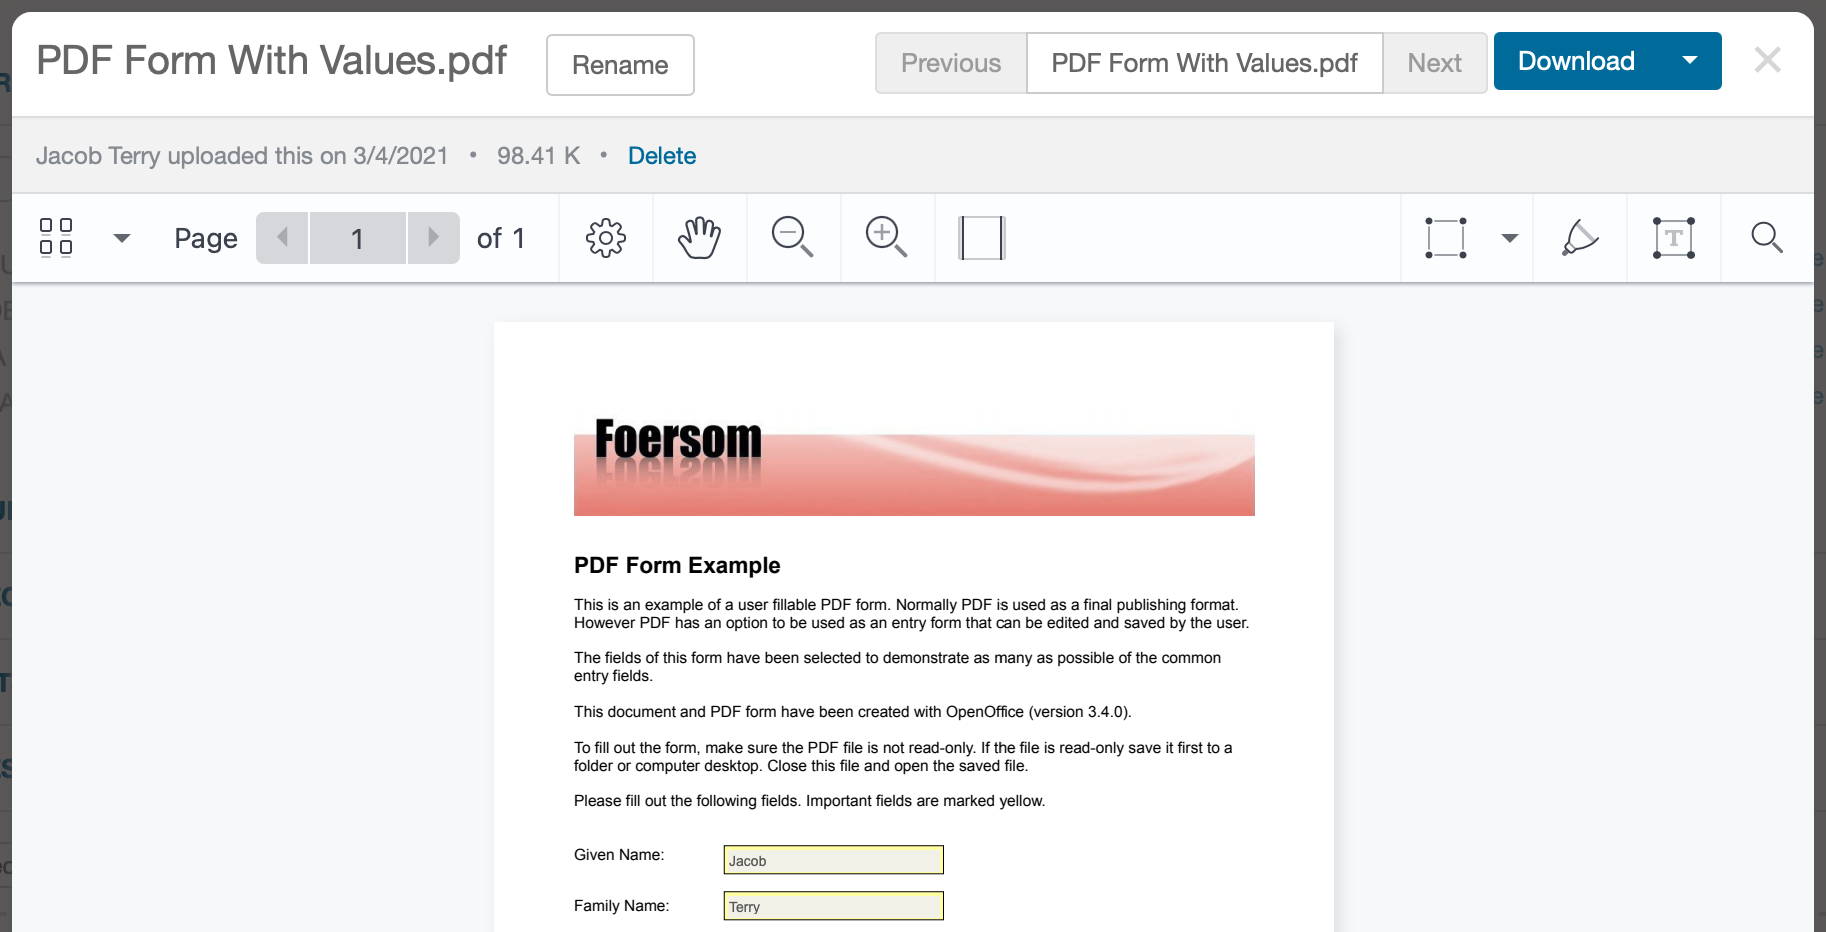
  • The ability to see PDF form field values.
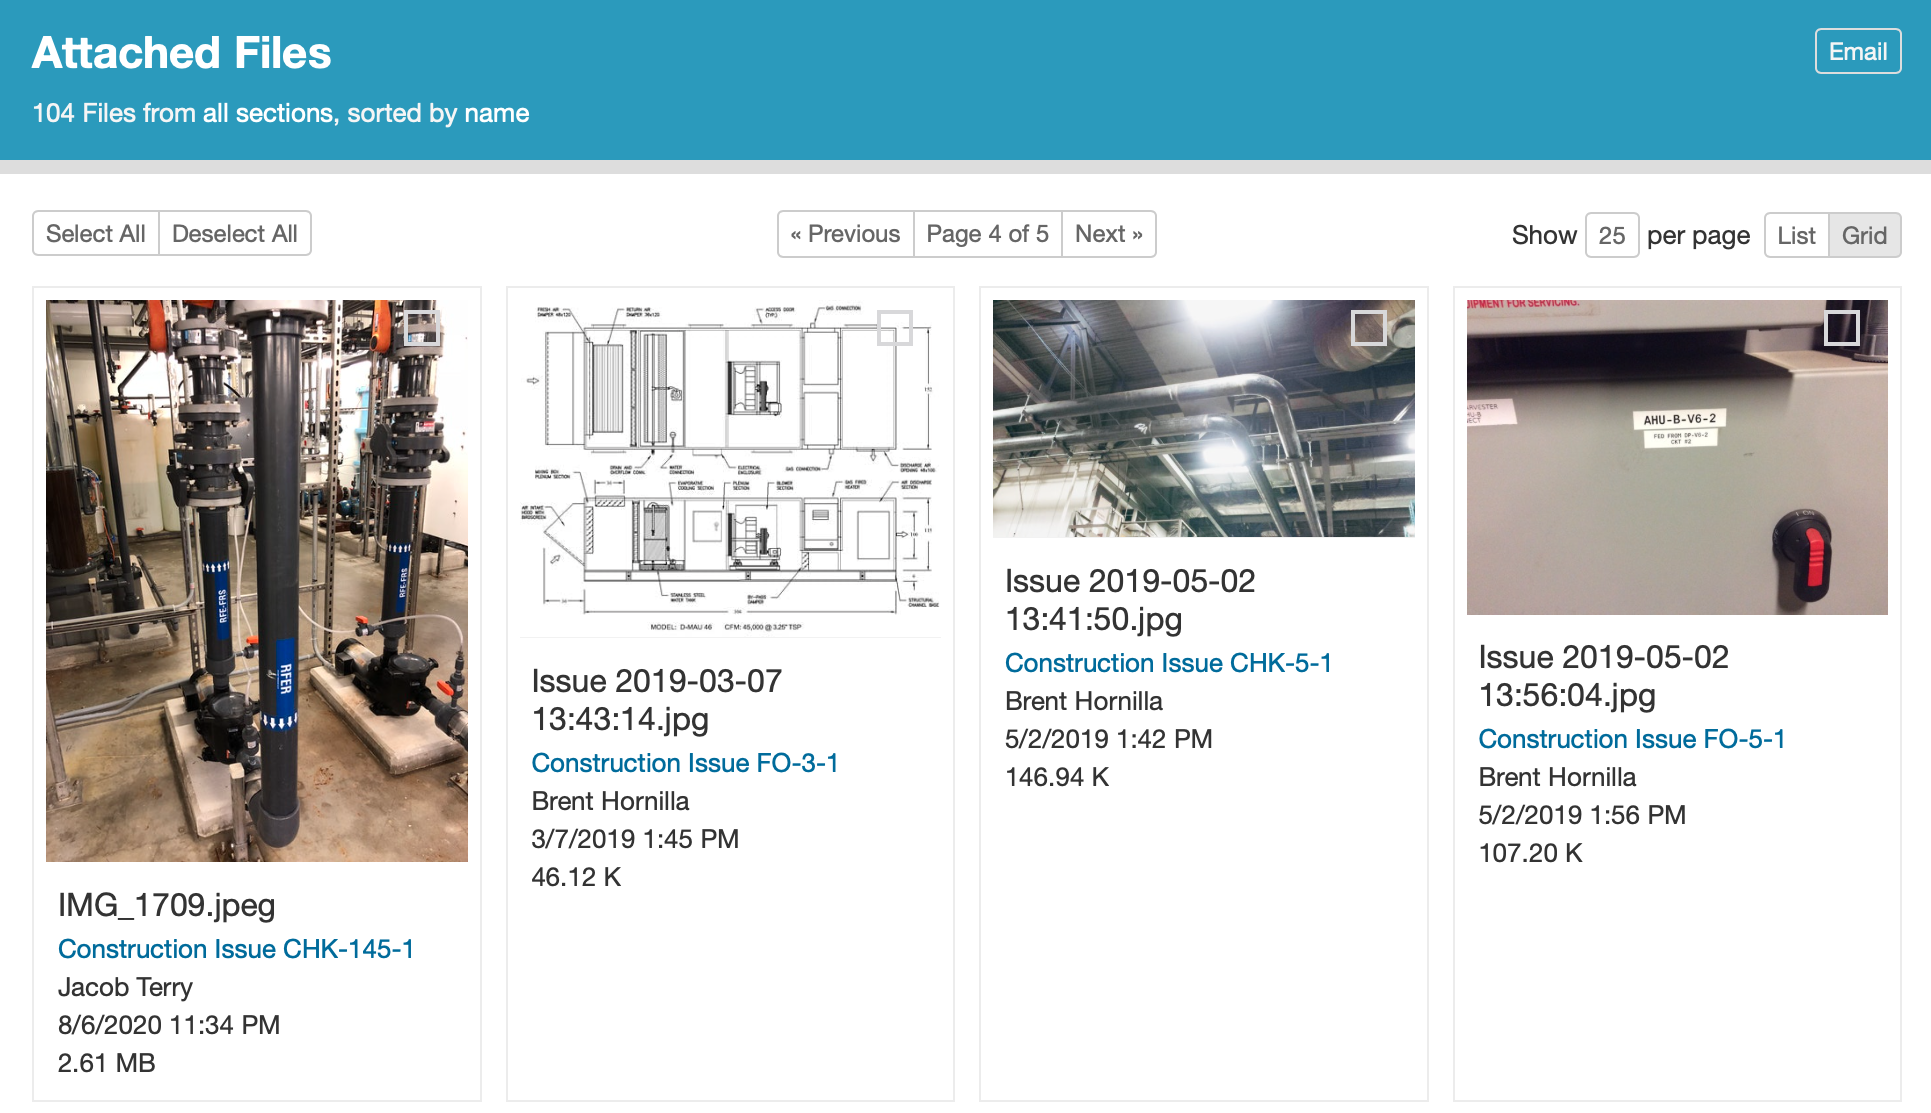
  • An improved “Attached Files” page.
  • Separation of attribute units into a separate column in the equipment export.
  • Ordering attribute columns alphabetically in the equipment export.
  • Performance improvements and bug fixes.

CxAlloy TQ for iOS 5.1

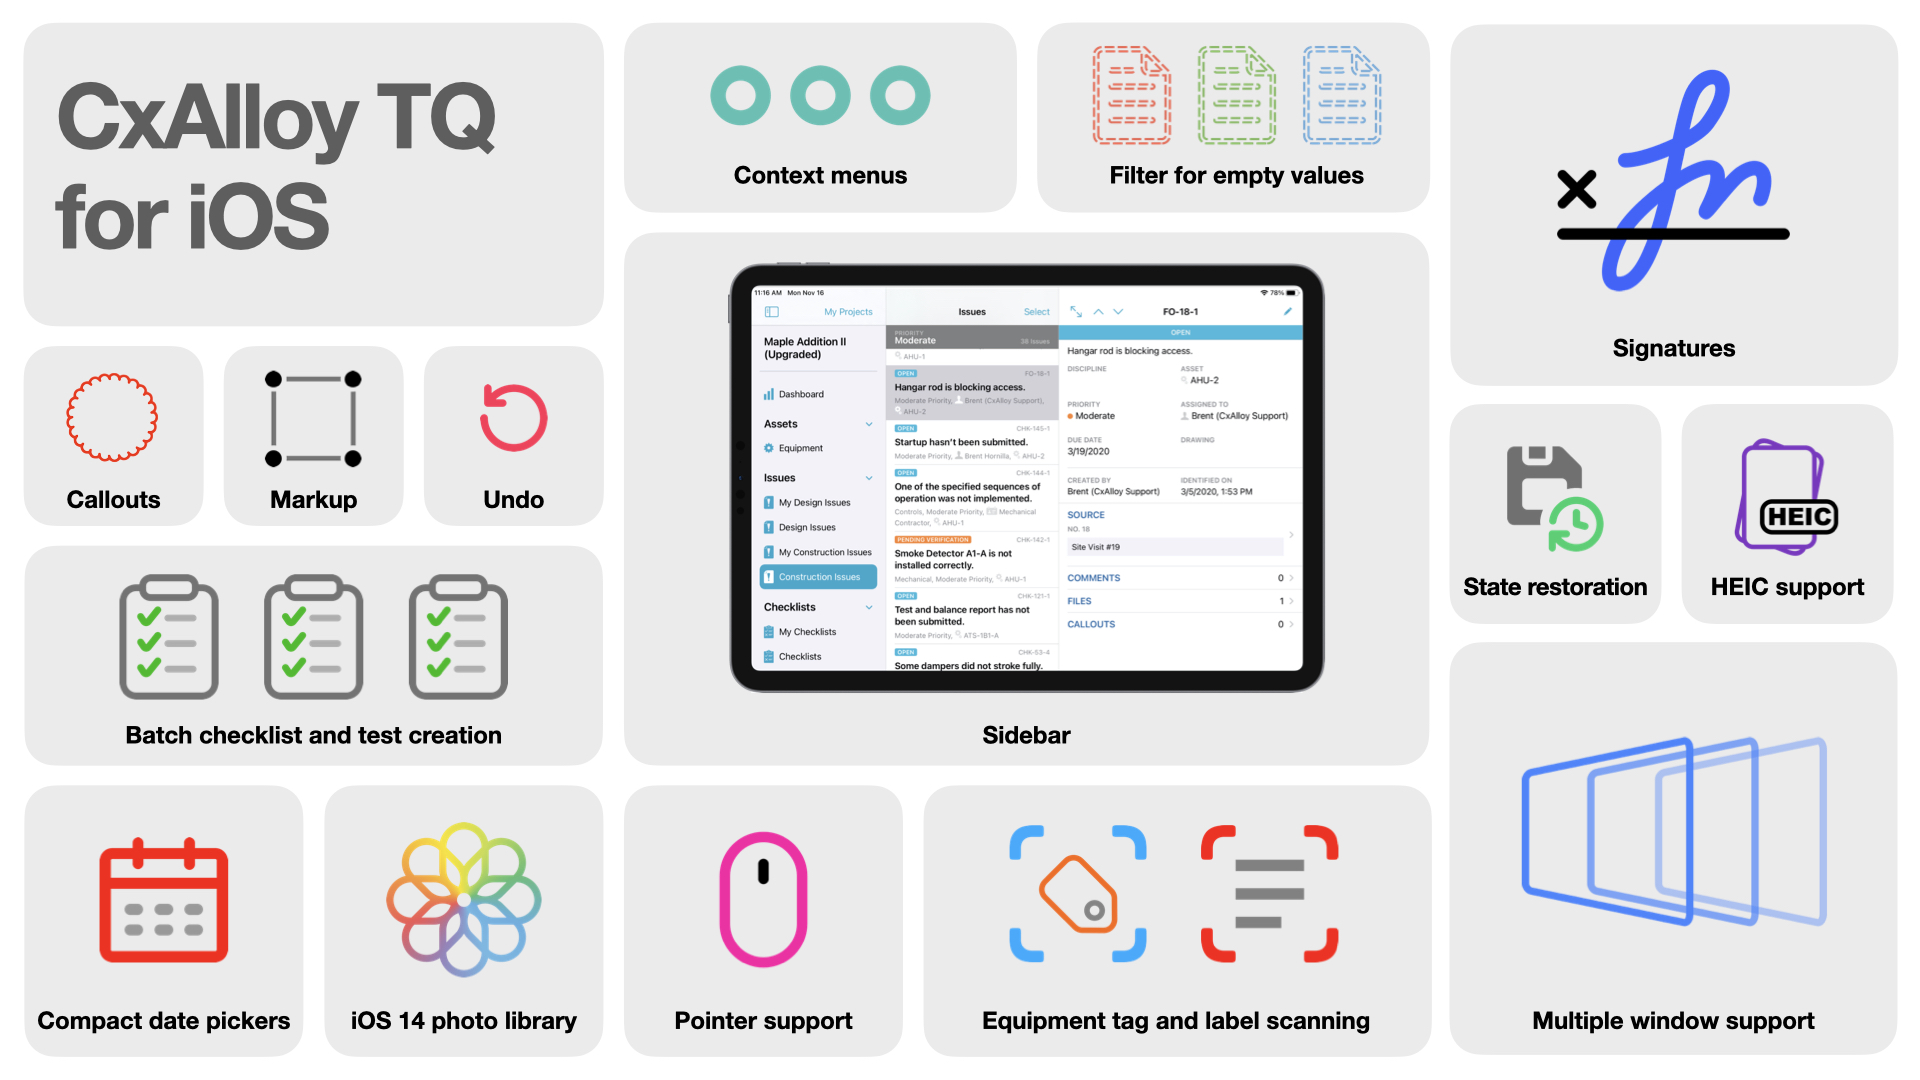
  • CxAlloy TQ app for Apple Silicon Macs.
  • Open CxAlloy TQ urls in the app (“Universal Links”)
  • If you have multiple Apple devices, you can now browse your project on one device and continue it one another (“Handoff”).

Read on for more details about these features.

PDF Form Field Values

Now when you view a PDF in CxAlloy TQ you will see any values previously entered into form fields in that PDF. Please note that you cannot enter new data into forms in CxAlloy TQ.

Improved “Attached Files” Page

The “Attached Files” page has been revamped with a cleaner view that features larger thumbnails and more information. This same revamp is on the way for the “Project Files” page as well.

Performance Improvements and Bug Fixes

  • Images and PDFs now load faster in the viewer, especially when using the “Next” and “Previous” buttons to navigate between files.
  • The Attached Files page loads faster.
  • The “Next”/”Previous” controls load faster when viewing an issue detail page.
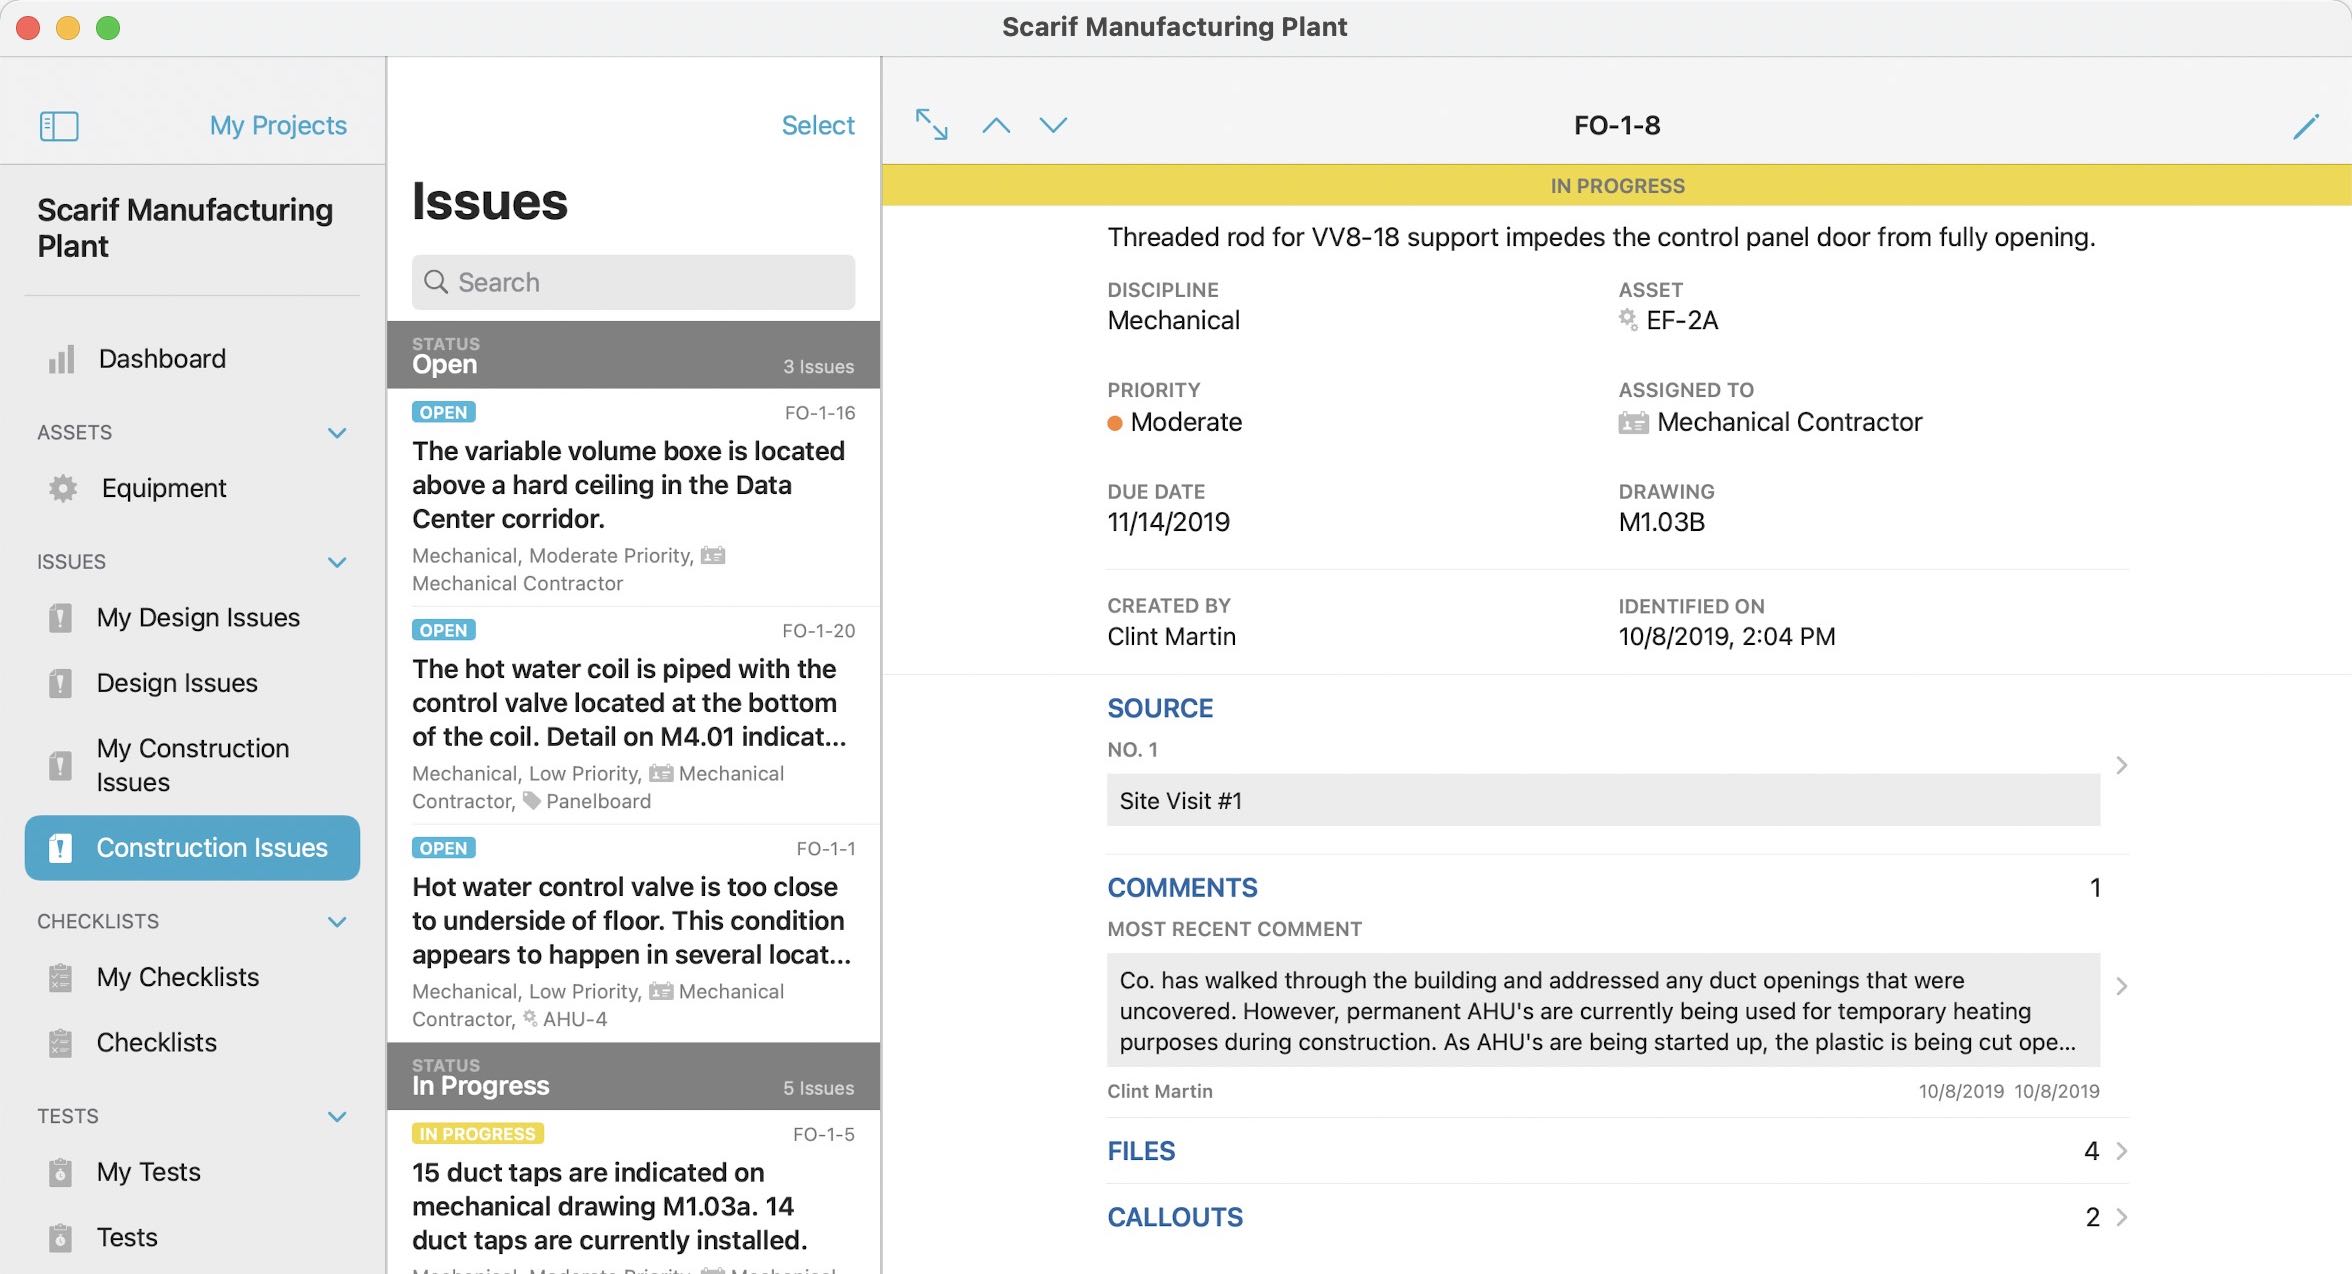
  • The “Source” field for attached files now includes more information for checklist and test line files and is a clickable link.
  • Tabbing between issue comment text boxes now works in more situations.
  • Searching in “Attached Files” now follows standard CxAlloy search rules, allowing for quoted strings and negation.

CxAlloy TQ for Apple Silicon Macs

Last year, Apple announced that it would start making its own chips for the Mac, like it already does for iOS devices. An interesting side effect of this was the new ability to run iOS apps on these new Apple Silicon Macs. After some testing and some tweaking of the user interface, we have now made the iOS app available on Apple Silicon Macs. To download it, simply search for “CxAlloy TQ” in the Mac App Store on an Apple Silicon Mac.

Universal Links

When you tap on a CxAlloy TQ link in an email, message, or note on your iOS device, it will launch the app and go to that item in the app instead of the website. This means you can successfully click on links even when you are offline!

If the project or item is not available in the app, the app will automatically pass it on to be opened in your browser instead as before.

Handoff

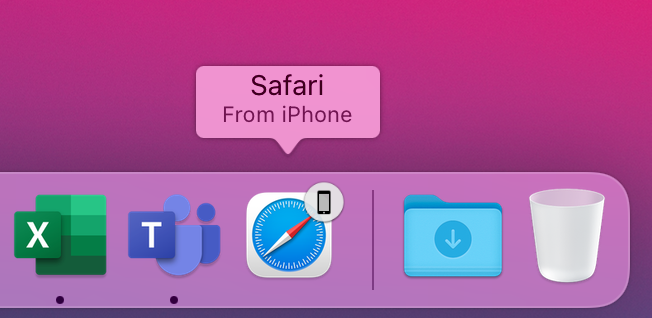
If you have multiple Apple devices, you can now browse your project on one device and continue it one another using Handoff. For example, if you are viewing a list of checklists in the iOS app and you bring your phone close to your Mac, you can click the Safari icon in your dock to load the same list of checklists in your browser.

CxAlloy TQ 2021 Roadmap

Our final webinar of 2020 was a roadmap of our plans for 2021 and a look back at what we released in 2020, including several features that we launched shortly before the webinar.

If you are a CxAlloy TQ user, you can watch the webinar right now on our training page by clicking the play button below, or read on for a brief synopsis.

CxAlloy TQ for Web

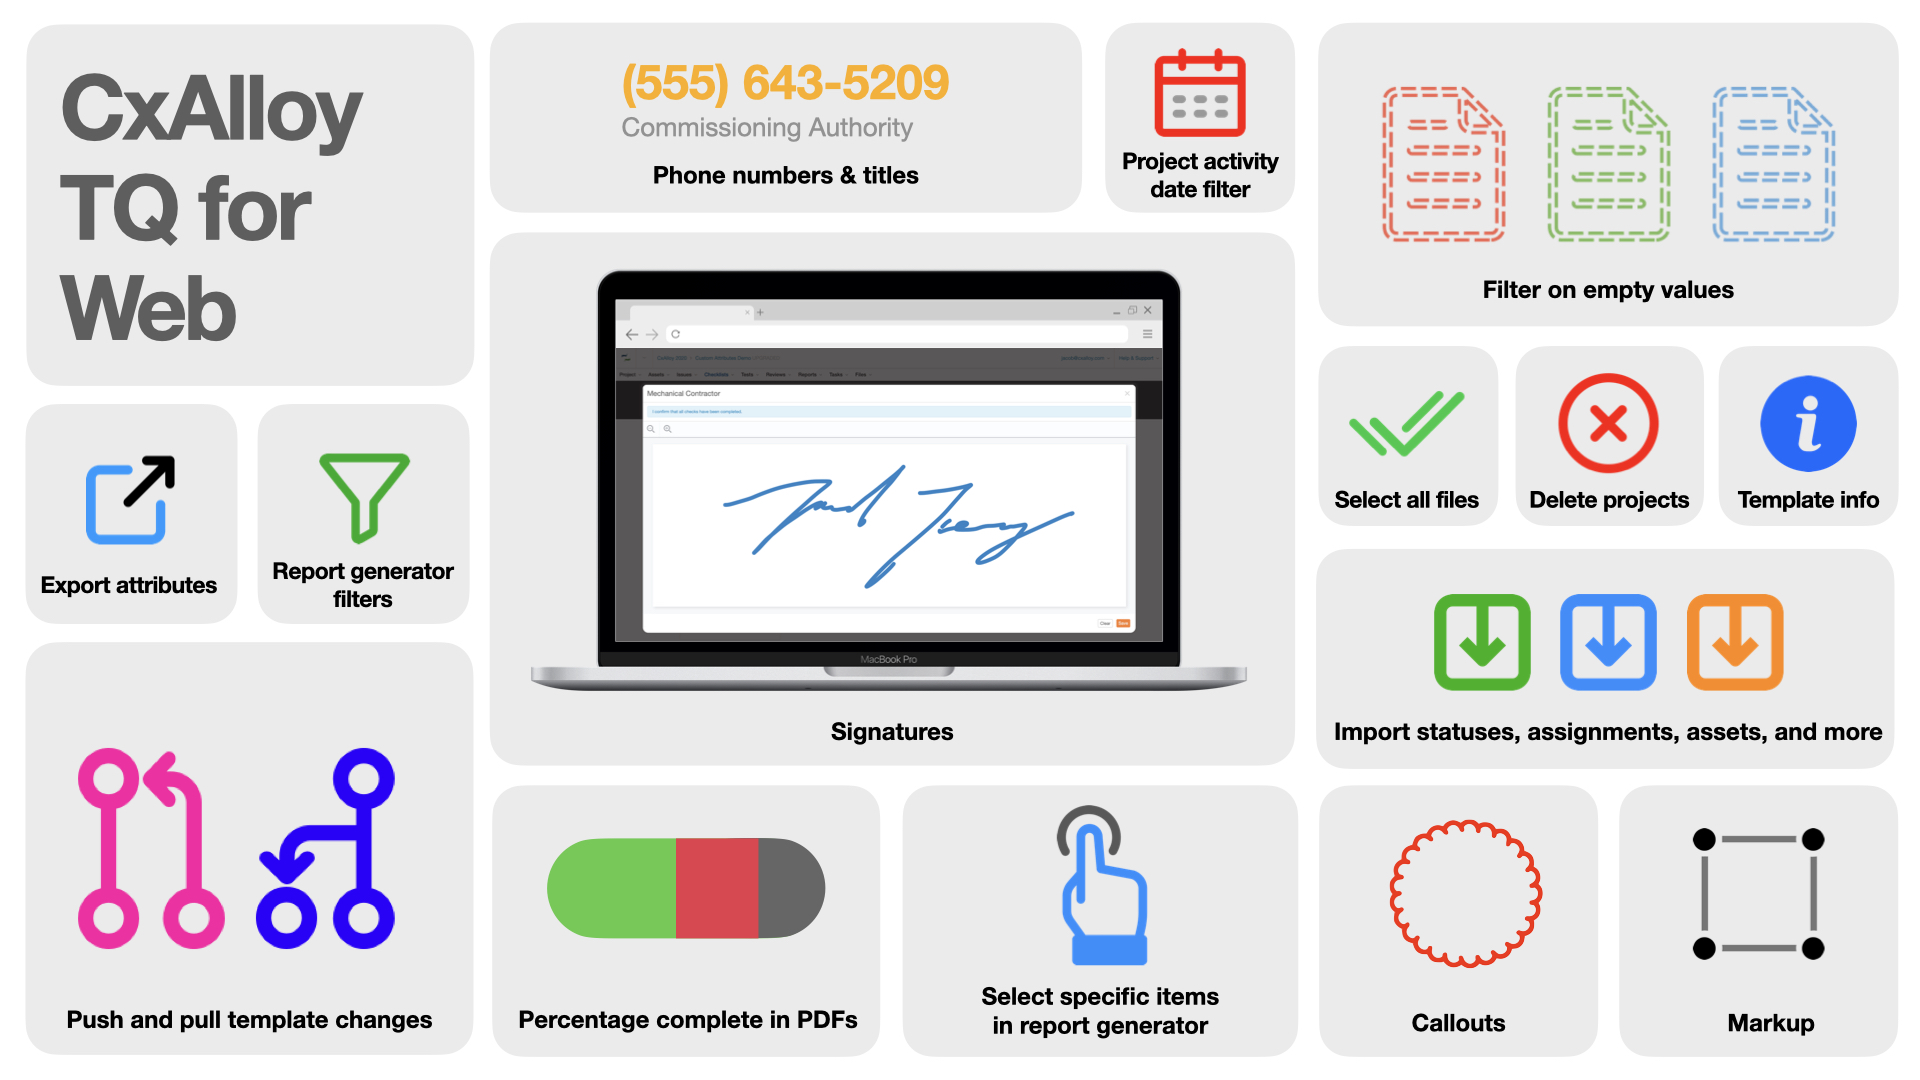
Throughout 2020 we focused on features that eliminated friction and administrative overhead in managing the data in your projects. From the many small improvements made during our third Customer Appreciation Summer to the major enhancement of pushing template changes – which allows you to update tens to hundreds of checklists or tests instantly, even when they’re partially completed – you can manage your work in CxAlloy TQ faster than ever.

At the end of the year we also made our markup and callouts feature available to all accounts, allowing you to draw on any image or PDF, and added signatures for those projects that require that extra layer of accountability.

CxAlloy TQ for iOS

Besides matching the markup and callouts, signatures, and other features that debuted on the web, the iOS app added new features all its own in 2020. From scanning labels so you don’t have to type in serial numbers to batch answering identical checklists and tests, the iOS app empowers you to be more efficient than ever before.

CxAlloy TQ for Windows

Finally, we released the beta of our Windows app. The Windows app represents a major step forward compared to our previous Chrome-based Windows solution, allowing offline access to multiple projects, adapting to any screen or window size, and featuring a more usable, modern interface. We have built it off of the same battle-tested sync backend as our iOS app so that you can be confident it will have the information you need when you need it.

You can download the Windows app today in the Windows store by clicking below.

English badge

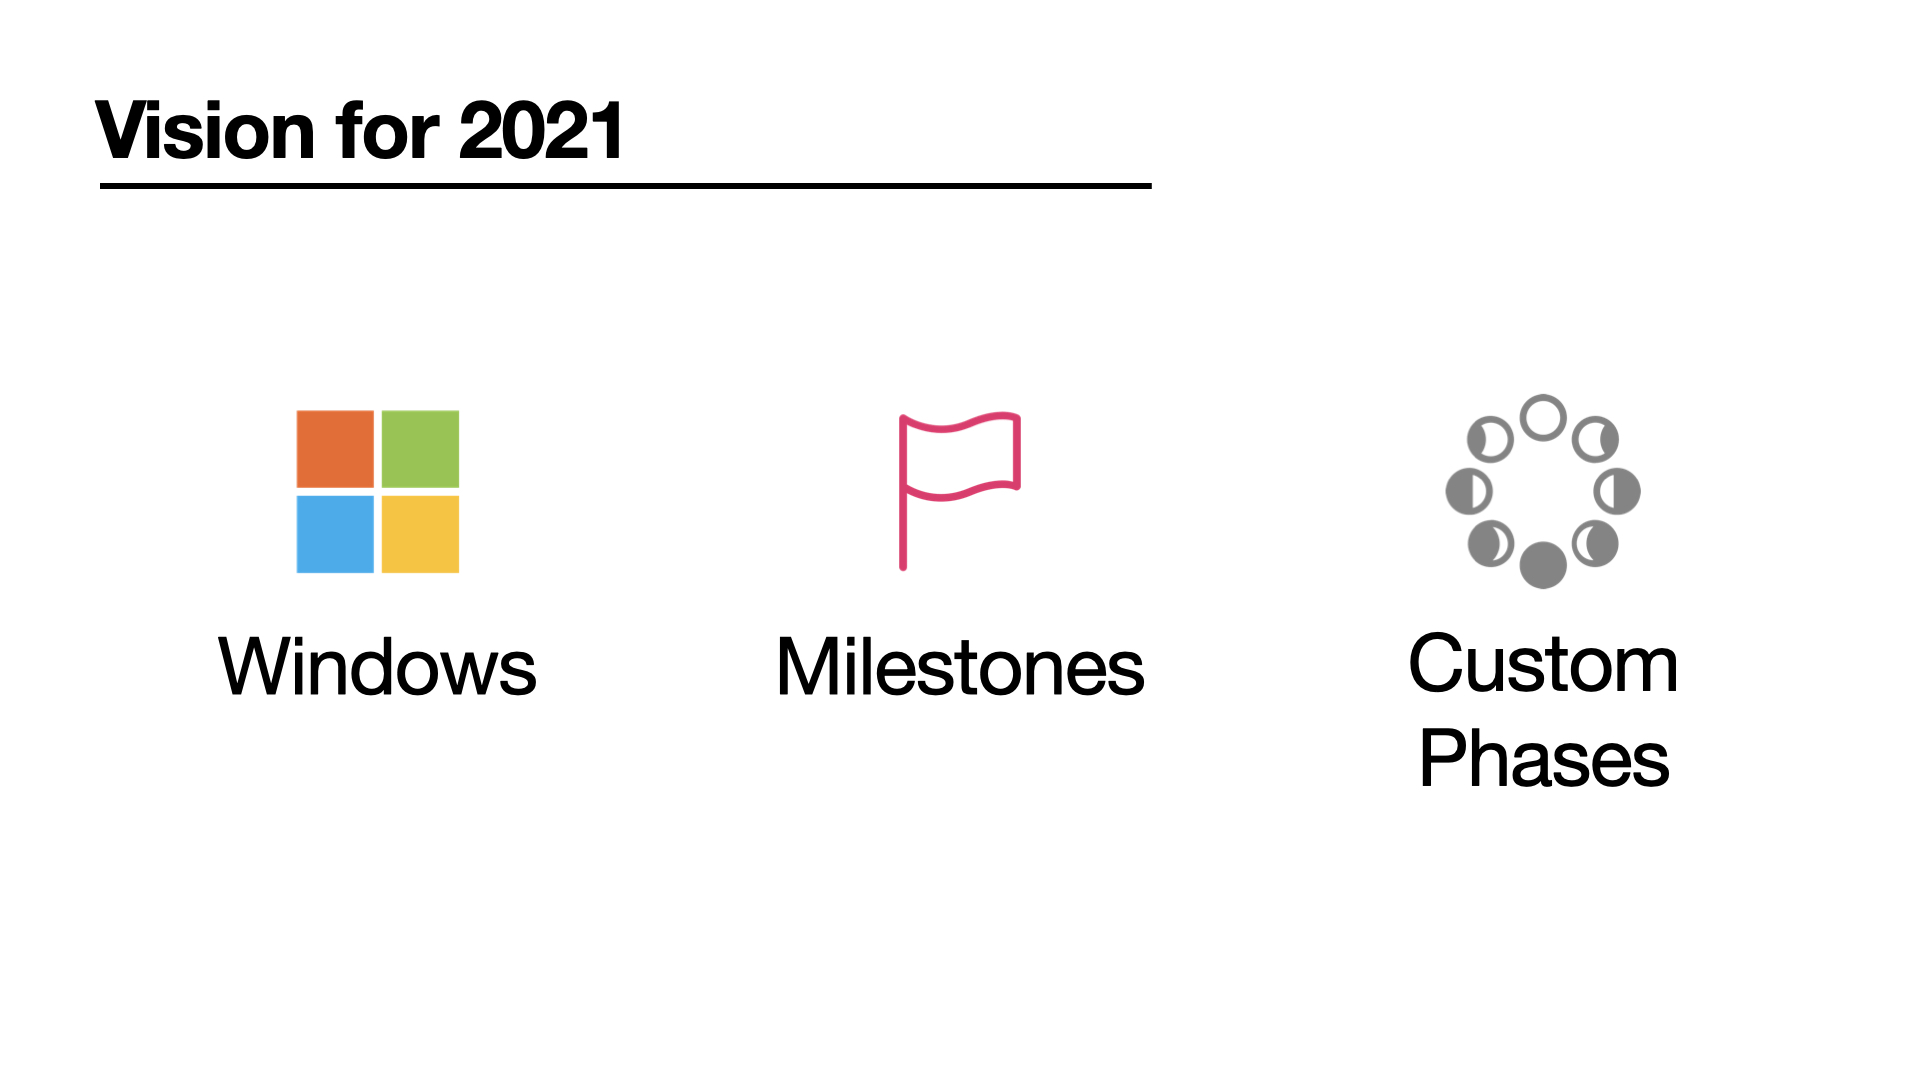
We have big plans for the Windows app in 2021 as we work to bring it to full feature parity with our iOS app. Speaking of 2021…

Vision for 2021

In addition to the Windows app, we have two major initiatives planned for 2021: Custom Phases and Milestones. We believe both of these will greatly expand the ways in which CxAlloy TQ can be used to manage and monitor project progress, giving you greater flexibility in how you organize, report, and track your project data. You can watch the webinar video for more details on our plans for these features as well as information about other planned features.

Of course, we’ll release other, smaller features throughout 2021 as well, so please keep an eye on the blog for details as those roll out. We think 2021 is going to be a great year!

Filter for Empty Fields – Customer Appreciation Summer Week 11

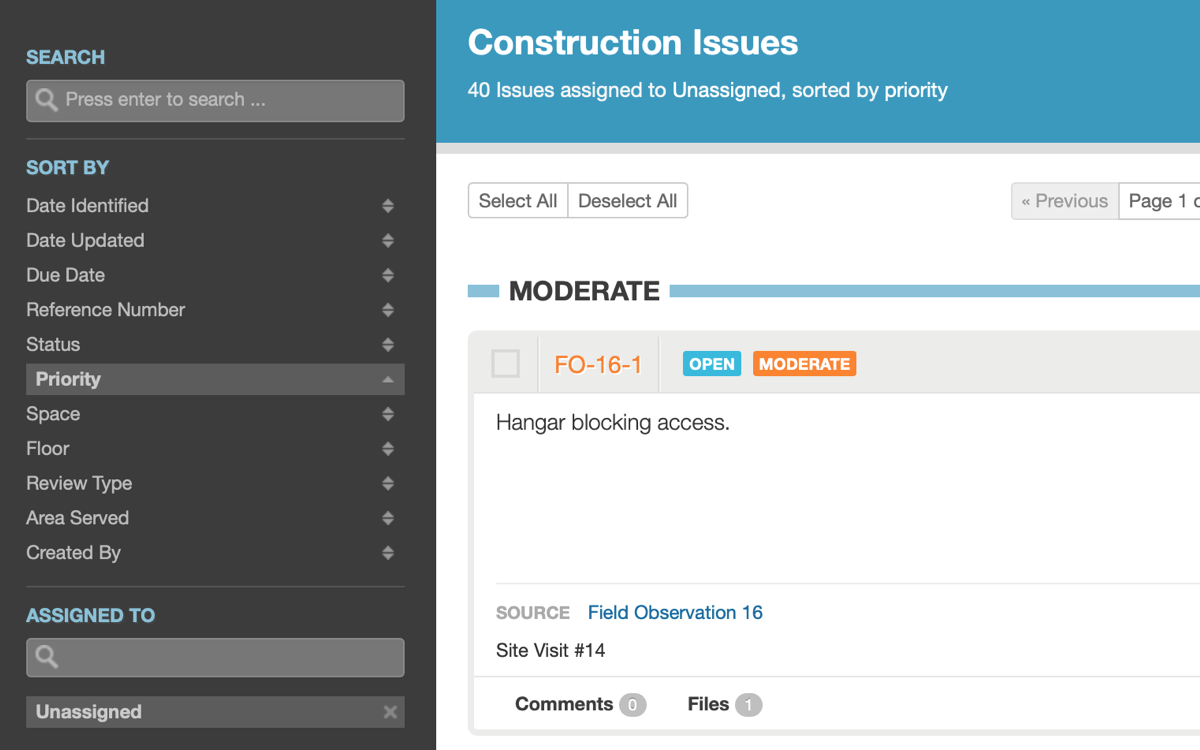
For Week 11 of Customer Appreciation Summer we’ve added the ability to filter based on when a value is not set. This makes certain actions much easier, such as finding all unassigned issues. Combined with our batch editing tools it’s now trivial to quickly audit and correct data gaps.

Easily find unassigned issues with the new filtering options

This ability (what we internally call the “none” filter) is only available when it makes sense. For example, issues always have a status and therefore don’t have a “No Status” filter. Filters that include a “none” option include assignment, discipline, priority, equipment type, system, checklist type, review type, review remark, and field observation type.

The “none” filters can be combined just like other filters. For example, you could find all equipment that either has no discipline or has discipline “Mechanical”.

Finally, we’ve also added the “none” option to these same filters in the report generator.

We hope this makes it easier to manage the data in your projects!

File Navigation Improvements – Customer Appreciation Summer Week 10

For Week 10 of Customer Appreciation Summer we have made two improvements to file navigation: we’ve added next and previous buttons so you can quickly cycle through attached photos and files, and we’ve added Select All and Deselect All buttons for attached photos and files.

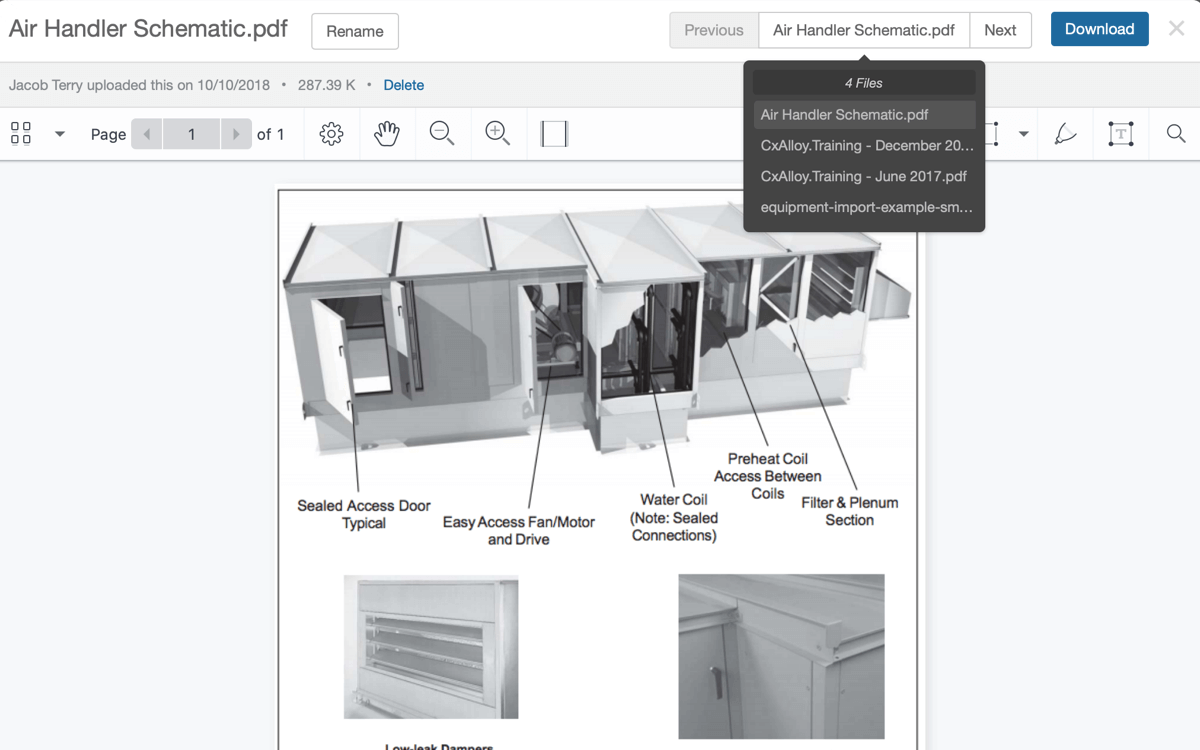
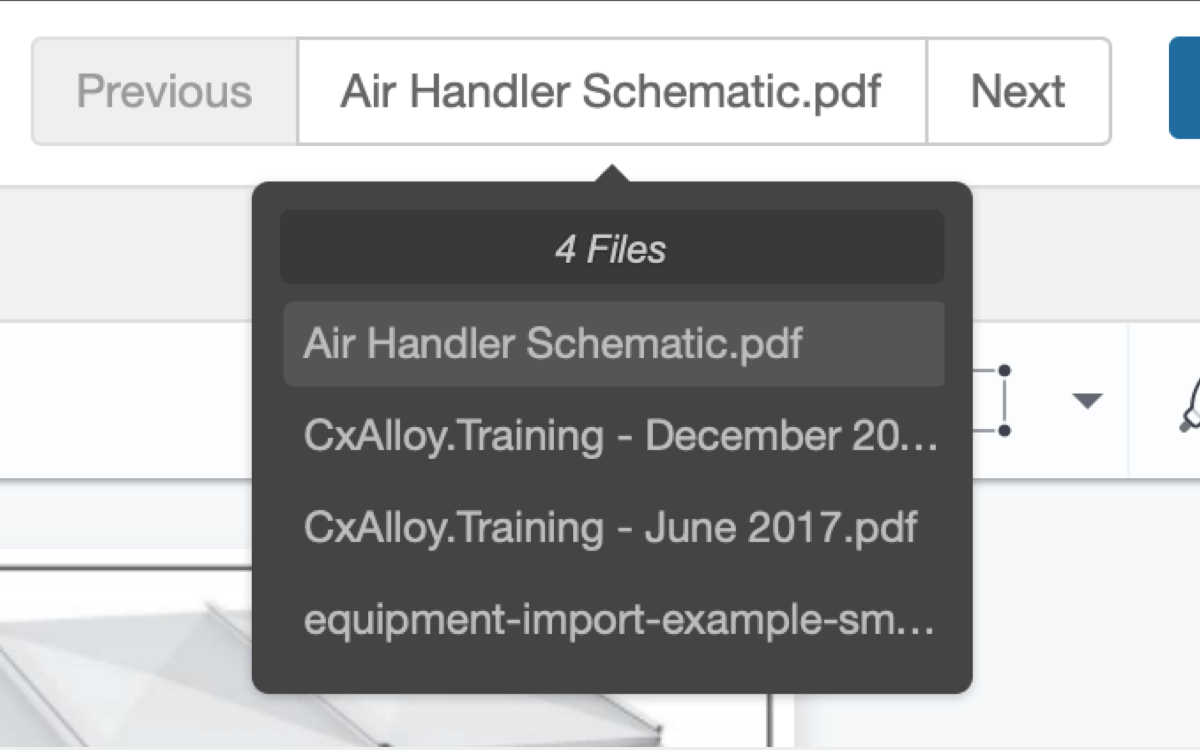
The new navigation controls allow you to move to the next or previous file in the list, or jump to any other attached file via a dropdown.

Quickly navigate between files with the new navigation controls

The new Select All/Deselect All buttons make it far easier to batch download files. We’ve also renamed the “Zip” button to “Download” (it still downloads a .zip file, though).

Easily select all attached files with the new Select All button

We hope you like these improvements!

Select Specific Items in the Report Generator – Customer Appreciation Summer Week 9

For Week 9 of Customer Appreciation Summer we’ve added new report generator options to select specific items for a section, such as specific equipment, checklists, issues, and so forth.

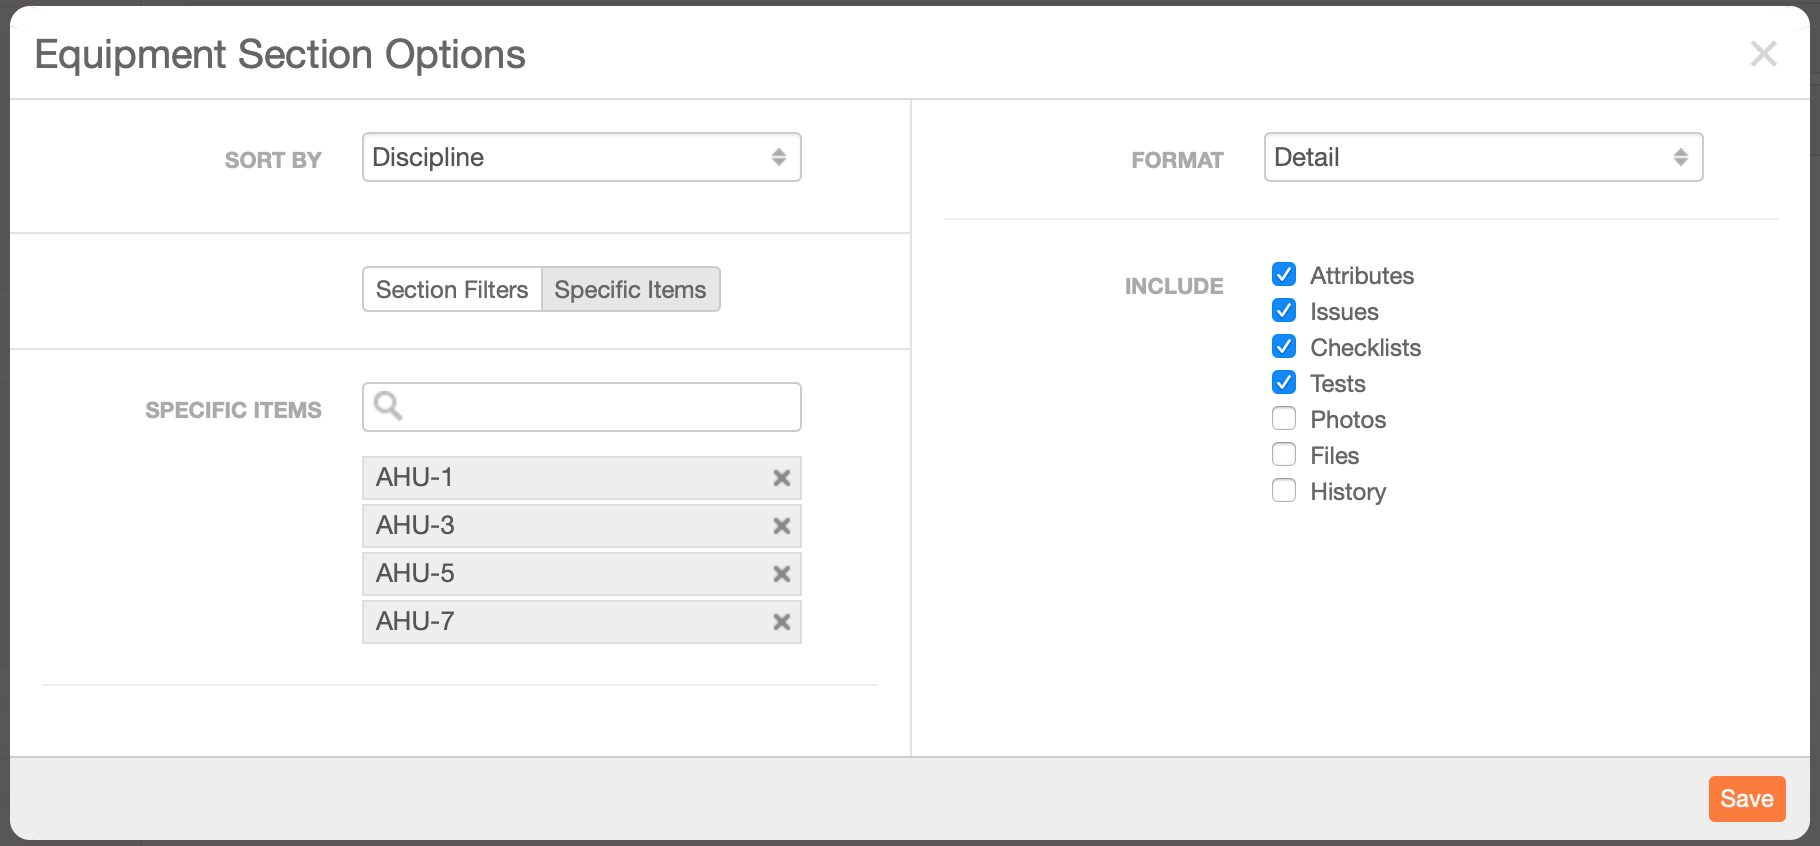
You can now choose specific items as an alternative to filters

Selecting specific items is an alternative to filters; you can’t combine the two. The interface reflects this with a toggle that allows you to switch between the two options.

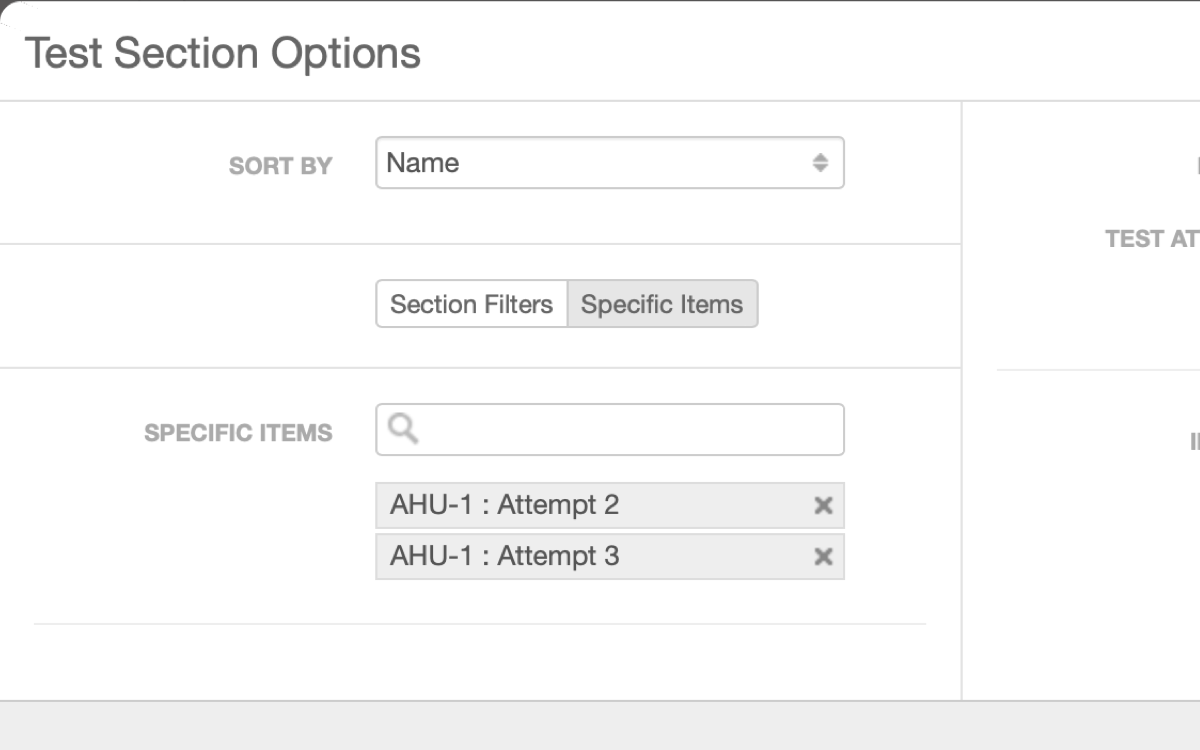
For tests we’ve done something special. The list of tests is actually a list of all attempts, allowing you to cherry-pick specific attempts to include. For example, you could select just Attempt No. 2 out of three total attempts. The resulting report would then only show Attempt No. 2 for that test. In addition, only issues, photos, files, and callouts related to Attempt No. 2 (or the overall test) would be included.

Tests give you the option to can select specific attempts

With these new options you are able to build reports that just weren’t possible previously. We hope you like it!

The End of Summer Blowout – Customer Appreciation Summer Final Weeks

Summer is drawing to a close but not without the final releases of our third annual Customer Appreciation Summer! We hit a few bumps here at the end but in the past week we’ve released our final three features: file navigation, new report generator options, and filtering for items where a field is empty.

We’ve got a quick overview of these features below and we’ll have more detailed posts on each of these throughout this week and next.

Select Specific Items in the Report Generator (Week 9)

You now have the option to select a specific set of items to include in the report generator as an alternative to filtering. With tests, you can even select specific test attempts to include.

Select the exact equipment to include with the new “Specific Items” option

File Navigation (Week 10)

You can now navigate to the next and previous file in the file viewer, or jump to any other attached file from a dropdown. Plus, we also added Select All/Deselect All buttons to file lists.

Jump to any attached file with the new file navigation

Filter for Empty Fields (Week 11)

Certain filters now allow you to look for items that don’t have a value. For example, you can filter equipment to those that have no discipline set, or filter issues by those that are unassigned. These same filters are available in the report generator as well.

Find all unassigned issues with new filter options

We hope you like these features, and we hope you enjoyed Customer Appreciation Summer! Please keep letting us know what features you would like to see in our feature request forum.

But wait! What about week 12? Well… it needs just a little more time in the oven but we are working on one final Customer Appreciation Summer feature. It’s one a lot of people have asked for. We hope you’ll look forward to it!

Commenter Role and Company – Customer Appreciation Summer Week 8

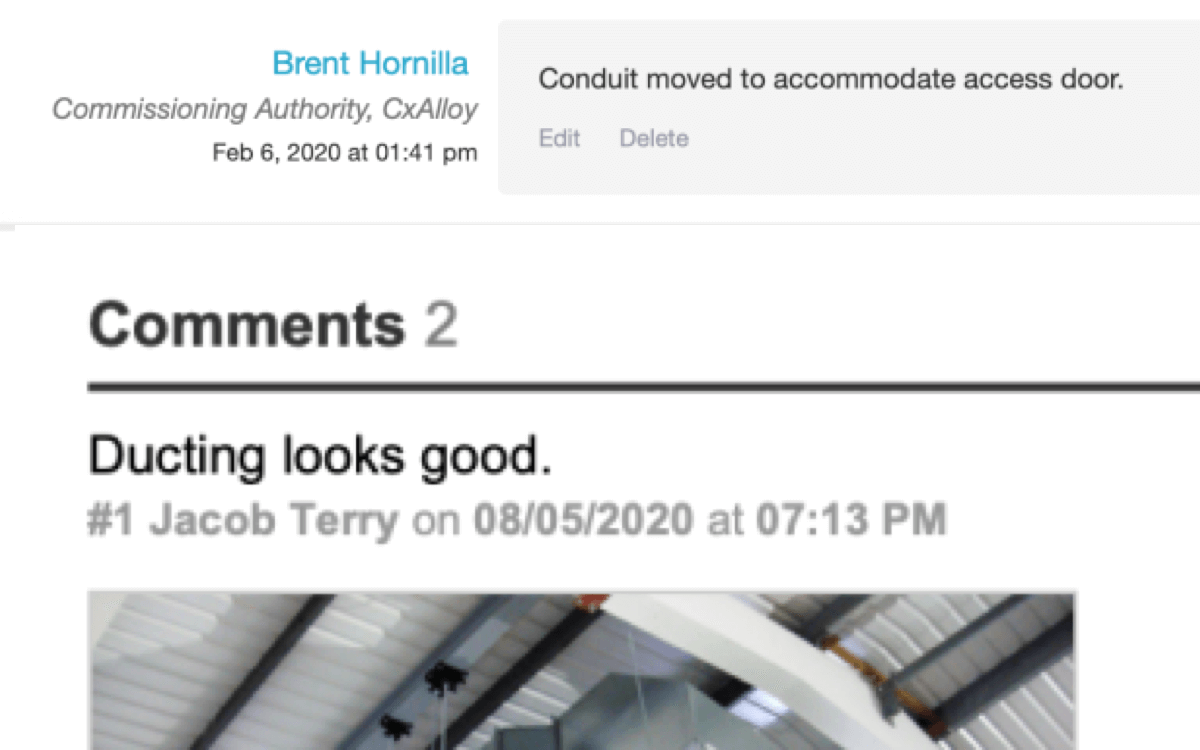
Week 8 of our Customer Appreciation Summer adds the company and role of the author to comments, both on the web and in PDFs.

Comments now show the author’s role and company.

You’ll also see this information in the next release of the iOS app later this week. That update also features the “Include Asset Name” option when creating checklists and tests that we first rolled out on the web last week.

In addition, we’ve improved the presentation of field observation comments in the PDF to make it clearer which comment photos belong to.

It’s now clearer which comment photos belong to.

As a reminder, all of these features are based on feature requests at feedback.cxalloy.com. Although we focus on smaller features during the Customer Appreciation Summer, we are also working on many of the bigger requests. If you’ve added a request, made a comment, or just voted on the ones you want, thank you – your input there has been incredibly valuable to us.
We hope you like these updates and we’ll see you next week!

Create Checklists and Tests Without Asset Names – Customer Appreciation Summer Week 7

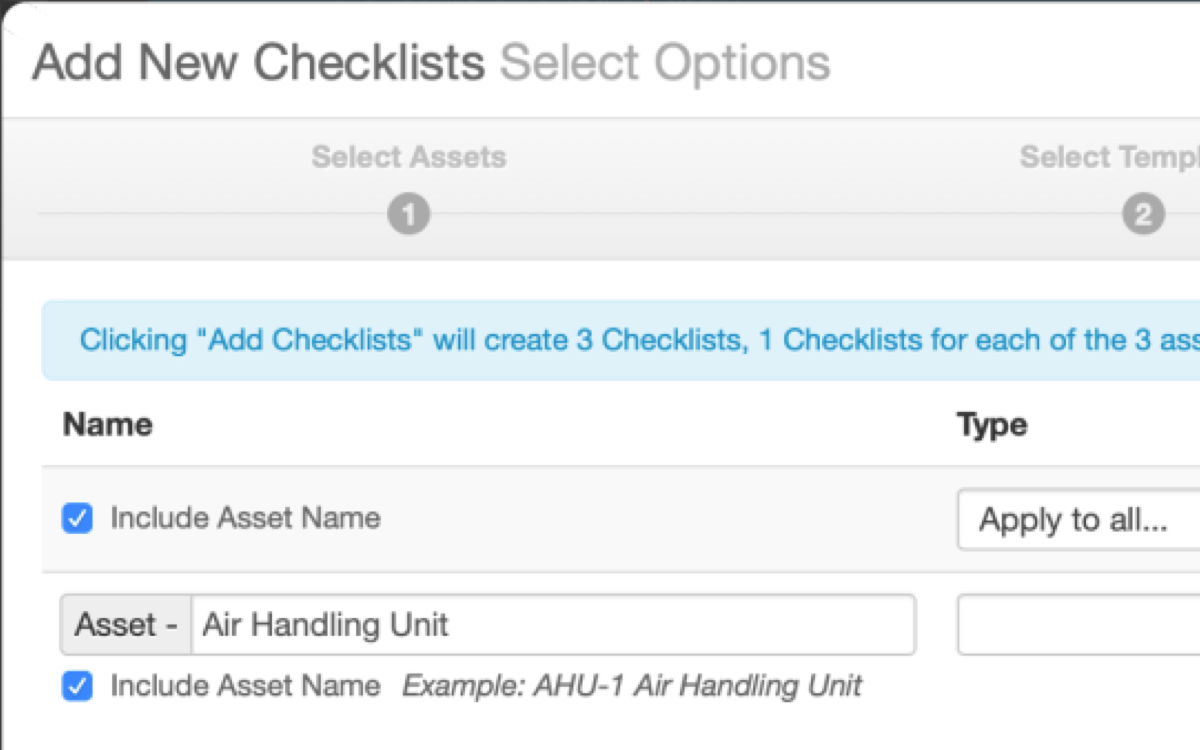
Week 7 of our Customer Appreciation Summer is all about checklists and tests. First, we’ve added a new option when creating checklists and tests: “Include Asset Name”. By unchecking this option you can create checklists and tests without their associated asset name, which was not possible before.

The new “Include Asset Name” option gives you more control

We’ve also made two other improvements to the options step – you can now change a name right away without having to click “Customize” first, and we show an example of the name the checklists or tests will be given.

In another improvement to checklists and tests you can now see the percentage of Yes, No, and N/A answers in the PDFs right next to the colored progress bar.

You don’t need to guess at the percentages anymore

We hope you like these updates. See you next week!

Navigation Improvements – Customer Appreciation Summer Week 6

We’ve improved a couple of small navigation bits for week 6 of our Customer Appreciation Summer. Though small these feature requests had a lot of customer votes behind them!

  • After creating a new checklist or test template within a folder, you will be taken to the newly created template inside that folder.
  • When adding lines to a checklist or test the “Add a line” form will remain so that you can quickly add multiple lines.

We hope you like these improvements. See you next week!

Delete Projects – Customer Appreciation Summer Week 5

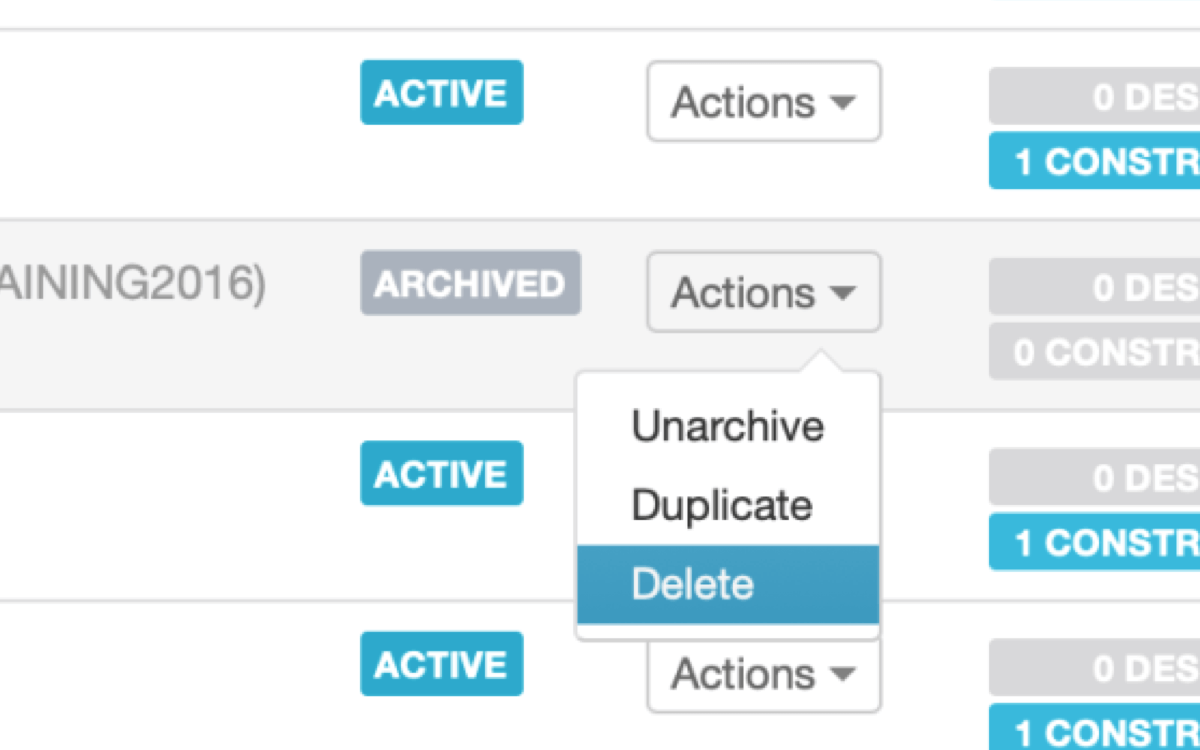
The latest Customer Appreciation Summer release adds project deletion. You can now finally get rid of that project you renamed “ZZZZ Don’t Use”! 😀

You can now delete projects

Deleting a project is as simple as clicking the “Delete” button on an account’s Projects page. It’s also available as an option in the “Actions” dropdown on the Overview page and on the General tab of the Project Settings page.

A project must be archived before it can be deleted, and only account admins can delete a project. Like most actions in CxAlloy TQ that modify data, you can undo a project deletion immediately after deleting it. If it takes you a day or two to realize that a project should not have been deleted, you can contact support and we can restore it for you.

Now your project list can look just a little cleaner. We hope you like it. See you next week!

Pull Template Changes – Customer Appreciation Summer Week 4

This week we’ve got something really great – a major expansion of the Push Changes feature we rolled out late last year.

Push Changes allows you make edits to a template, such as adding lines or editing questions, and then “push” those changes to the checklists or tests that were created from that template.

With this release you can now also “pull” changes, meaning you can bring a checklist or test up to date with its associated template directly from the checklist or test. You can even select multiple checklists or tests in a list and “pull” changes to all of them.

Even better, we now show information about the associated template directly on the checklist and test page. This makes it easy to know when a checklist or test differs from the template it was created from and also provides a convenient link to that template.
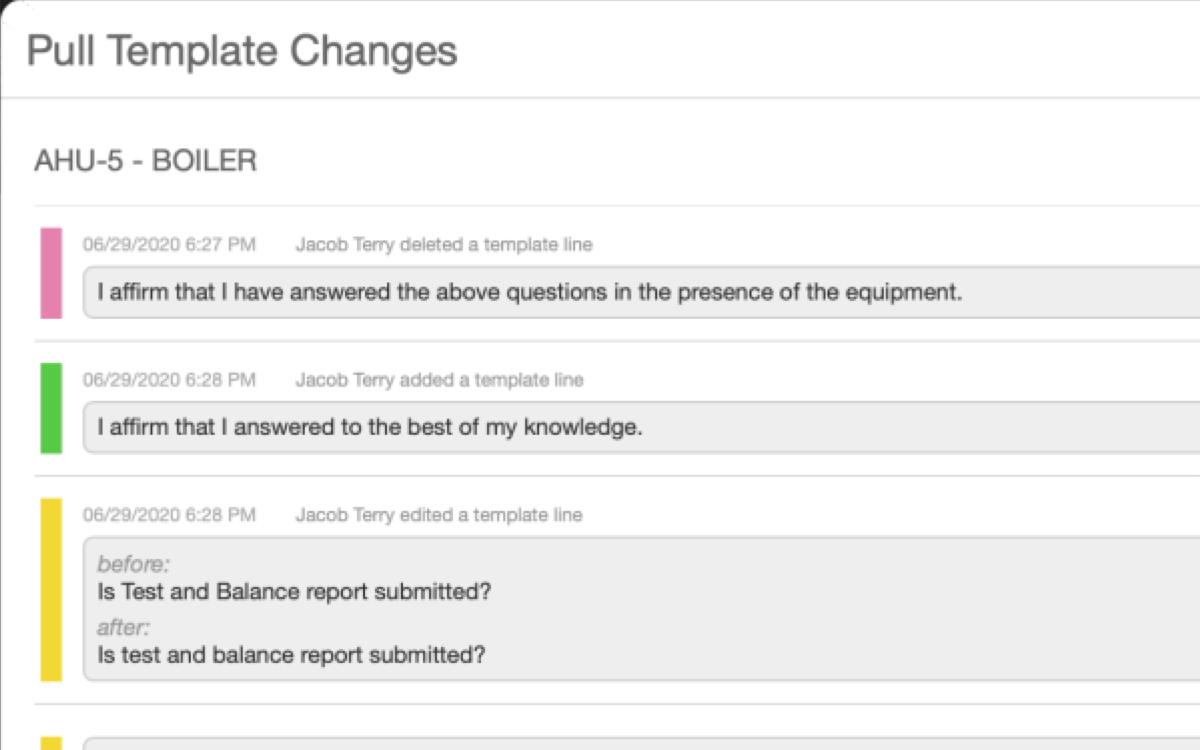
You can now easily see whether a checklist or test differs from its associated template.

Prior to this release we also expanded push changes to allow pushing from account templates. The sum of these releases is a complete picture for pushing and pulling changes, allowing a checklist or test to be brought up to date with its associated template, regardless of whether it’s a project or account template and whether you are starting from the template or the checklist or test.

We hope you like this feature. See you next week!

One note: pushing and pulling changes are limited to upgraded accounts.


Filter Project Activity by Date – Customer Appreciation Summer Week 3

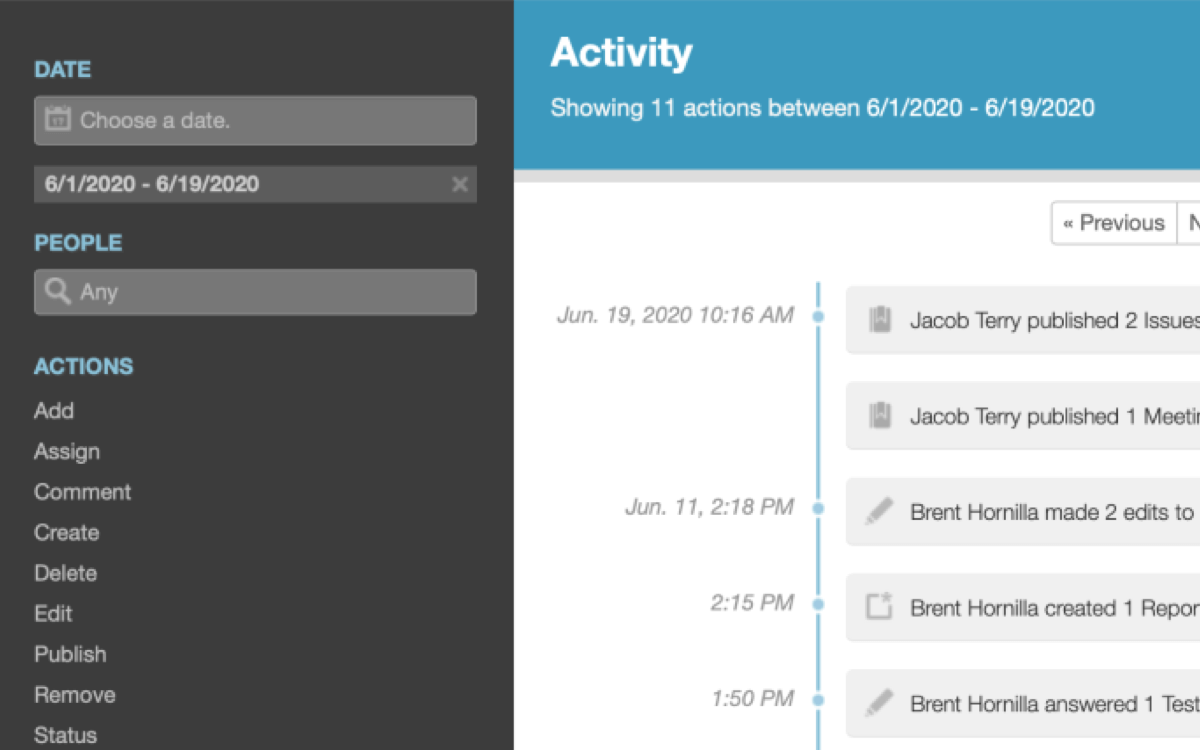
This week’s release in our Customer Appreciation Summer I’m personally excited about, as it makes the Project Activity page a lot more useful – you can now filter by date range! As part of that, we have also changed how the activity page works so that it no longer requires you to navigate day-by-day.

Filtering activity to a date range

Previously the project activity page could only show one day’s activity at a time. This approach made it tedious to use the activity page to answer common questions like “When did this user last make changes?” and even “What’s happened recently?”.

Now Project Activity works more like a newsfeed, showing you the most recent activity regardless of when that activity occurred. You can page through activity to see older actions. Using the new Date filter, you can filter activity to specific time periods. Combine date filtering with the other filters to answer detailed questions such as “What issue comments did this user create last month?”.

We hope you like it. See you next week!

Phone Numbers – Customer Appreciation Summer Week 2

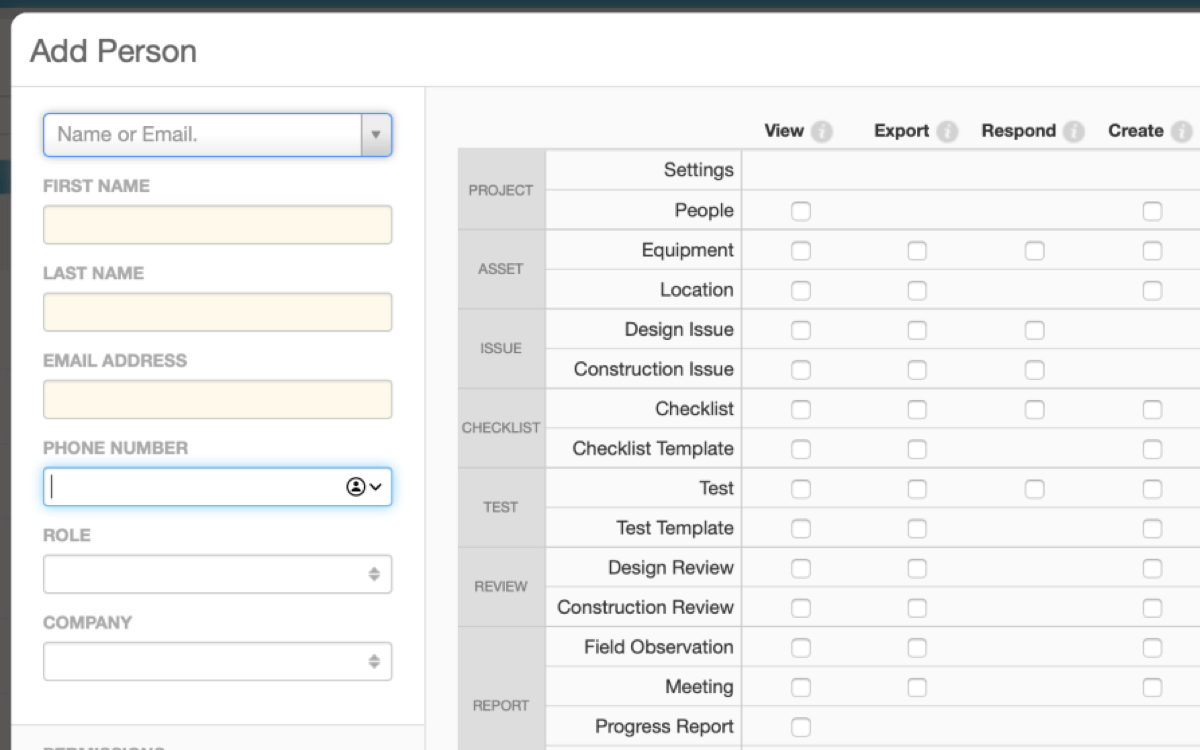
This week’s release for Customer Appreciation Summer is a simple but useful improvement: we’ve added a phone number field throughout the application. Technically this field was always there (you could set it on your profile page) but we didn’t show it in many places.

The “Phone Number” field is now available when adding users

The phone number field is now available where you would expect:

  • When adding a new user to a project or account
  • When viewing a user in a project or account
  • When editing a user in a project or account
  • When exporting account or project users
  • When adding a person to a Meeting distribution list
  • When viewing a Meeting distribution list
  • When exporting or PDF’ing a Meeting distribution list

As a bonus, we also updated the date for Meetings to include the year. A tiny feature but highly requested!

The year: small but important

See you next week!

A New Feature Every Week – Customer Appreciation Summer

The 3rd Annual Customer Appreciation Summer starts this week! Just like in past years, we’ll be releasing new features all summer long. In fact, we will be releasing one new feature every week for twelve weeks. That’s twelve new features in three months. Perhaps more importantly, these features have been sourced entirely from customer requests and include some of our most requested features.

Many of these features are the relatively small improvements that make the day-to-day experience of using the software more pleasant. Don’t worry, though – there’s a few bigger ones in there, too. Here’s just a few of the features that will be coming:

  • Deleting projects
  • Attaching files to progress reports
  • Showing users’ role and company next to their comments.

The First Weekly Feature – Editing Names and Titles

We are kicking off with one of the more highly requested features, available today – the ability to edit a user’s name after you have invited them. Now any time prior to the user accepting your invite you’ll be able to edit their name to correct any misspellings or other issues you discover. While we were doing this we also added an optional “Title” field to a user’s profile which will be shown if set.

More To Come

When a customer makes the decision to use CxAlloy TQ they are not only investing in the CxAlloy TQ of today but also what it will be in the future. We hope we are living up to that investment and are grateful for your trust and confidence in us. See you next week!

Capture Equipment Data without Typing a Single Letter

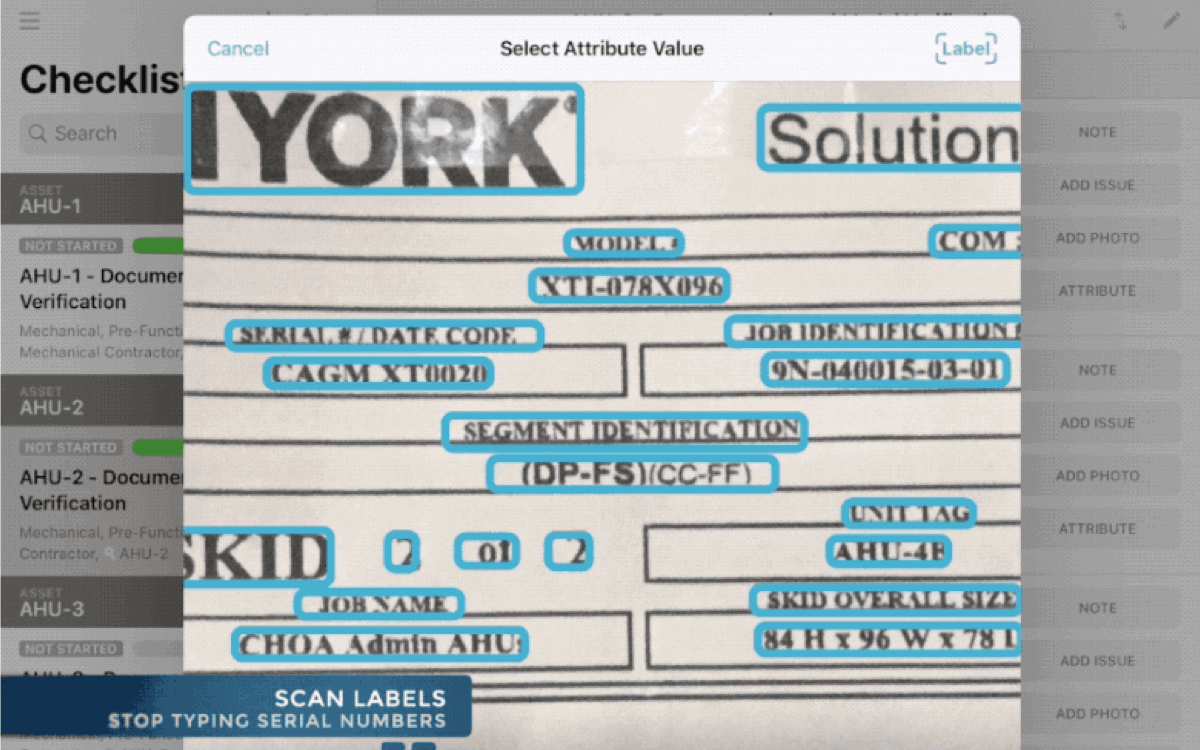
Today we have an incredible new feature for you – the ability to scan equipment labels and record equipment data, without typing a single character. Simply take a photo of equipment labels with your iPhone or iPad camera, then tap the recognized text to record instant, accurate data.

The feature may not always work perfectly, so we have initially released it as an “Experimental Feature”. To enable it, go to the Projects screen in the app, then tap the gear icon ⚙, then Advanced, then toggle on Experimental Features.

Once enabled you’ll see a new Label button at the top right when answering a checklist or test line with a linked attribute. There will also be a new Tag button in the search field that will let you quickly scan a nameplate or label for an equipment tag. We’ve prepared a short video that shows you how these features work.

https://cxalloy.wistia.com/medias/empma7kuay?embedType=async&seo=false&videoFoam=true&videoWidth=640

More Powerful Import Tools for CxAlloy TQ

In our February 2020 release of CxAlloy TQ we made four key additions to the import capabilities of CxAlloy TQ. You can now:

  • Import issue and equipment status.
  • Import issue assignment and asset.
  • Import multiple systems for equipment and multiple zones for spaces.
  • Import areas served for equipment.

Status Importing

When importing equipment or issues you can now import status. Statuses have some unique considerations, including restricted and locked statuses, which we have been careful to address.

The import will automatically handle restricted statuses to prevent a user from setting statuses they are not authorized to set. For example, if you are trying to import issues with the status “Closed” and you don’t have permission to set the “Closed” status, the import will prompt you to select a different status to use in place of “Closed”.

Similarly, when updating existing issues or equipment you may not be authorized to change the status of certain items at all (see the status locking blog post for more). The import will automatically ignore status changes on those items and will notify you in the results page if any status changes were ignored.

Unlike some other fields, it is not possible to create new statuses through an import.

“Multi-Field” Fields – Asset and Assigned To

Issues in CxAlloy TQ have the fields “Asset” and “Assigned To” which can reference one of several types of items. This is different from most fields. For example, an issue’s asset could be a space, zone, floor, building, system, equipment type, or piece of equipment. Previously you couldn’t import into these “multi-field” fields, but now you can.

Unlike other fields, it is not possible to create new values during the import for these “multi-field” fields. For example, you cannot create new people, companies, or roles for the “Assigned To” field when importing issues. You must either select one of the existing options or leave it blank.

Multiple Value Fields – System and Zone

Previously it was impossible to specify multiple systems for a piece of equipment or multiple zones for a space. Now, it is possible to import multiple systems for equipment and multiple zones for spaces.

To do so, you separate your systems or zones by a custom delimiter: a space, a pipe, then a space ( | ). For example, to have a single piece of equipment belong to both the “HVAC” and “Chilled Water Loop” systems you would put “HVAC | Chilled Water Loop” as the system value in your spreadsheet.

CxAlloy TQ uses the same delimiter when exporting, so you can round-trip (export then import) equipment or spaces and all the systems or zones will be maintained.

As part of this feature we have changed how importing systems and zones into existing items works. Previously whatever system or zone you supplied would get added as an additional system or zone for the item. Now, the set of systems or zones (even if only one) in your spreadsheet replaces any existing systems or zones for that item.

Putting It Together: Area Served

I’m really happy that we can now offer the ability to import “Area Served” values for equipment. Area Served was challenging because it is both “multi-field” (it can be a space, floor, zone, or building) and multi-value, as one equipment can serve many areas.

With the additions we have made it is now possible to import Area Served. To specify multiple values, separate them by the space-pipe-space ( | ) delimiter. The import will automatically match the values against existing spaces, floors, zones, and buildings and suggest the closest match it can find. Please keep in mind that just like our other “multi-field” fields, you can only select from existing values for Area Served, and like our other multiple value fields, whatever you specify for Area Served will fully replace any existing served areas.

Whew! That’s a lot. We hope you like the improvements we’ve made. Please let us know any questions you have at support@cxalloy.com and give us suggestions for future improvements at feedback.cxalloy.com.